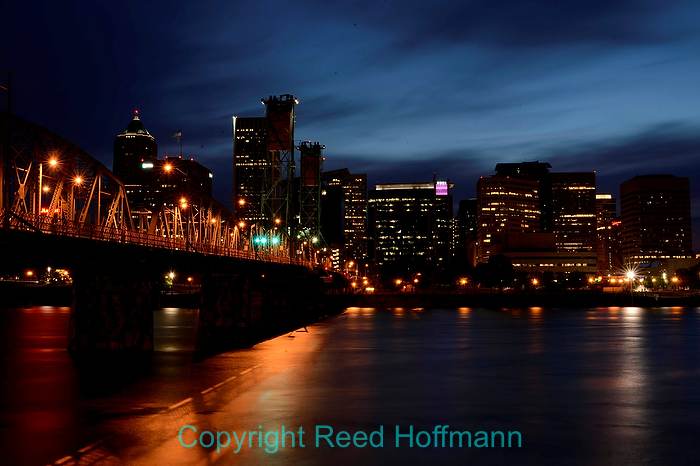
During the recent New Zealand workshop, we had a couple of opportunities to do some night photography (like the cover photo on my Facebook page now).That can be a lot of fun. In cities, or lit areas, this is reasonably easy to do. But once you get out into real darkness, it becomes much more difficult. As with most photography, knowing a few little tricks makes the difference between success and failure.
First, always try to get to your location before night’s fallen completely. That offers several benefits, not the least of which is being able to see where you’re going and what you’re doing at the start. Having a bit of light also makes it much easier to focus and frame your scene. And finally, many night pictures benefit by having some light in the sky, to help the horizon stand out.
Once you’re in place and ready to start shooting, the two most important concerns are focus and exposure. Cameras need light and detail to autofocus. If you still have enough light for that, great. Once the camera’s found focus, turn the autofocus OFF and tape the lens barrel in place. If you don’t, when it gets dark the camera won’t be able to focus and you’ll have unusable photos. Some people mistakenly think that setting the focus mark on the lens to infinity will guarantee focus on distant objects. It won’t. Lenses are designed with some leeway in their focus mechanism, so the infinity mark rarely means focus at infinity. That’s why it’s important to find your focus early and tape it down, so it doesn’t move. If it’s already dark when you start, try to find a bright object in the distance (not necessary that it’s in your frame), like the moon or a streetlight, and try to focus on it. If the autofocus won’t focus, turn it off and do it manually. Then make sure the AF is OFF and tape the barrel.
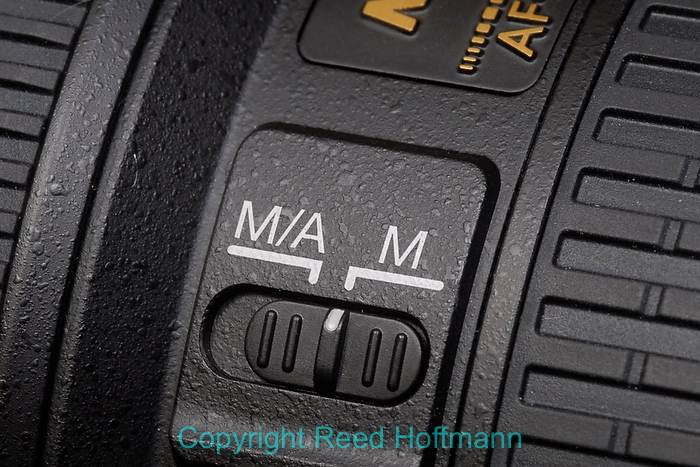
It’s important to turn off autofocus when doing night photography. Photo copyright Reed Hoffmann.
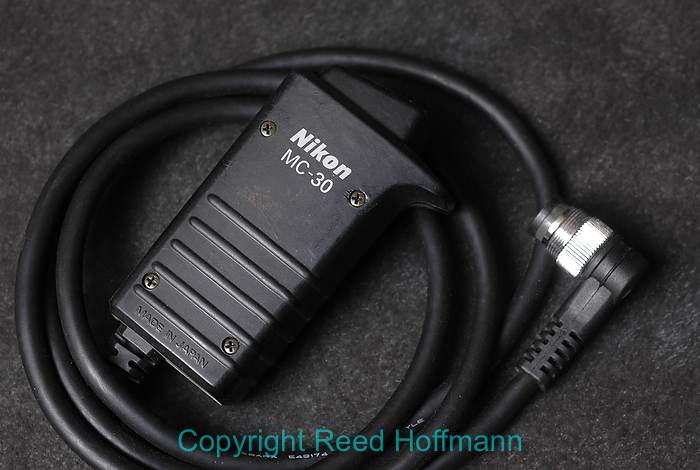
Nikon’s MC-30 is my favorite locking release, but your camera needs a ten-pin connection to use it. Photo copyright Reed Hoffmann.
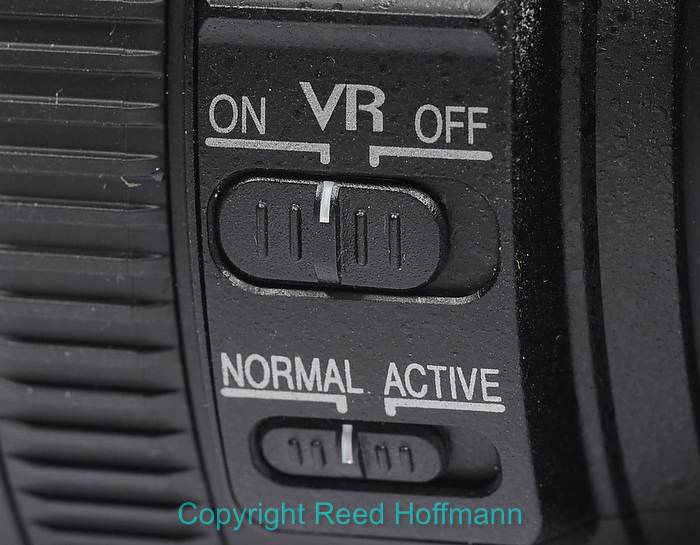
It’s also important to turn off VR, or any image stabilization your camera has. Photo copyright Reed Hoffmann.
The next problem is exposure. The majority of your scene will be dark, and you want to expose for the small areas of light. To do that, it’s easiest to turn off any automatic exposure mode and work in Manual. That means you’ll probably need to guess at exposure the first few times. Fortunately, with your camera’s LCD, and the histogram and highlight displays, that’s fairly easy to do. Start with a reasonably low ISO, like 400, and go from there. Start with a fairly wide aperture (like f/4, or faster if your lens offers it). Most cameras offer shutter speeds up to 30-seconds, so five or ten seconds might be a good starting point, depending on how much light there is. If you want to expose for longer than 30-seconds, you’ll need a release that can lock the camera in “Bulb” mode. Bulb means that as long as the shutter button is held down, the shutter will stay open. With a locking release, you can keep the shutter open as long as you want, or as long as the battery holds out. After a few test frames you should find an exposure that’s close.
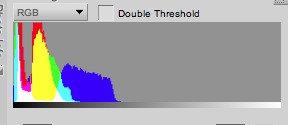
This is the histogram from the mountain and stars shot, below. While it’s pretty far left, indicating a lot of dark tones, it’s a good exposure for this shot, and looked very bright that night in the dark.
When judging the exposure, don’t simply rely on how the LCD looks. In the dark that LCD will appear overly bright, so if it looks good on the LCD, it’s probably underexposed. It should look a bit too bright, and try to use feedback from the histogram to feel confident that your exposure is at least close. Don’t try to use the Live View function – at slow shutter speeds (long exposures) – it’s usually next to useless.
There are a few other tricks as well. If it’s truly dark out and you need to re-frame your scene, turn the camera off. That will prevent the viewfinder display from lighting up and ruining your night vision. Flashlights are handy to have, but you want a really weak one, or better yet one with a red lens, for checking settings on your camera. Bright light will also ruin your night vision, and have your fellow photographers yelling at you to turn it off.
Tripods are necessary for almost all types of night photography. Nikon D300, ISO 800, 1/10, f/4, -0.3 EV, 16-85mm lens. Photo copyright Reed Hoffmann.
If your camera or lens has Vibration Reduction or any form of image stabilization, turn that off too. Having it on can actually create blur in an slow exposure (around one-second or longer).
Long exposures of course require a tripod. Good tripods are worth the investment, so if you’re going to stay with photography, spend real money (no less than $150) and buy a decent tripod. (You can read what I have to say about tripods here.)
You have to make sure you’re not accidentally moving the camera when you take the picture, as that will cause blur. If you have a wired or infrared release, great. If not, there are some work-arounds. The simplest is to use the camera’s built-in self-timer. The default time is usually ten seconds, but many cameras let you change that in the menu. Most of my Nikons let me set that time to as little as two-seconds. Doing so lets me press the shutter button (gently) and then remove my hand from the camera for the actually opening of the shutter two seconds later. Also, many Nikon cameras have something called “Exposure Delay Mode” in their menus. Because an SLR has to flip the mirror up out of the way before firing the shutter, that movement, sometimes called “mirror slap,” can add some movement and risk blur. Exposure Delay Mode makes the camera wait after raising the mirror before opening the shutter. That pause is about a second, but some newer Nikon cameras let you set that interval to one, two or three seconds. Combined with the self-timer, this is an excellent way to shoot without adding movement.
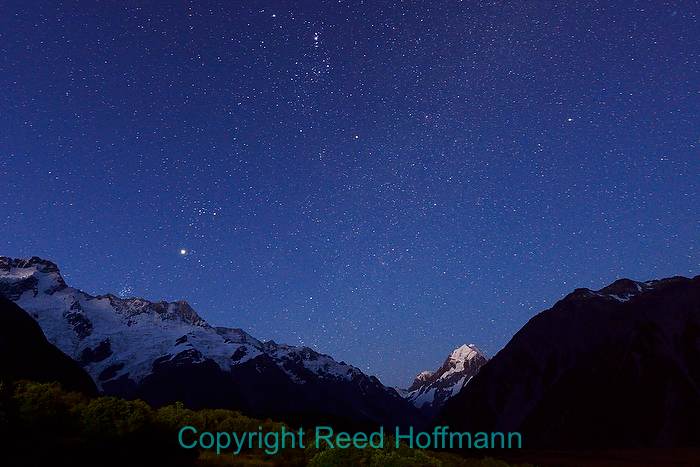
With a thirty-second exposure, there’s very little movement in the stars, so you can make out constellations. Click each image for a larger view.
Nikon D800, ISO 2500, 30 seconds, f/4.5, 0.0 EV, 16-35mm lens. Photo copyright Reed Hoffmann.
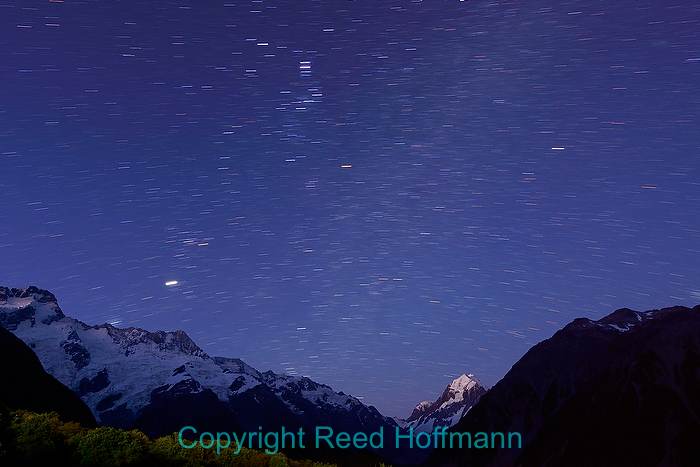
Even a five minute exposure shows so much movement in the stars that they become short streaks of light.
Nikon D800, ISO 320, 303 seconds, f/4.5, 0.0 EV, 16-35mm lens. Photo copyright Reed Hoffmann.
If your scene includes the stars, keeping the shutter speed to 30-seconds or less will avoid having too much blur from the stars’ movement in the photo. That means you might have to raise your ISO, but with most of today’s cameras, you can probably go up to 2000 ISO (or higher with certain models) and still get excellent results. Once you go beyond 30-seconds, the blur can be distracting, and it becomes difficult to pick out constellations. If you want to have star trails revolving though the sky, you’ll need extremely long exposures –an hour minimum – that are difficult to do with digital cameras. Long exposure noise, different from high ISO, will create image quality issues. If you want to do those types of photos, you’ll generally need to employ a technique of shooting dozens of shorter exposures (perhaps five-minutes each) and then stacking them together in software. That’s a detailed story in itself, and you can find some good tutorials online.
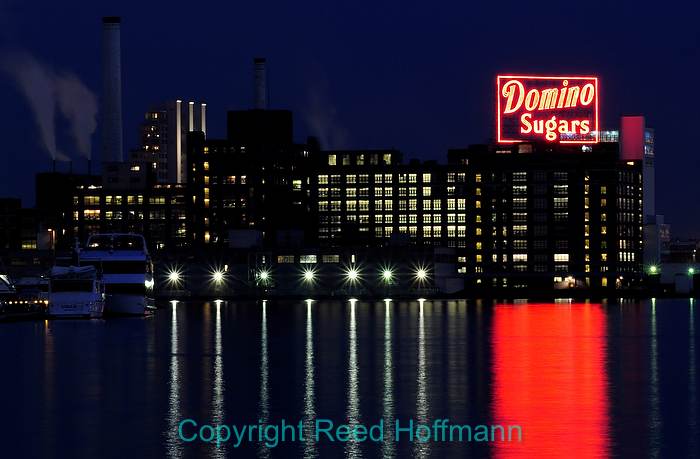
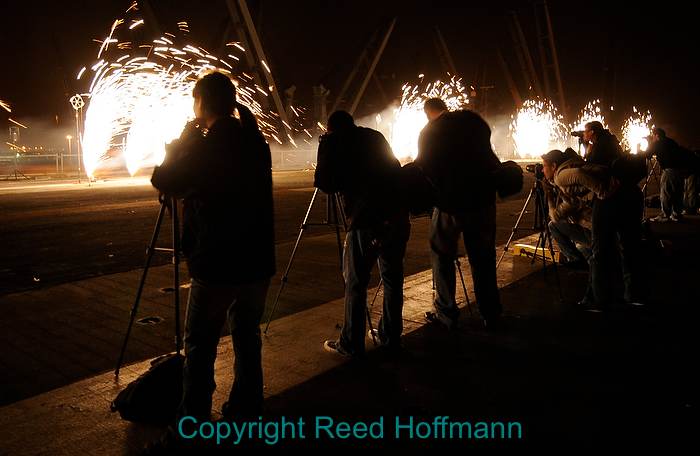
I was able to use a small aperture (f/16) thanks to the long exposure, to get the starburst effect on the lights. The long exposure also helped to smooth out the water. Nikon 1 J1, ISO 200, 8 seconds, f/16, 0.0 EV, 30-110mm lens. Photo copyright Reed Hoffmann.
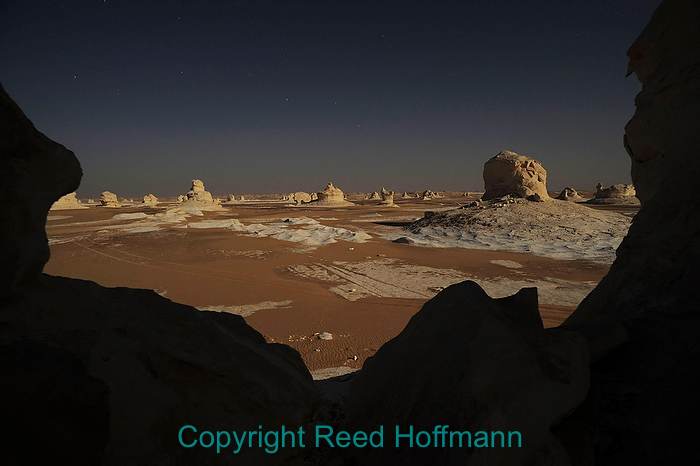
The moon provided the light for this night photo of the White Desert in Egypt. Nikon D700, ISO 400, 30 seconds, f/6.3, 0.0 EV, 14-24mm lens. Photo copyright Reed Hoffmann.
Finally, my Nikons, and some other cameras today offer something called “Long Exposure Noise Reduction.” If you turn that on the camera will run a routine to reduce that special type of noise, but your exposures will take twice as long. That’s because after the exposure, the camera will do a second “dark frame,” essentially another exposure of the same length of time, with the shutter closed. It then uses the two frames – the one you shot and the dark frame – to try to remove or reduce that long exposure noise. Using it, of course, will mean that a five-minute exposure will actually take ten minutes total, and your battery will wear out faster.
As with a lot of types of photography, night photography can seem more difficult than it really is. Once you master the basics, you’ll find a whole new world of different, wonderful photos to create.