Copying my old family pictures reminded me of a photo restoration I did for a friend. They can be surprisingly easy to do with the right tools, and many old photos need this sort of help. Especially if you’d like to make a nice print from one.
In this case it was a picture that had lost much of its color, which is not uncommon with old photographs. The color technology of that time was early-generation, and many of those prints have not aged well. There’s a pretty interesting story about one particular Kodak color print paper that simply faded away with time. There are literally no color photos from that time that still exist (in color) printed on that paper. But I digress…
To start your restoration, you need to make a good scan, although these days, I’m just as likely to photograph an old picture. With today’s cameras we’ve got more than enough resolution for good copy work, and as long as you keep the hard copy parallel to the camera, you can do a nice job. Plus, make sure you’re using the right white balance. I tend to use strobes, bounced off a white ceiling, or daylight.
Then bring that photo into your editing software. For this type of work I prefer to use layer-based software, like Photoshop Elements or Photoshop itself. That way I can keep the color and clean-up work (scratches and such) in separate layers. But I’ve also used non-layer software, like Nikon’s Capture NX 2 for work like this.
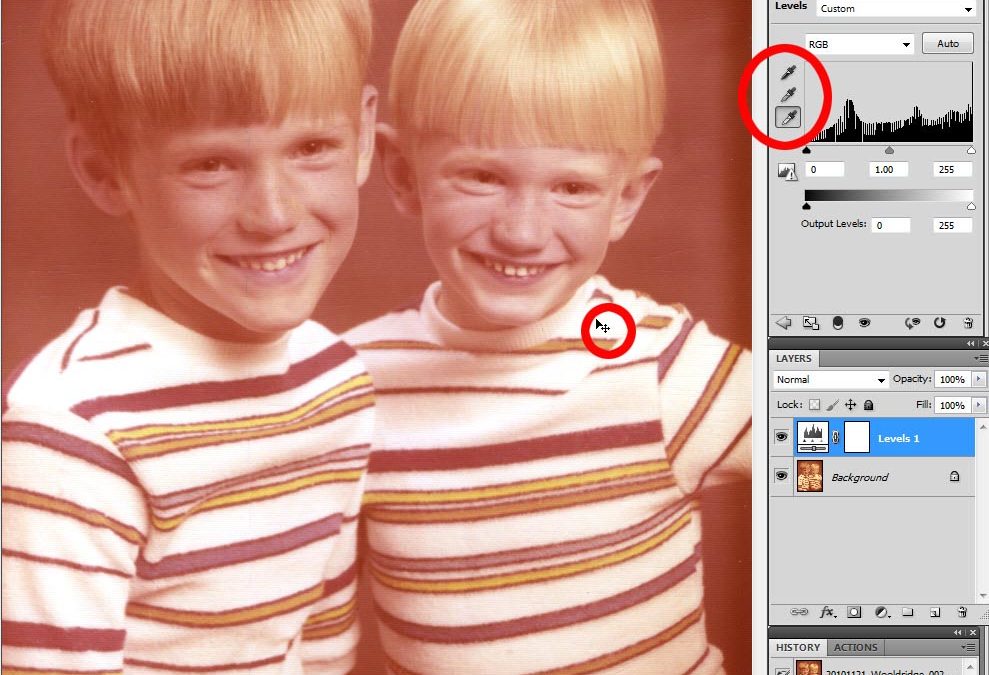
 Now that the color is fixed, it’s time to clean up other problems. And most of the time those also involve the aging of the photo, and the damage it’s gotten overthose white and black points, they’re also re-calculating color (making what you clicked white and black, and adjusting all other color the same amount). In many cases – and this is one of them – the before and after can be amazing.the years. Look for a “Clone” tool, “Healing Brush,” or “Auto Retouch” tool in your editing software. Properly applied, that can repair creases, scratches, tears and more. In this case the photo had marks I wanted to remove, or hide, so I spent a few minutes, at 100% magnification or more, fixing the worst of them.Our old photos are the visual history of our families. You have the equipment, software and ability to not just preserve them, but make them better. Take advantage of that.