On the long list of topics that people find confusing about digital photography, resolution is near the top. I recently had a note from a friend who was making prints, and they came back “pixelated.” When I read that, I was 90% sure the problem was resolution (and it was). If you’re going to share your photos, and get the result you want, then you have to understand resolution. It’s a little confusing, but bear with me and we’ll get through this together.
Everyone knows that digital images are made up of pixels. You can think about those pixels as tiny bits of information that together form your photos. The more pixels you’ve got, the more information you’ve got. And that information equals resolution. A 24-megapixel camera doesn’t just have more pixels than a 12-megapixel camera – it’s got more resolution. They’re one and the same.
Let’s imagine a pool table whose surface is completely covered with balls, edge to edge. If you took away every other ball, would they still cover the table’s surface? No. There would be green felt showing between them. And if you pushed them together again, they’d cover a smaller area of the pool table. That’s what happens when you don’t have enough pixels (resolution). In our example, that would mean you didn’t have enough balls to fill the surface. Those gaps exist because there’s not enough balls (information). That’s what causes images to pixelate, or look like they’re falling apart. It’s simply a lack of information, in the form of pixels.
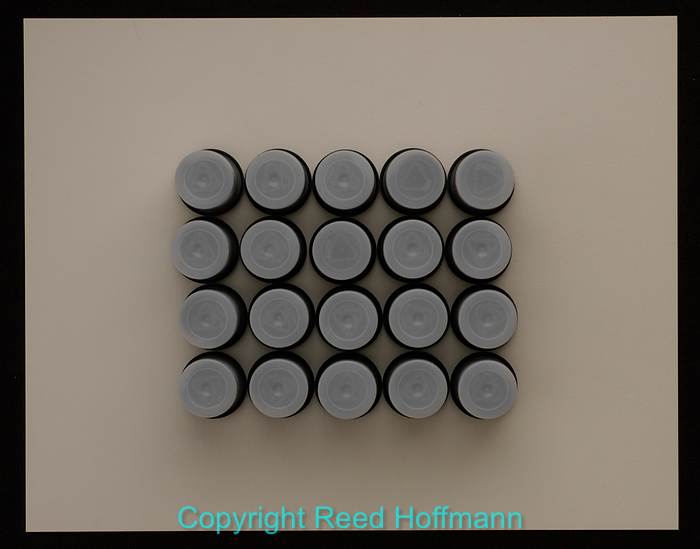
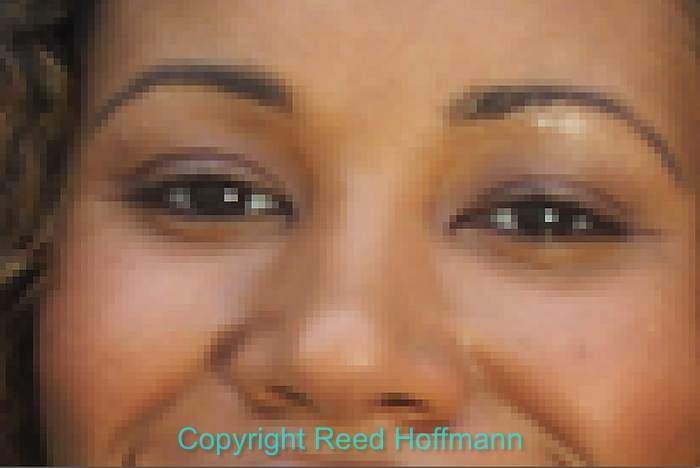
The size you can display an image on screen, or in print, is dependent on the number of pixels you have. When they’re close together, your image will look good. Photo copyright Reed Hoffmann.
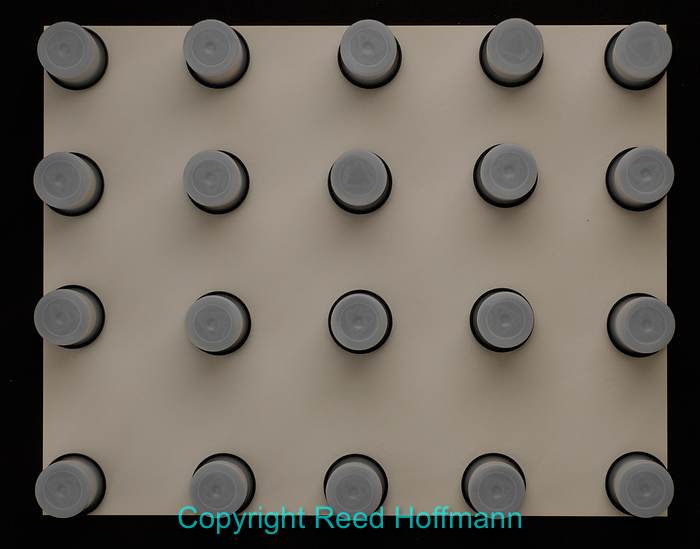
If you spread those pixels out too much, though, the result will be an image that no longer has smooth edges. Those gaps result in a look that’s referred to as “pixelation.” Photo copyright Reed Hoffmann.
Every digital camera has a maximum number of pixels – that’s the megapixel count. More pixels mean more information (more detail in the picture). And more pixels also means you can make a larger print than a camera with fewer pixels. The other advantage to a lot of pixels is that you can crop and still have plenty of pixels. When you crop you’re throwing away the pixels outside that crop, so having more when you start means you’ll have more when you’re finished.
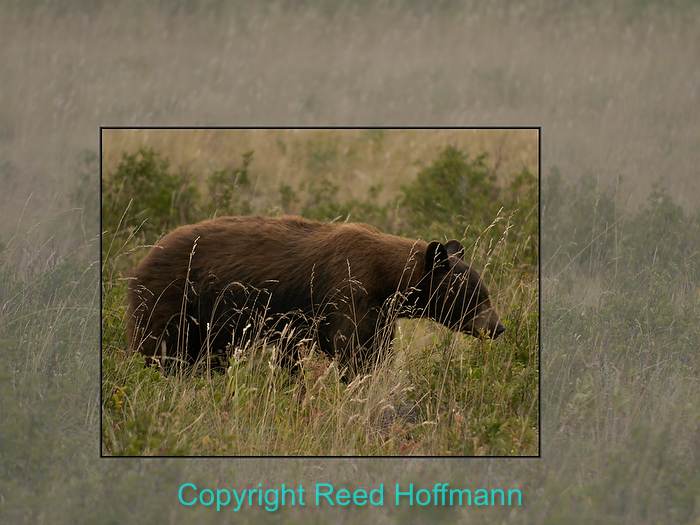
When you crop a photo, you’re choosing to get rid of the pixels outside the crop. That results in less resolution – fewer pixels – and limits how large you can use the picture. Photo copyright Reed Hoffmann.
To this point, all I’ve talked about is pixels, and that’s where you start when you’re planning output. With a 24-megapixel camera, you have an image that’s 6000 pixels wide by 4000 pixels deep (6000 X 4000 = 24,000,000). If your image will be viewed on a screen (web, email, presentation, Facebook, etc.), then pixel dimensions are all that matter. For instance, right now I’m working on a laptop that has a display that can show a maximum of 2560 pixels wide and 1600 pixels deep. If I were to open that 24-megapixel image on this screen and view the complete image on screen, it would have to be at a reduced magnification, because the display can’t show me all 6000 pixels of width that image has. If I zoom the image up to 100%, then I’d only be looking at a part of the image, because again, the display can only show me 2560 pixels across. What this means is that if you’re preparing an image to be viewed on a screen, all that matters is how many pixels wide it is by how many pixels deep. That’s why you should be re-sizing (sometimes called “resampling”) your images down for screen use. There’s just no need to have all those extra pixels. Here’s how I use that.
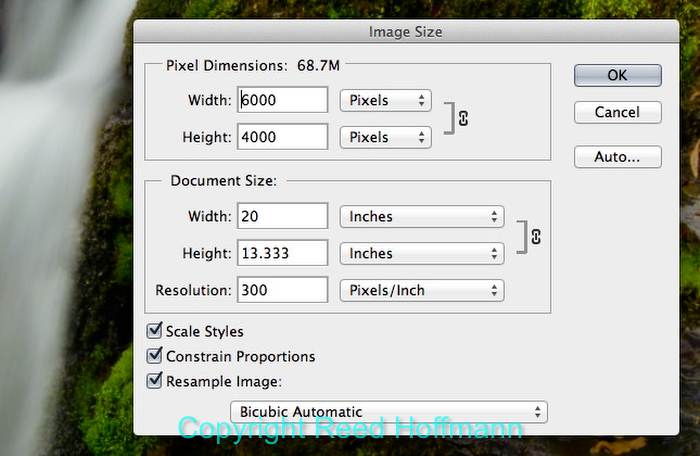
All that matters for viewing an image on screen (or with a projector) is the “Pixel Dimensions,” how many pixels wide by how many tall. With this 24-megapixel image, it is 6000-pixels wide by 4000-pixels tall. Photo copyright Reed Hoffmann.
When I present programs using a projector, that projector is normally working at a resolution of 1024 pixels wide by 768 pixels deep (.8-megapixels). There’s no advantage in using an image with more pixels than that – it won’t make it look any better, because the projector can’t take advantage of those extra pixels. So I re-size those images to a maximum of 1024 pixels wide (or 768 pixels tall). If I’m preparing images to be viewed on an HD TV, I know the maximum resolution for that TV is 1920 pixels wide by 1080 pixels deep, which is about 2-megapixels of information. So again, I re-size to those maximum dimensions. If I’m emailing pictures to people and want them to see a nice-sized image, I’ll often re-size to a maximum dimension (long side of the image) of 1000-pixels. And the photos I use in my blog entries are re-sized to a maximum of 700-pixels, which is enough for people to clearly see them, but be of little use if someone were to steal them. In other words, when I’m preparing a picture for screen use, I ALWAYS re-size my photos smaller, to either show them at maximum size for that screen (based on the resolution of that screen or projector) or to the size I want them viewed at. And that’s always defined by pixels wide by pixels deep. Notice I haven’t mentioned anything about Pixels Per Inch (PPI) or inches yet?
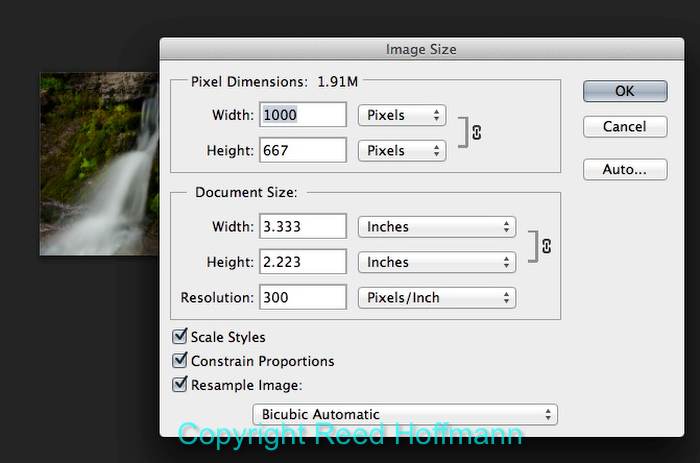
If I’m preparing an image to be viewed on screen (or with a projector), then I’ll resample the image down to the size I want to to be displayed at. In this case that’s 1000-pixels wide. Photo copyright Reed Hoffmann.
When you want to print a photo, then you have to start thinking inches wide by inches high, plus PPI (Pixels Per Inch). Inches by inches by PPI don’t mean anything for screen use. In that case, all that matters is pixels. But once you decide to go ink on paper, you have to define the print size you want (inches by inches) and the pixel density you want (PPI). That pixel density has a direct impact on how fine the detail is in your resulting print and how sharp that print looks.
In the old days of scanning film, the rule was to scan at a high DPI (Dots Per Inch, the calculation that scanners use), to make sure you recorded enough information good output. But times have changed. Film had grain, and so had a different look to it than digital images, which are cleaner because they’re composed of pixels. While many people still insist on printing at 360, or even 300 Pixels Per Inch (not Dots Per Inch), I don’t think that’s necessary, and can even be detrimental. Here’s the reason(s) why.
We all know by now that we have a fixed number of pixels in our images. All editing software can resample images down to make the picture smaller (which we were doing above, and has little impact on sharpness), but it can also re-sample images up (to make them larger). It’s just math. However, when you re-sample images up, you can’t create new detail. The software will do a very nice job of adding pixels that blend in (for color, contrast, tone, etc.) with neighboring “real” pixels, but they can’t add detail. That can only be done by capturing the image at a higher resolution (more pixels to start with). So anytime you resample a photo up (make it bigger), you’re absolutely softening it. Stay with me here, we’re almost done.
For example, let’s say you want to make a 16 X 20 print. You crop your image and look at the “Image Size” box (or whatever box your software uses to show pixels by pixels and inches by inches at PPI). And what you see is that the pixels that image has, when you set those inches boxes to 16 by 20, result in a pixel density of 209 PPI. If you believe you need 300, or 360 PPI to make a print, then you’re going to re-size (resample) your photo up to that, and in the process soften it by adding those extra “fake” pixels. In which case you’re going to have to do some aggressive sharpening after that to try keep your image looking sharp. On the other hand, if you leave it at 209 PPI, you’ll be using the native pixels, not adding any fake ones. And that means you’re going to have sharper output without that extra sharpening.
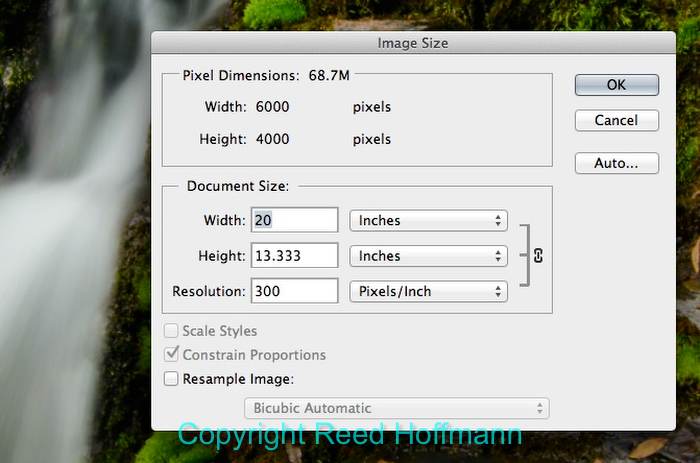
If I want to print this image, then the “Document Size” is what’s important. If I insist on 300 PPI, I can only make a 20-inch wide print from it. Photo copyright Reed Hoffmann.
So if re-sizing up is going to soften the image, why would anyone do that? There are two reasons, one I disagree with and one I agree with. The argument for re-sizing to higher PPI settings is that the image will look better printed that way. Over the past ten years I’ve run a number of tests, printing images from 360PPI all the way down to 160PPI, using only native pixels (sometimes re-sizing down, but never re-sizing up). And when I show those prints to people, I have yet to find anyone who could tell me which was which. So from experience I’ve learned that I can get by with as little as 160 PPI and still have good looking prints. The other reason for re-sizing up I do agree with. When I want to make a print, I always check the Image Size box to make sure I have enough resolution. If it’s below 160 PPI, I know that the final print actually will look better if I re-size up and then add extra sharpening. That’s because below 160 PPI you can start seeing a loss of detail in the print that’s more noticeable than adding pixels. Adding those extra pixels and then adding sharpening gives the impression of better detail. But I rarely have to re-size up any more.
Todays cameras have more resolution than I ever dreamed of ten years ago. For me, a big print is 24-inches by 16-inches, and every camera I now use has enough pixels to give me at least 160 PPI without having to re-size up. And that means I can stay with those native pixels and avoid softening my images.
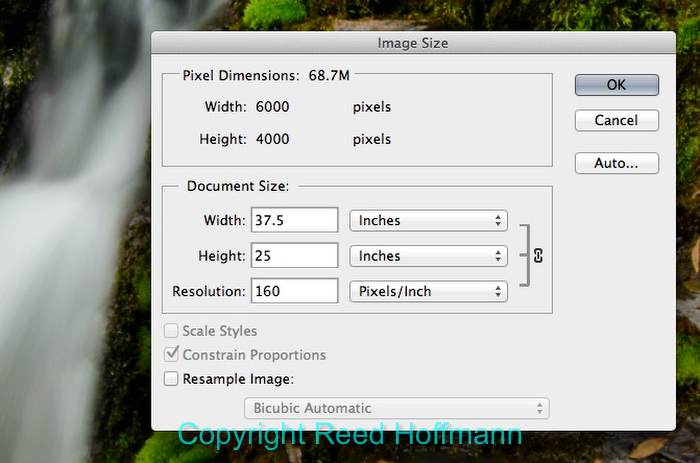
That same 24-megapixel image, if re-sized (resampled) to 160PPI, will now print 37.5-inches wide. Photo copyright Reed Hoffmann.
So the problem my friend was having was that she’d re-sized her photo for screen use, and then tried to make a print from it. Since that screen image lacked the resolution for a good print, it looked “pixelated.” The solution was to go back to before she re-sized for screen (which resampled the image down, losing pixels), and size the image for printing from the original pixels.
This is a commonly misunderstood issue. When you see a contest entry that asks you to submit images at a certain PPI, but gives no other information, then you know that whoever wrote the rules doesn’t understand resolution. For instance, if they say all images have to be submitted at 300PPI, that means you could enter a picture at one-inch by one-inch at 300PPI. Which translates to 300-pixels wide and deep, which would be a very small image on screen, probably not what they want to see. If, on the other hand, they ask for images to be sized to inches by inches by PPI, then they’re requesting them to be prepared for printing, not viewing on screen. If the contest is going to be displayed and judged on screen, then there’s no need to prepare images for printing. In that case all they need to ask is for the images to be resized and delivered with a maximum horizontal or vertical pixel dimension, so all images are viewed at the same size.
Resolution makes sense once you understand the difference between screen output (pixels) and print output (inches by inches by PPI). And understanding it, you can get the output you want, regardless of print or screen. That, of course, is the goal all of us strive for in photography – to take control of the process, both capture and output, to get the most out of our pictures.