Light
Light’s an amazing thing. It can keep us warm, grow our food, extend our day and help us see where we’re going. Life would be much more difficult – or impossible – without it. As photographers, we have a special relationship with light. Obviously, we can’t make pictures without it – exposure is all about light. But it’s more than just that. It’s also one of the ingredients that makes our pictures special. Beginners are told to look for “good” light and to try to shoot during “the golden hours” of early morning and late in the day. That’s just the basics. To make the most of your photography, you have to understand the qualities of light, and how to take advantage of them. There are five that I’ll discuss here.
QUALITIES OF LIGHT
1 – DIRECTION
Photography’s always had limits, or weaknesses, when trying to replicate how we see the world. In the early days one of the biggest of those was quality. Poor media (plates or film) and poor lenses combined to make it a real challenge to capture anything. Because of that, photographers needed as much light as possible on their subjects. It was also difficult to see detail in the shadows, so subjects were strongly frontlit when possible. That’s why one of the early “rules” for photographers was to “keep the sun over your shoulder,” or behind you. That meant your subject, in front of you, would have plenty of light on them. Times have changed, and today our cameras can make outstanding images in even the poorest of light, which lets us be more creative with light.
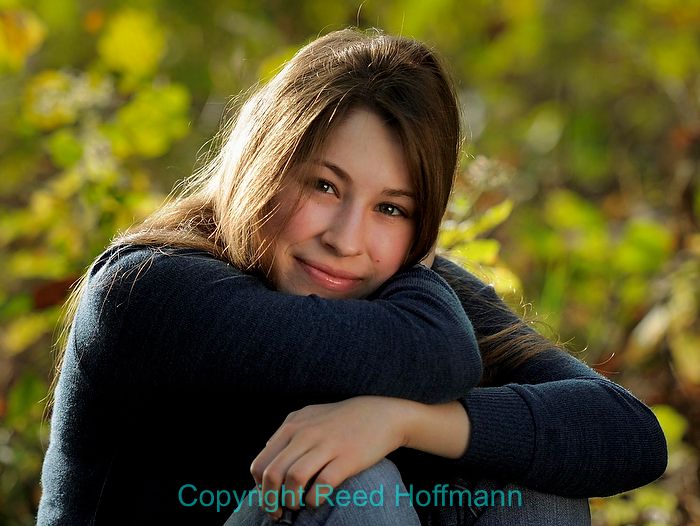
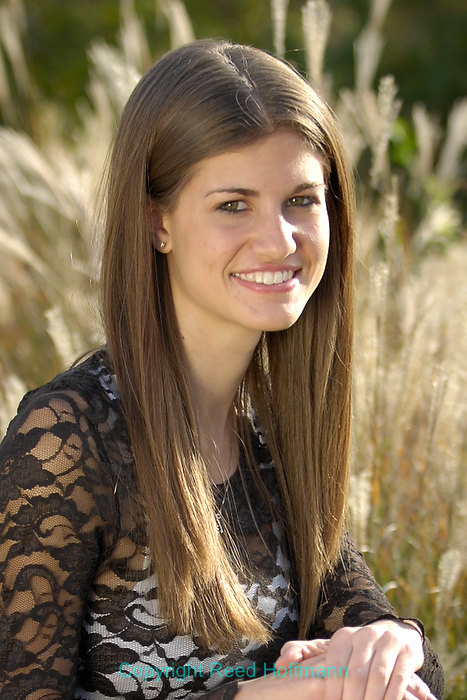
Frontlight is when a subject is fully lit with a source in line with the camera, and tends to be the least interesting light. Photographers often refer to it as “flat,” because the light tends to flatten out whatever shapes are in the scene. The reason for this is simple – photography is two-dimensional. (Yes, there are some 3-D cameras out there, but few of us are using them.) So frontlight may result in a lot of detail in a scene (everything’s brightly lit, you can see a lot), but is often boring.

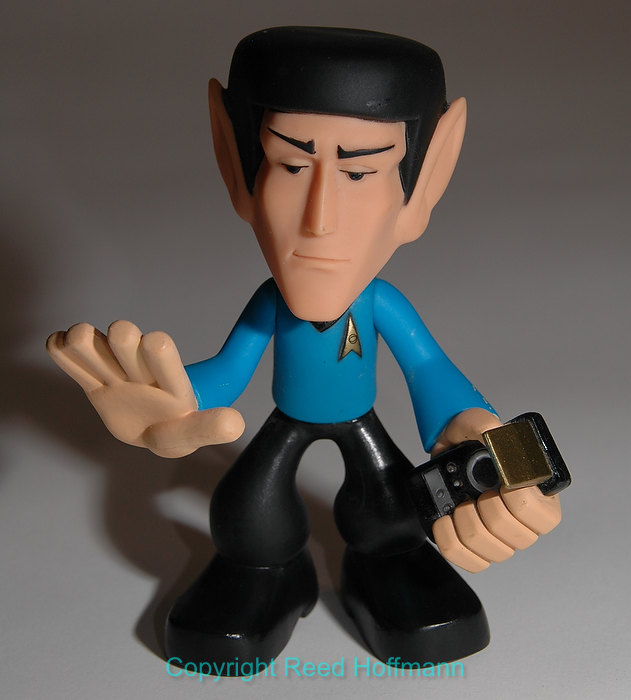
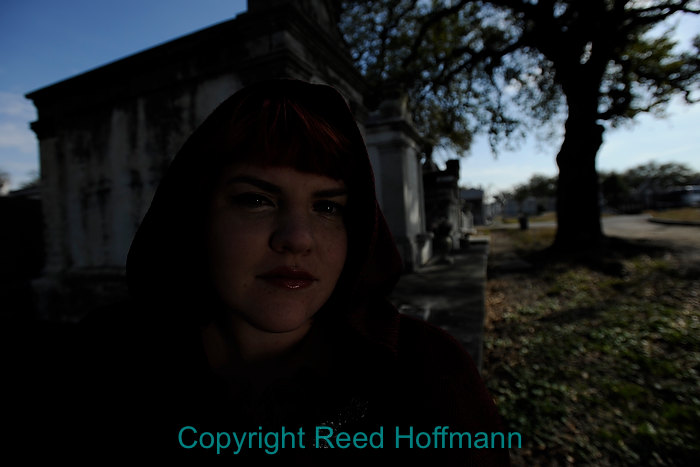
With the light coming from the same side as the camera, the light “flattens” out detail in the subject. Photo copyright Reed Hoffmann.
The resulting look has lots of detail, but lacks any feeling of depth or texture.
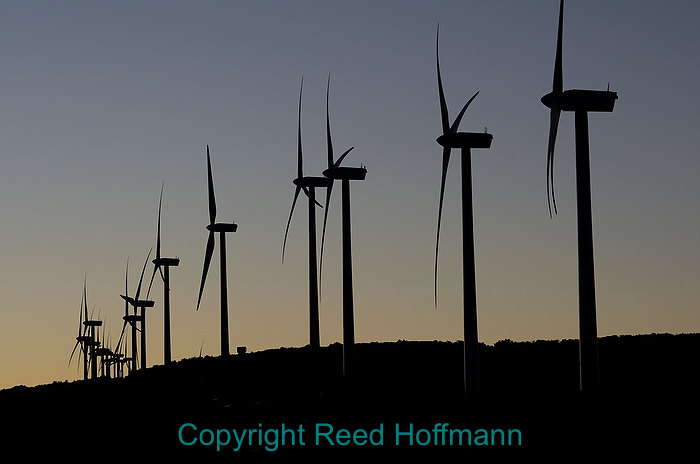
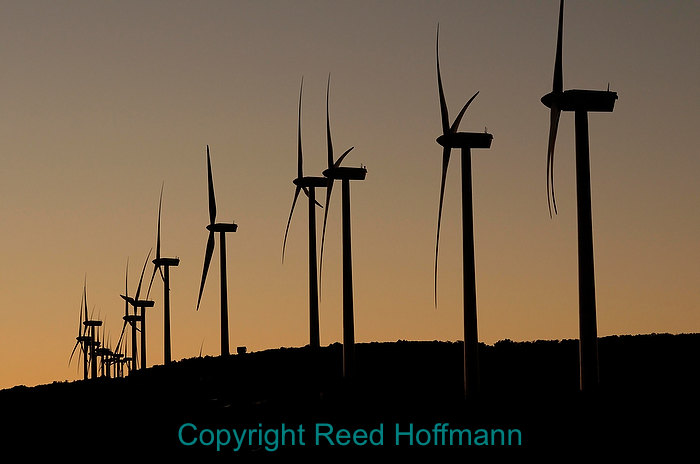
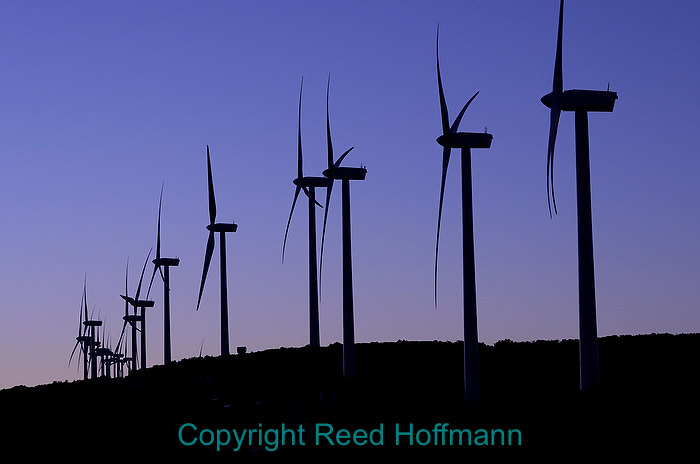
Backlight is when the light is directly behind the subject. This can be dramatic, and allow you to create a silhouette, but limits what you can see. Your choice will come down to exposing for the subject, and letting the background overexpose, or exposing for the background, and letting your subject go dark. Silhouettes can be interesting, but they can also be overdone. A few silhouettes go a long way. After that, you need to find a different way to make pictures.
One problem with both frontlight and backlight is that since our photography is two-dimensional, we have to rely on other things to give viewers a feeling of depth, shape and texture in our photos. And sidelight is one of our primary tools for doing that.
With the light behind your subject, your choice is to make a silhouette or lose the background entirely.
If you choose to try to expose for your subject, you’ll overexpose the background.
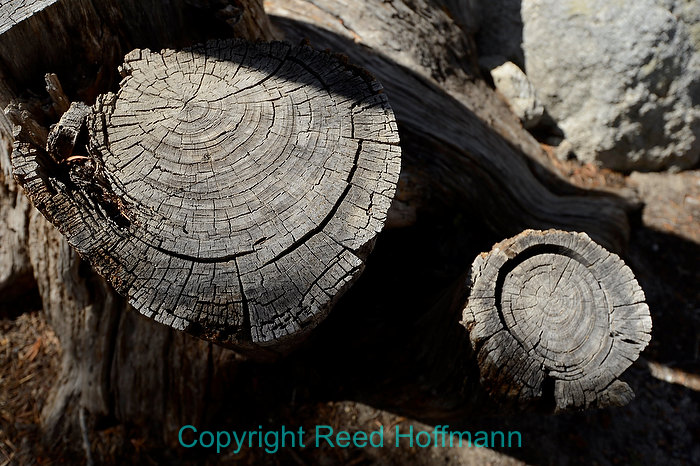
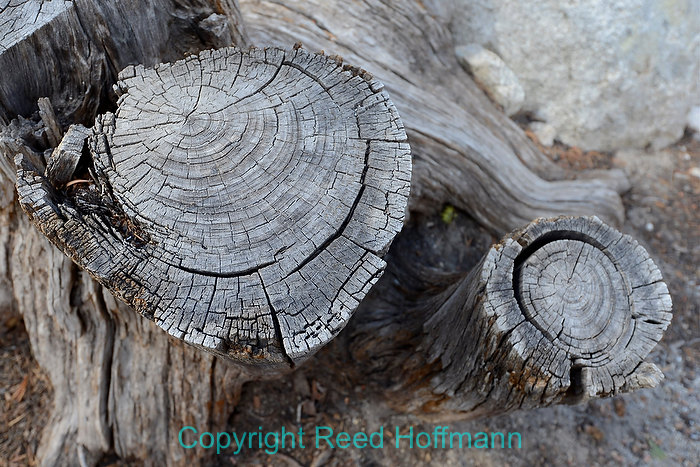
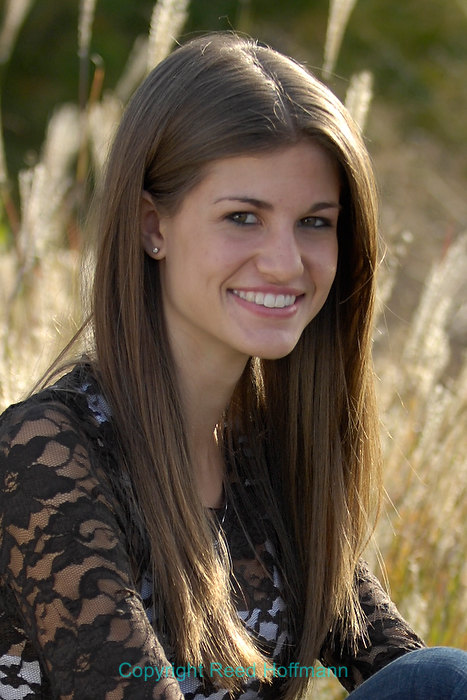
Sidelight is when the light on the subject comes from the left or right. Because of that angle, the light creates shadows, which gives shape to the objects it strikes. Of course, since the image is two-dimensional, light can’t actually give shape. Instead, it gives the illusion of shape in the viewer’s mind. It can show where there are corners as well as curves. And not just shape, but texture. Sidelight can bring out rust, peeling paint and tree bark. The further it is to the side, the stronger the effect. And because side light creates not just light, but shadows, it also gives a feeling of depth to an image. Those shadows give the photo a feeling of three-dimensionality. This is one of the prime reasons photographers often try to have the sun, or whatever light source they’re using, off to the side. But this strength of sidelight becomes a problem in some situations.
In portraiture, you’re usually trying to create a pleasing photo of the subject. Sidelight brings out texture – and wrinkles. And remember, the further to the side, the stronger the effect. That’s why sidelight can be so right for some photos, and so wrong for others. It creates edges and adds contrast. Which can be good for a dramatic portrait, but not what you want for most portraits. In that case you’re probably better off with the light source more in front of your subject. That “flatter” light can be, well, more flattering. And the size of the light source is the other factor that determines how “flat” the light is.
Sidelight is anytime the light is off to the side of your subject, but with people it tends to be best at about 45-degrees.
At that angle, you still have light on most of the person, but the resulting shadows add depth and dimension to the photo.
2 – SIZE
The first thing to remember when talking about the size of the light source is that size and quantity (or strength) are two different things. Right now we’re simply talking about how large the light source is, not how strong. The second thing is that the distance of the light source to the subject has a tremendous impact on size of the light source. And finally, your light source is the last place the light was before it strikes your subject. So let’s talk about all of this.
The sun is a small light source, so it creates harsh light with hard shadows, which result in contrast.
The sun, while huge, is about 93-million miles away (fortunately). So despite its size, that distance makes it a small light source. Think of it as a spotlight, and we’re on stage. Because of its small size, it creates distinct shadows with hard edges. And that brings us to why small light sources, like the sun or a spotlight, are called “hard” lights – they create a hard-edged shadow. That edge, going very quickly from light to dark, is also what gives us contrast. So small light sources are “hard” light sources and create contrast.
A large light source, on the other hand, creates soft-edged shadows (if at all) and so has much less contrast. A good example of a large light source is
When clouds block the sun, the result is much softer light and lighter shadows.
a cloudy sky. While the sun is a small light source, once a cloud comes between it and your subject, the cloud now becomes the light source. And since that cloud is much larger, in relation to your subject, than the sun, it’s also a large light source. The larger the cloud, the larger your light, and the “softer” your light. So a large light source is a “soft” light source, and it’s also a lower-contrast light source than a small light, like the sun. Going back to the spotlight, the example here would be hanging a white sheet between you and the spotlight. The sheet now becomes the light source, and since it’s much larger, the resulting light will be softer.
So when it comes to light, size does matter. Small lights are “hard” lights with contrast, large lights are “soft,” with much less contrast. Generally, we like contrast in photos. However, there are times where less contrast is better. For example, that’s why you often see photographers using large light sources (like umbrellas, soft boxes and reflectors) when shooting portraits.
3 – COLOR
Light has color. Few people other than scientists and photographers think about this. That’s because the human visual system does an amazing job correcting color for us. The actual color of daylight varies throughout the day based on the angle of the sun and atmospheric conditions (clouds, dust, smog, etc.), but most of us are unaware of those changes. Artificial light sources usually produce light of still different colors, but again, we rarely notice because our eyes and brain adjust for it. Our cameras, however, don’t work the same way. And that’s a good thing. It gives us another way to be creative when deciding how to record or reproduce a scene. This choice is made, whether done intentionally or not, by the white
The “correct” white balance for this shot is Daylight.
balance setting of our cameras. Out of the box, cameras are set to Auto white balance, and that works fine for most people. Auto white balance has the camera decide shot-by-shot how to process the color. It tries to determine what the neutral point should be in the color temperature, and adjusts the rest from there. And most cameras today do a pretty good job. But if you want to get the most out of your camera and your photos, then just like exposure, you need to go beyond Auto.
You can start this way – if you know what the light source is, then tell the camera by setting it to that. If you’re outside and it’s sunny, set it to “Sunlight” (or whatever your camera calls that). If it’s cloudy, or
I could choose “Shady” for a warmer look.
you’re in the shade, try the “Cloudy” or “Shady” settings. (Note – I leave my Nikons on “Direct Sunlight” almost all the time when I’m outdoors in the daytime). Going inside? Look up- if there are incandescent lights (round, house-hold type bulbs) use the “Incandescent” setting. If the lights are fluorescents, then try the “Fluorescent” setting. Remember, though, that this is just a starting point. Each of these settings will process your photos to a specific color temperature. If you don’t like what you’re seeing on the back of the camera, then try something different. And many of today’s cameras give you either choices within a setting (Nikon offers many different fluorescent choices),
Or I could go the opposite direction in color temperature, choosing Fluorescent for a cooler, blue look.
and/or the ability to shift a particular setting to make it warmer/cooler or more green or magenta. My preference in artificial light (anything but daylight) is to use the “White Balance Preset” control, sometimes called “Custom White Balance.” By choosing this and following the steps – shooting a neutral target in the same light your subject is in (check your manual for specific instructions), you can make the camera process your photos to a specific color temperature. This is the easiest and most efficient way to get correct color in artificial light.
Finally, remember that “correct” color may not be what you want. In the film days, photographers didn’t choose Kodachrome or Velvia because they were accurate. They used them because they liked the oversaturated colors those films created. Once you start using and understanding your white balance controls, you’ll realize that they’re another creative tool you can apply. Choosing the “wrong” white balance may be just want you need to get the “right” picture.
4 – QUANTITY/STRENGTH
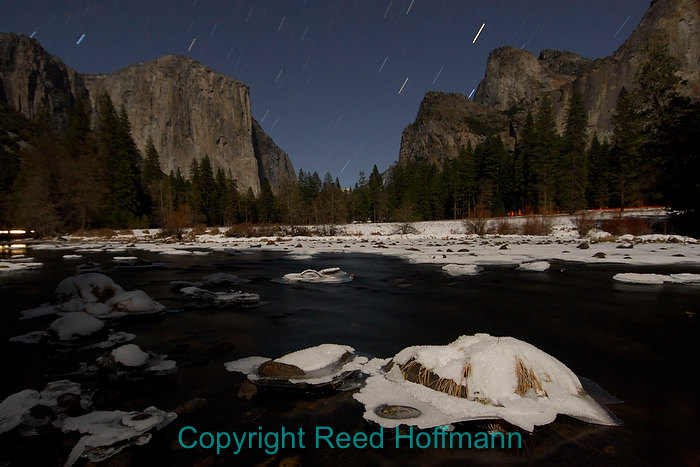
With nothing but starlight, if you leave the shutter open long enough – seven minutes in this case – you can get a picture.
Strength, or quantity of light is of course important to us as photographers, but only for exposure. If you have a non-moving subject and a tripod, then you need very little light to make a picture. You just need a long exposure. But it you want to shoot hand-held, or stop action, then the quantity of light available is extremely important. But the strength of the light source is the least important quality of light in how it affects the beauty, or impact of our photos.
5 – DISTANCE
Because of our distance from the sun, the exposure right in front of us is the same as that miles away.
With the sun as our light source, the exposure six inches in front of us is the same as it is six miles away. That’s one advantage to the sun being so far away, and a good lesson for us photographers. The further your light source from your subject, the more even the quantity of light will be over a large area. And the closer the light source to your subject, the faster it drops off behind. This is called the “Inverse Square Law,” and simply means that if you’re using artificial light, and want your exposure to remain fairly constant for some depth, you need to place your light source a fair distance from your subject. With the light close to the subject, the exposure behind them will drop off quickly.
Like the sun, the further your light from your subject, the more even the exposure over a deeper area.
However, when the light is close to your subject, it will fall off quickly on the background.
CONTROLLING LIGHT
Photographers who understand the qualities of light are simply more successful creating strong photos. That success comes not just from using light properly, but sometimes by taking an active role in controlling it. As one of my friends says, “I only shoot available light – whatever light I have available.” That’s why there are graduated neutral density filters, HDR solutions, portable and studio strobes, hot lights, cold lights (fluorescent), soft boxes, umbrellas, diffusers, reflectors, beauty dishes and on and on. All of these are tools photographers use to control and/or create light. Let’s start with ways to control available light, then we’ll go into working with created light.

There are only five stops difference between this photo and the one below, but you need at least that much if you want to see good detail in her cape and hair as well as the brightest parts of the sky.
The first thing we need to understand is that cameras have a limited range of light they can capture. That’s called dynamic range. You can argue whether it’s six, eight, ten or even twelve stops, but regardless, there is a limit. As photographers, one of our primary jobs is deciding what range of light is most important to us in a scene and how to capture that. Anything in your photo below that range will turn out black with no detail, anything above white with no detail. When we’re in flat light, the resulting low contrast makes it easier for us to find an exposure that records the entire range in one exposure. When we’re in hard light (coming from a small light source, or sources), then we’re going to have contrast. As humans we like contrast, but as photographers we continually fight that contrast. We’re trying to find the perfect balance between contrast that looks good in a
photo, while still holding detail in the areas that are important to us. Traditionally we expose for the highlights (brightest areas) and hope the areas that go dark aren’t important. So our starting point for managing dynamic range is how we choose exposure. If that doesn’t do the job as well as we’d like, we reach for other tools.
High Dynamic Range imaging (HDR) is a technique where your goal is to have a photograph that shows a wider range of light than is possible with a single exposure. You do this by shooting several

This image was created in software by merging three separate exposures to hold good detail in the important highlight and shadow areas.
different exposures of the same scene (best done on a tripod), attempting to capture good detail in everything from the darkest shadows to the brightest highlights with those different exposures. Then you take those separate shots, which should now cover the entire dynamic range of the scene, and combine them in software to make one photo that shows that range. How many frames you shoot, and how much exposure difference between frames, is dependent on the light and your intentions. In general, you need at least three exposures – one for the darkest tones you care about, one for the brightest, and one for the midtones. While traditional editing software like Adobe Photoshop and Elements offers a menu item to do this, specialized programs like Unified Color’s “HDR Express” or “HDR Expose” tend to do a better job. There are also more traditional tools photographers use to control light.

Called a “grad,” a graduated neutral density filter allows you to “gradually” reduce the exposure in one area of the scene.
A regular accessory in many landscape photographers’ bags is a graduated neutral density filter. It’s a rectangular filter (there are circular screw-on ones – don’t buy them!) that gradually changes density from one top or side side to the other. It’s usually grey in tone (that’s the “neutral” part of the term), as the goal is to change exposure, not color. You slide it in front of the lens to reduce the brightness of one part of the scene while having less effect on the other areas. In doing this you’re reducing the exposure for the brightest areas of the scene, thus reducing the dynamic range. You can read more about these filters, and my recommendations, on the “Gear” page of my website, at https://reedhoffmann.com/training/education/gear/.
LIGHT MODIFIERS
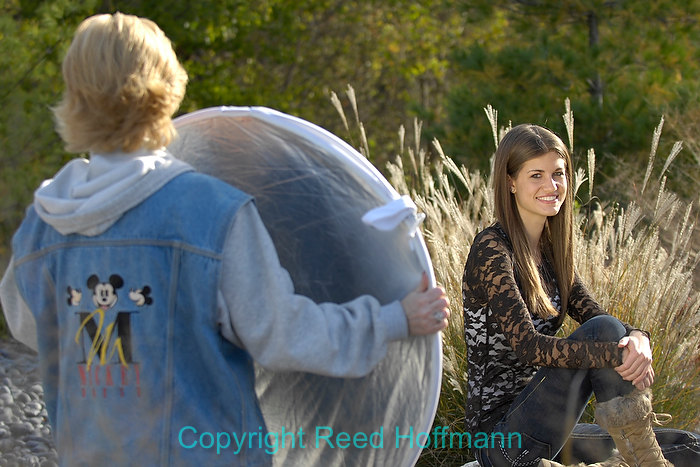
Circular reflectors are easy to use, and can have a tremenodus impact on the quality of the light. Notice the examples with, at left below, and without, at right.
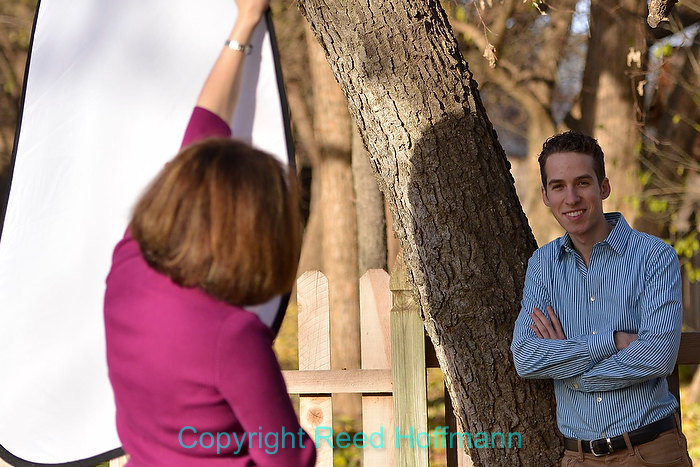
Light modifiers are any tool that changes the character of light, by controlling or even shaping it. The most common modifiers for controlling available light outdoors are reflectors and diffusers (or scrims). A reflector is anything that reflects light onto the subject. In photography their most common form is a circular ring covered with cloth that can be either white, silver, gold or a combination of two or three of them. The more reflective the surface, the stronger the light that’s reflected off of it. Gold will not just reflect light, but add warmth to it. To get the most impact from a reflector, you need sun. One popular technique has the subject in shade, with an assistant in the sun using a reflector to bounce that sunshine onto the subject. The big benefit here is that the reflector doesn’t need to be close to the subject, as long as
‘
Carolyn Appelbaum at park near their home for modeling application shots (Photo by Reed Hoffmann on 11/3/07) Shot with a NIKON CORPORATION NIKON D2Xs set to white balance of SUNNY and ISO of 200, shutter speed of 1/640 at f/3.2, with exposure compensation at -0.3, lens at 80mm and sharpening set to NORMAL, tone set to LOW.[/caption]it’s in the sun. However, remember how the size of the light source affects the quality of the light? So the closer you can have the reflector to your subject, the softer the resulting light will be. Reflectors can also be useful when the subject is in the sun, by adding (filling) light into shadows, thus reducing contrast.
Diffusers are used to remove or reduce light from your subject. They do that by making the size of the light source larger and so reducing contrast. By holding a diffuser between the sun and your
A diffusion panel turns the sun into a soft light source.
subject, you’re changing the size of the light source from small (the sun) to large (the diffusion panel). And again, that larger light source results in softer light, with less contrast. This is true whether photographing people, flowers or any other subject where softer light will mean a more pleasing photo. It’s possible to use reflectors on cloudy days as well as indoors, but their impact will be much less. Which usually means that the reflector will need to be much closer to the subject. And when reflectors are used indoors, they’re most often used with an artificial light source.
When photographers use artificial light sources, they’ll either be continuous lights or strobes. Continuous lights are less portable, but have the advantage of being able to see exactly where the light is going. However, they have more limited power than strobes. Electronic flash can be extremely powerful in a small package, without creating a lot of heat. Both continuous and strobe, though, can benefit by using light modifiers to control their output.
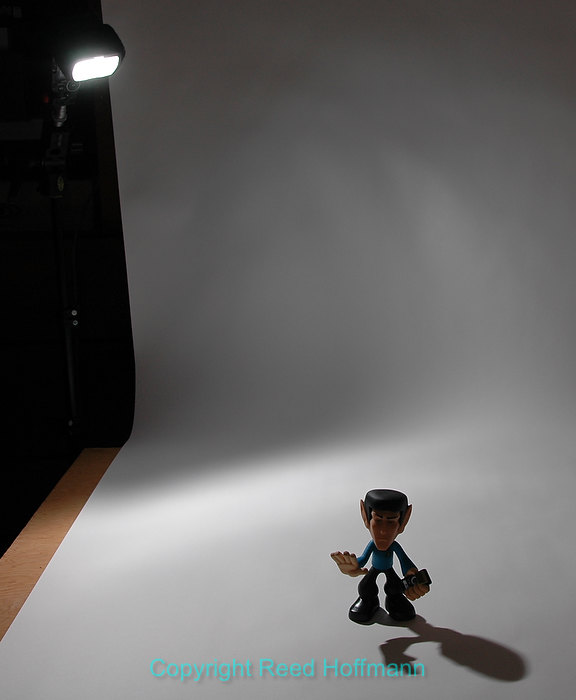
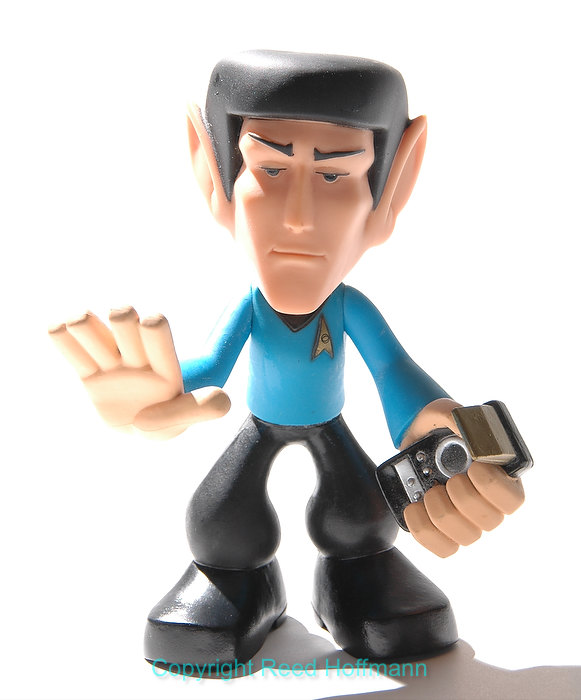
An umbrella takes a small light source and turns it into a much larger one.
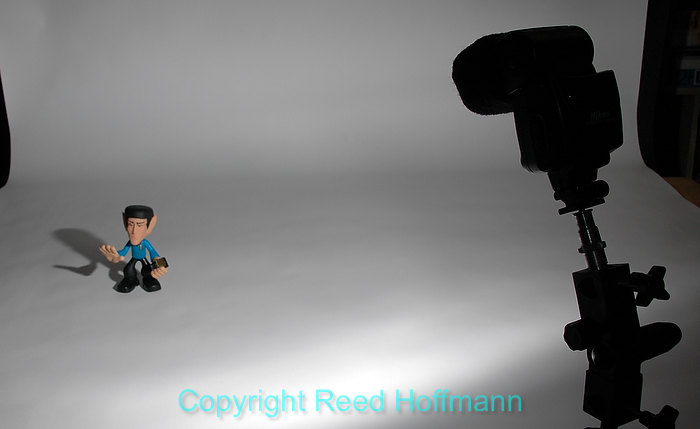
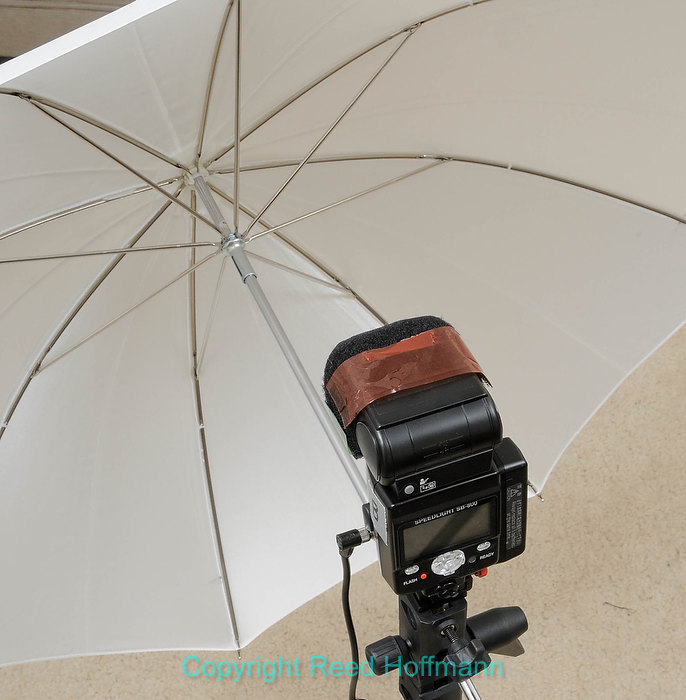
The most common and inexpensive light modifiers are umbrellas. Their job is a simple one – to increase the size of a light. They come in different sizes and surfaces, just like reflectors. And some of them are called “shoot through.” This means they’re made of a lightweight white fabric, and can be reversed to be placed very close to the subject, with the light firing through the fabric instead of bouncing off of it in the traditional way. Umbrellas are a simple way to increase the size of your light source, but harder to control where the light goes. For more control you need a softbox.
A softbox is simply a box made of fabric and poles that a strobe (or possibly a continuus light) is fired into. Since the sides are black and the front white, the photographer has enlarged the size of the light source, but more importantly, is now able to have more control over where that light goes. While an umbrella bounces the light out of it rather
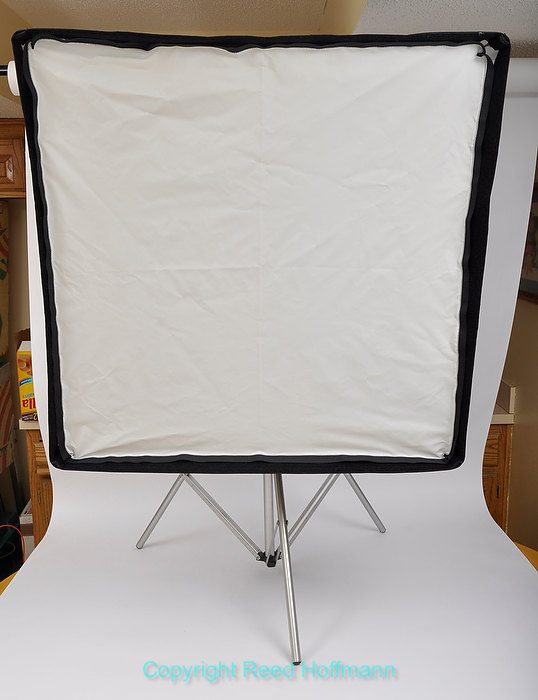
Softboxes make a small light source larger too, but give you more control over where the light goes.
indiscriminately, a softbox allows light to go in one direction only. And like a diffuser, that piece of fabric (or several) between the light and the subject creates a large light surface for softer light. Like umbrellas, they come in all different sizes, and also in different shapes, from rectangular to square to octagon to strips. They’re probably the most common light modifier a studio photographer has.
Barndoors are panels on the sides of a light that let you adjust the spread of that light. Most often used on continuous lights, they’re sometimes used on softboxes too.
Gobos are like diffusion panels with holes cut in them. Most often used to light a background, they can create a dappled look to the light, or if the panel is solid (prevents light from passing), then the holes can create a pattern.
There’s an entire industry of light modifiers designed to give photographers more control over their portable flashes (speedlights). Bounce cards and domes (small electronic flashes) are the simplest of light modifiers. A bounce card is often used when the photographer is “bouncing” light off the ceiling by pointing the flash up. By doing that, the ceiling becomes the light source and so is larger, and less harsh. However, having the light come from the ceiling can create heavy shadows in the eye sockets, under the nose and chin. Adding a bounce card to the flash will “kick” some of the light going up into the subject’s face, filling those shadows and adding catchlights to the eyes. Larger bounce cards can be used even without a ceiling to turn the small flash head into a slightly larger light source for more pleasing light. An example of this would be Expoimaging’s “Rogue Flashbenders.”
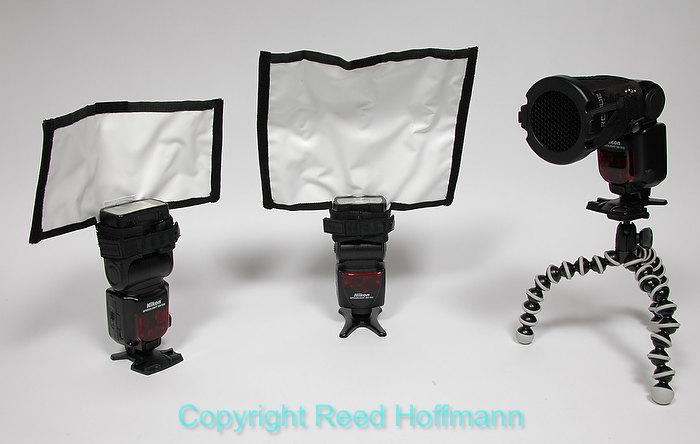
ExpoImaging’s line of “Rogue” flash accessories are inexpensive ways to expand the capabilities of your portable strobes.
There are also a number of flash “domes” being made, whose goal is to try to turn that small light source into a larger one, like the Gary Fong “LiteSphere Domes.” The goal with a tool like this is to send some light up to the ceiling while spreading the rest in the area around the photographer. Technically, they’re simply another form of a bounce card.
Another common accessory is a small softbox that attaches to the front of a speedlight to enlarge the size of that light source. Not much larger than the flash head, they’re still an improvement if you need softer light in a portable package.
Finally, there are snoots, grids and gels available to extend the capabilities of small flashes. They let you shape, control and choose the color of the light you’re using, and Again, ExpoImaging “Rogue” kits are a good example of those.
Light is more than just something we need for pictures. Good photographers know that “good” light is something you don’t just stumble on, or take for granted. Understanding the qualities of light, and taking steps to modify it, is the trademark of a photographer that understands their craft.