
When was the last time you had a portrait made? If it’s been more than a few years, it’s time for a new one. Plus, you probably already own the gear to do that. But what if you don’t have anyone to shoot it? That was the challenge for me, so I figured out an easy way to do a DIY self-portrait.
You’d think would think the camera’s self-timer would perfect for this, but it’s not. That is, unless you can figure out the exact distance your eyes will be from the camera, and set focus there. However, if your camera has a built-in intervalometer (like all of mine do), that problem is solved. Why? The intervalometer is similar in function to the self-timer, but with more options. The important one being that it can be told to focus before each shot.
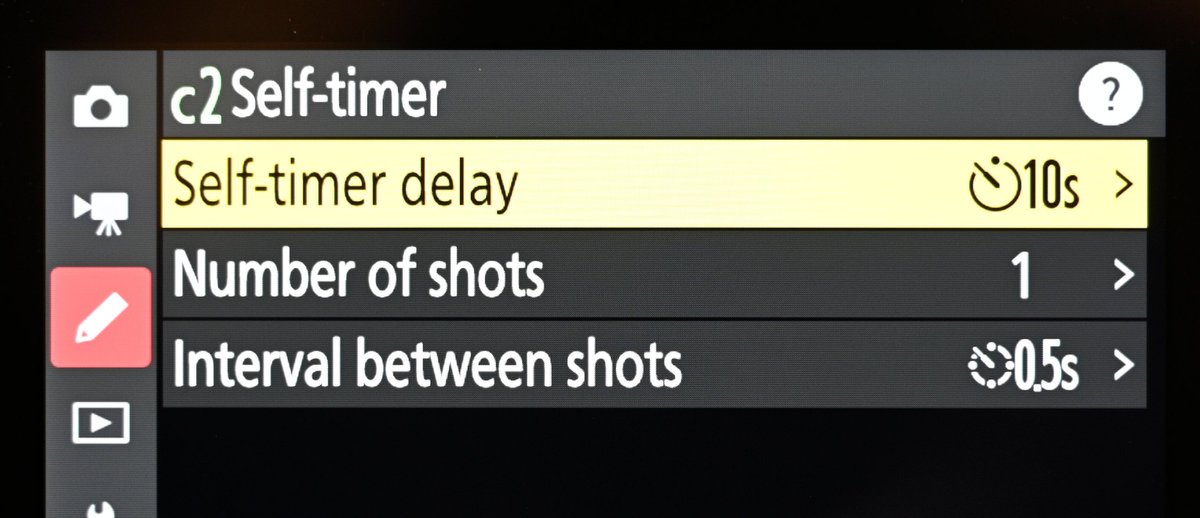
The self-timer has some nice options, but you can’t tell it to focus before each frame.
For a simple portrait like this, the setup can be also be simple. Hang a sheet over a door close to a window for the backdrop, use that window as the main light to one side and a sheet of cardboard covered by aluminum foil as a reflector on the other side. However, if you have a flash and a couple of other basic accessories, you can easily create a better setup. That’s what I did.
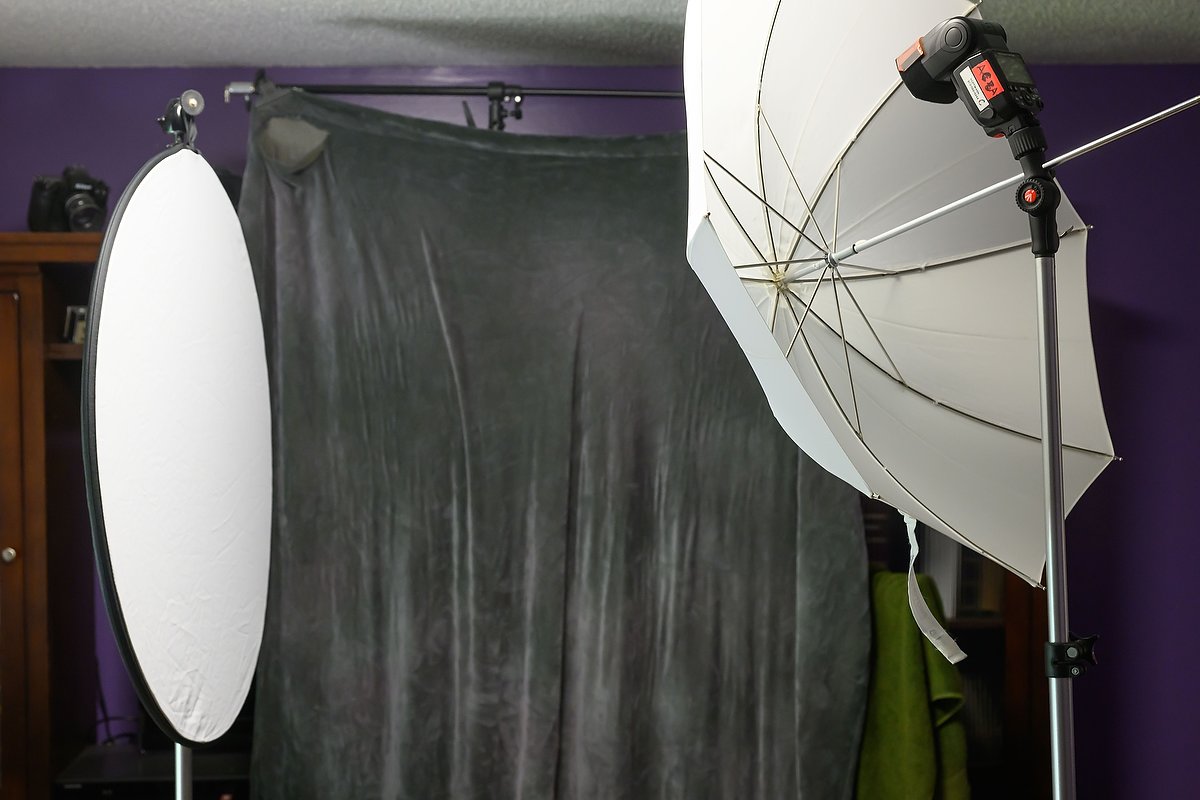
Here’s my setup: three light stands, one crossbar to hold the fabric, one reflector, one umbrella and a speedlight. All that’s missing is me.
For the backdrop, I used a crossbar and light stand to hold a sheet of dark fabric (something like this). For light, I used one speedlight (a Nikon SB-5000) shooting through a small white umbrella, close to me. On the opposite side, also close to me, I hung a white reflector so the non-flash side of my face would get some extra illumination. The camera then triggered the flash using its built-in wireless capability (along with a Nikon WR R11a). There are many other options for having the camera fire the flash, one of them being a simple flash trigger (which of course can come in handy for other types of photography as well). Here’s an example, but if you decide to buy one, make sure to order the right model for your camera.

As you can see, I struggled a bit to put myself in just the right spot, but shooting a 45-megapixel camera meant I knew there was more than enough pixels to crop in. Nikon Z 8, Manual exposure, Natural Light Auto white balance, ISO 320, 1/160 at f/5, Nikkor Z 24-120mm f/4 S lens at 105mm.

The same image, cropped and edited to make me look oh-so-much better. Hah!
With that done, it was just a matter of mounting the camera on a tripod and setting up the intervalometer. I programmed it to shoot ten frames at four-second intervals. That gave the flash enough time to recycle, and time for me to change my pose and expression.
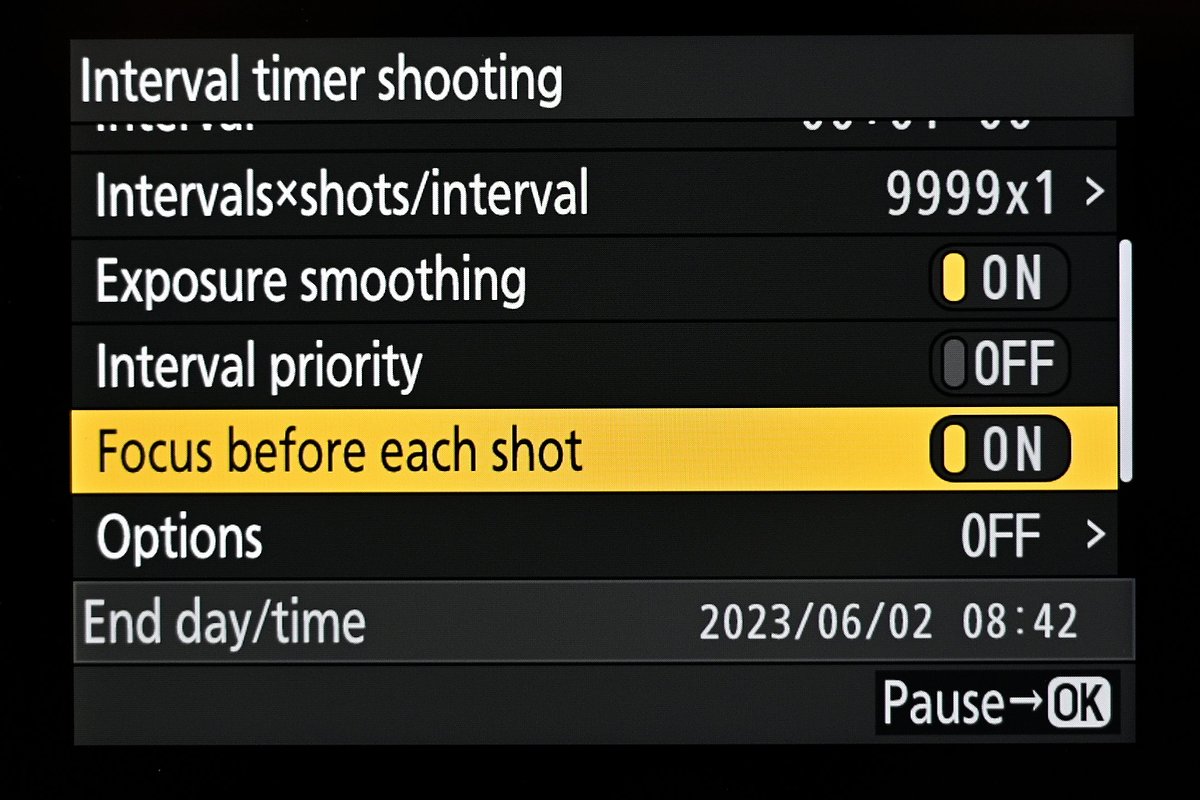
The key here is that the intervalometer lets me tell the camera to focus before each frame. The settings I used for the portrait session were: shoot ten frames, four-seconds between each one, “Exposure smoothing” OFF and “Focus before each shot” ON
The biggest challenge, honestly, was getting myself in the right spot. I needed to frame tightly enough to keep the umbrella and reflector out of the photo, but have them close enough to me for the soft light I wanted. So I just kept having the camera shoot ten-frame sequences. I also swapped shirts a couple of times for different looks, and changed my body position as well (facing more into or away from the umbrella). Options are good! And finally, I did a few without my glasses, since I’m going to be renewing my passport in the next six months.

At left is the photo I had the camera shoot for my passport renewal. I then took it into Photoshop, selected the background and made it white, which is what’s required along with being square and solemn.
Honestly, it wasn’t hard, and I actually made it more difficult than it needed to be – I could have just asked my wife to come downstairs and take the picture. For me, though, part of the joy of photography is finding new ways to do things with the tools I have. Most of us don’t take enough time to really explore everything our gear’s capable of, which might then lead us to trying something new. So the main point of this story isn’t actually to get everyone to make a new self-portrait, but to explore more of the capabilities or your camera. Oh, and have a little fun with it too! I sure did.
(If you like this story, please share it with your friends and let them know about the links on photography that I post on my business Facebook page. You can also find my photos on Instagram. And if you’re curious about the workshops I teach, you can find them here. Finally, you can subscribe to this blog on my home page.)
Great idea! Another Reed Hoffmann classic!
Thanks Reed. Great DIY advice