Computers and Software
(updated May, 2019)
Windows or Mac? For nearly twenty years now, I’ve worked on both Apple and Windows systems. As far as I’m concerned, there’s no inherent advantage of one over the other. A good computer, running either operating system, will be able to use the best software out there and do a great job for you. That OS is simply a personal choice. The Windows system is more open, which has advantages and disadvantages. And the Apple system is more closed, which also has advantages and disadvantages. What’s more important is what’s under the hood – the components that make up that computer.
As a photographer, you need fairly good power (processors), plenty of RAM, fast and large hard disk drives (SSD better) and good video support with a good screen. So there’s no such thing as a good cheap photo computer or cheap photo laptop. That doesn’t mean you can’t do photo work on those types of machines, just that they will run slow, be short on space and the screen won’t be reliable. So make sure that what you buy has multiple processors, a minimum of 16GB of RAM and at least a 500GB hard drive. It’s possible to get by with a 256GB drive, but you’ll spend a lot of time moving images off of it to have enough space to work. SSDs (solid state drives) are faster and more power efficient, plus costlier, but most laptops and even desktop machines are moving to them. To me the biggest advantage to them is when used in laptops (for longer battery life) and how much they improve boot speed (both laptops and desktops). Screens are more difficult to judge. Apple has a very good record of using good displays for both their laptops and desktops. On Windows you’ll need to do some research. I like PCMag.com for their product reviews and trust what they say about computer displays. You can buy a laptop with a very good display, but again, you’re going to pay for it. That’s one reason I like connecting my laptops to external displays at home – larger screens and better quality.
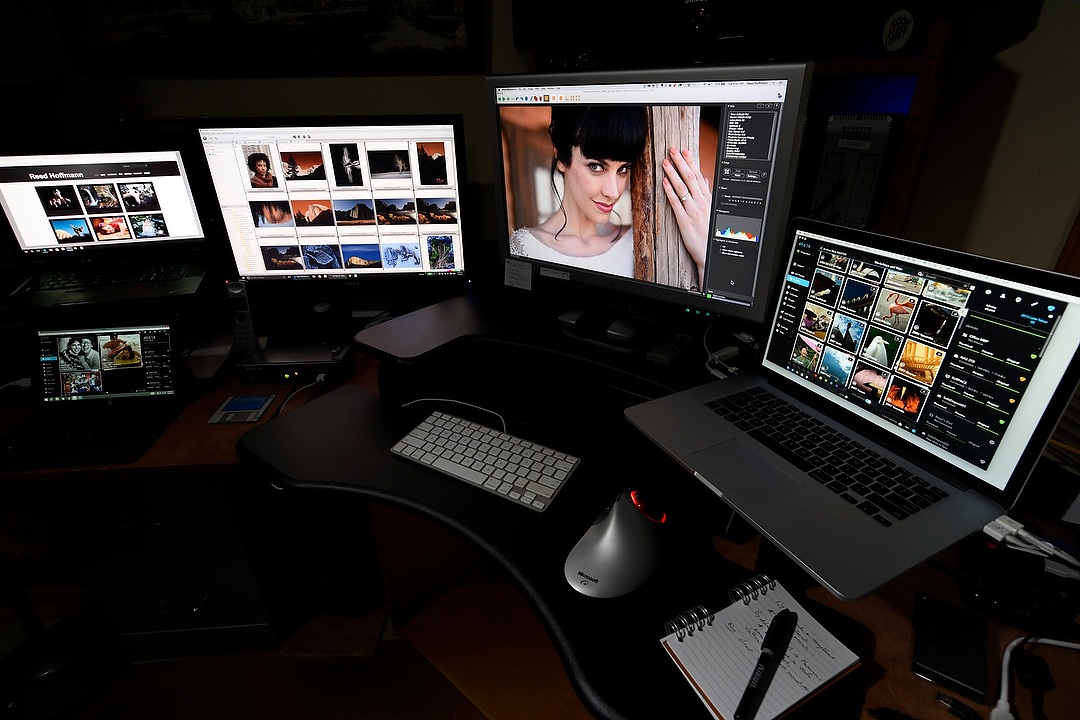
These days, all I are laptop computers. While I still have both Windows and Mac systems, the two I use the most are both Macs, a 15-inch and a 13-inch. The 15 is my power machine, newest, with multi-core processors, 16GB RAM and a 512GB SSD. It’s in my office connected to a 24-inch display, external keyboard, trackball and multiple large, mirrored hard drives. I travel with the 13-inch, and bring along either extra SSD drives and/or high-capacity USB sticks (up to 128GB) for added storage.
Workflow
My digital workflow relies on software to automate as many steps as possible, and a folder-based system that uses the date each image was shot as part of the strategy. Here are my steps:
1 – Download to the computer, using my software to create a folder structure, rename the files and add metadata (location, caption, copyright, etc.). I’ve published instructions on how to set this up with three different programs – Photo Mechanic (my favorite), Lightroom CC and Nikon’s ViewNX-i– in a PDF here.

Photo Mechanic is the “hub” of my digital workflow. All images come into my systems through it, are sorted and organized, and go out from it.
2 – Next, I do a quick review of the images, occasionally checking for sharpness (by zooming to 100% in the browser) and marking all photos I like and have any possible need for. Then I delete everything else.
3 – Now I go through one more time, marking only my best photos. Those photos get copied to a “best of” collection. I have those “best of” collections for every year, as well as special projects or trips.
All of this happens on a connected 3TB mirrored drive. Since the hard drive space on my computer is more limited, I do all of my image work on this drive. “Mirrored” means there are actually two 3TB drives in the box, and everything I do to my photos happens to both of them. That way, if one should fail, I’ve lost nothing, since the second drive is still functional. Once I replace the failed drive (and I’ve had to do that), the other drive duplicates to it, and once again I’m “mirrored.”
For backup I recommend, and use, a multi-tiered strategy. That means after the steps above, I back my photos up to a second, external hard drive (again mirrored). I also have servers in my home where all of the “best of” collections are stored (as well as my music and video collections). A server is simply a box containing multiple hard drives which is connected to my home network. It’s designed for redundancy, which means if one hard drive fails, no data has been lost. As long as I replace that hard drive before a second fails, everything’s still intact.
I keep all the photos I’ve shot for each year, and the collections for that year, on individual hard drives. I also burn DVDs of everything. I’ve had hard drives fail, I haven’t had DVDs fail (yet). And I have copies of those “best of” collections in an off-site location, in case my home copies are lost in a disaster. That’s a pair of hard drives that I rotate between my house and a safety deposit box at my bank
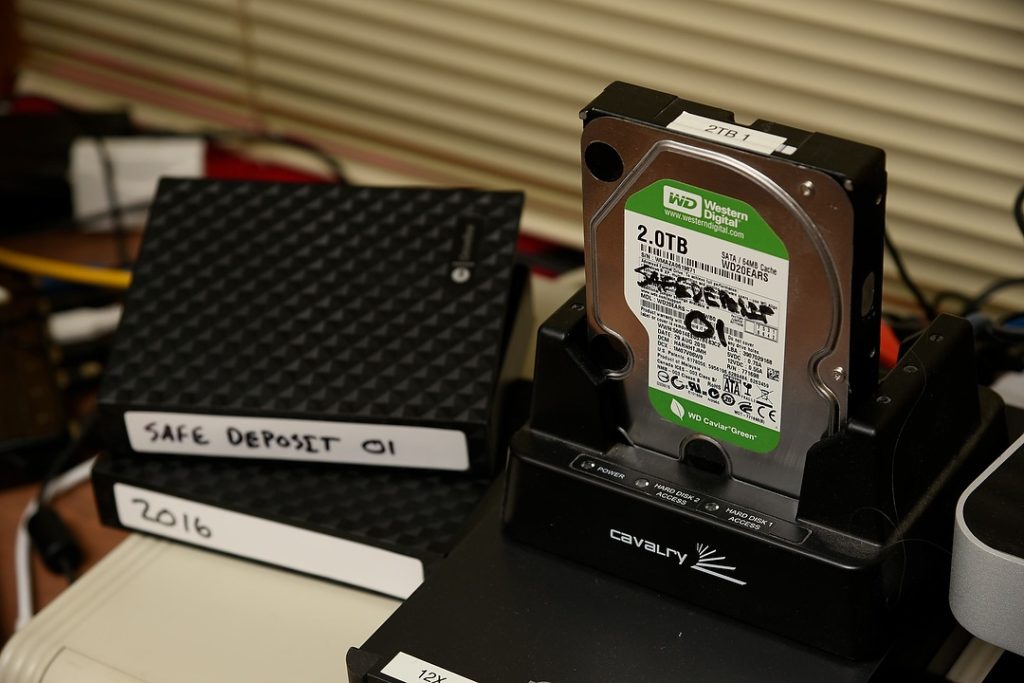
I use bare drives to backup all my yearly collections, plus a pair that cycle through a safe deposit box.
Color Management
The reason a quality computer screen’s so important should be obvious – you have to be able to trust what you’re seeing on screen. But even a good screen isn’t that helpful without color management. So the first step to color management is buying a package that will help you calibrate and profile your screen. These packages are made up of two parts – hardware and software. The hardware part, a colorimeter or spectrophotometer, is used to read how your screen is displaying color and tone. It connects, via USB, to your computer, and the software then controls it. The simplest packages to do monitor calibration cost under $100, and use a colorimeter. More expensive packages give you more options, and starting around $500. These will usually have a spectrophotometer, which means you can also profile cameras, scanners and printers.
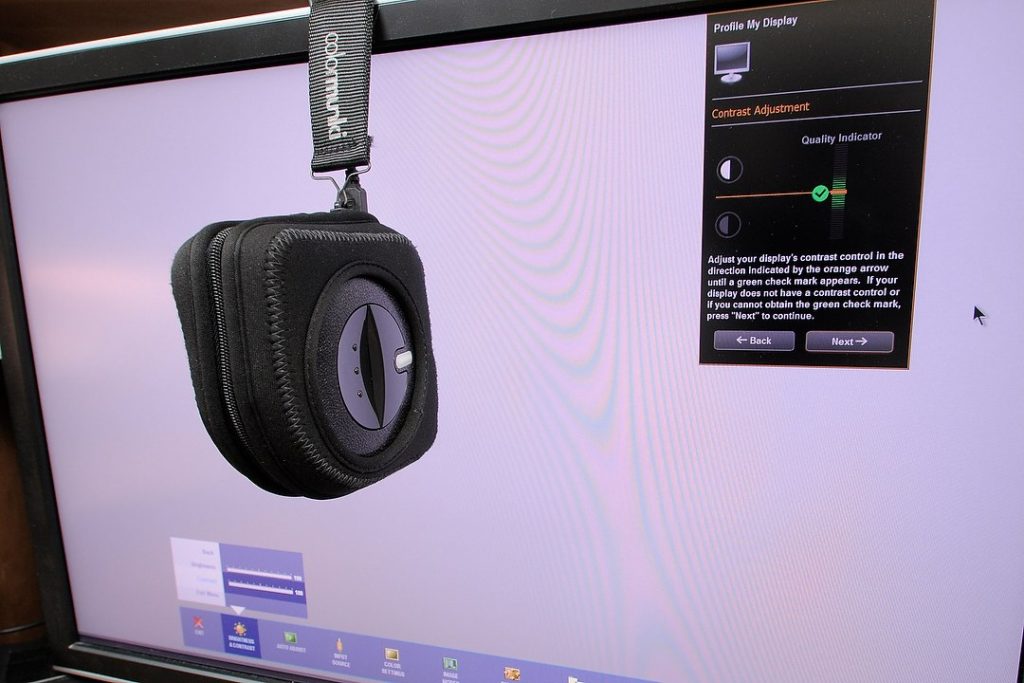
A spectrophotometer or colorimeter is needed if you want to properly calibrate and profile your display.
To create a good profile, you need to first calibrate the monitor. That’s accomplished by attaching the device to the screen and then following the software as it guides you through adjusting the brightness, contrast and sometimes color point to where they should be. Once that’s finished, the software will then display a series of tonal and color patches and read the values of those. By knowing what the values of what those colors and tones should be, and then reading how your display, properly calibrated, reproduces them, it’s able to build a look-up table. That table, called a monitor profile, is then installed on your system as the default monitor profile. By doing that, any image displayed on your monitor from that point on will be adjusted, on the fly, by the profile to display that image correctly. Because of this, you now have an image that you can make reliable decisions about. In other words you can trust what you’re seeing on screen. Obviously, this requires at least a decent laptop screen or external monitor. As mentioned before, I think PCMag.com does a nice job with their reviews of screens. You should be able to buy a good 20 or 24-inch screen for around $400, sometimes less.
Now that you can trust what you’re seeing on screen, you should follow through with more good color management practices. That means you need to understand color spaces and color space conversions. And perhaps even take advantage of soft proofing.
A color space simply defines the range of color a device is capable of capturing, displaying or reproducing. Digital SLRs today give us a choice of two color spaces, sRGB and Adobe RGB.
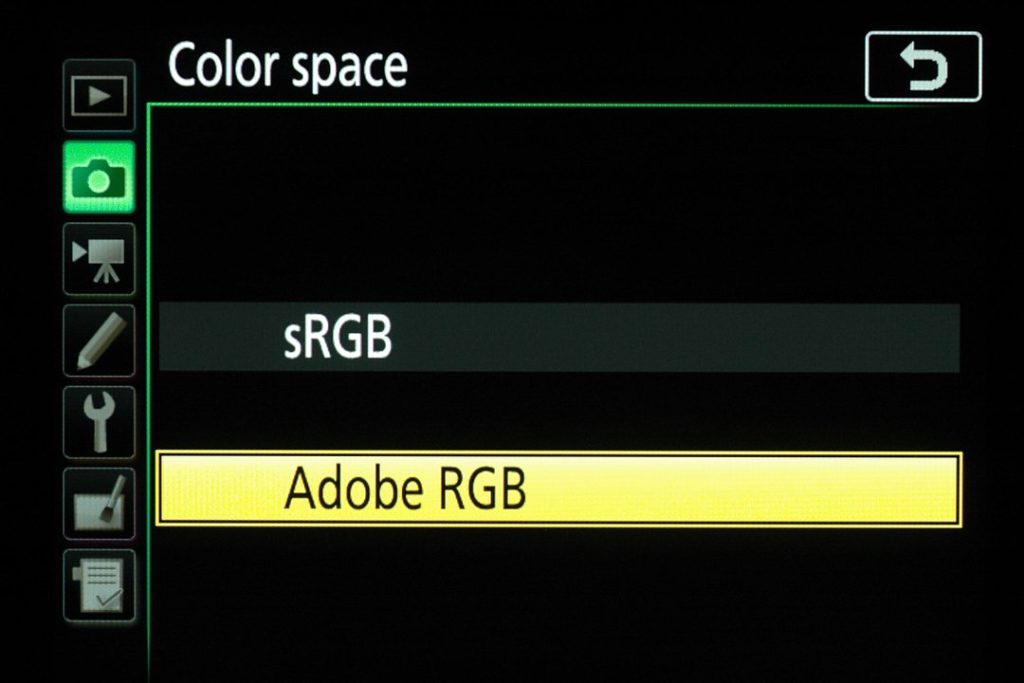
Today’s good digital cameras allow you to choose either the default sRGB color space or the more advanced Adobe RGB.
sRGB is the default color space that’s used for most things, from software to cameras to printers. As such it’s the easiest color space to use. If you leave your camera on sRGB, then you don’t need to do a lot with color management other than making sure your monitor is calibrated and profiled. The web and most printers use sRGB as their default color space, so you can expect that your images sent to either of those will look fairly close to what you intended.
Digital SLRs let us choose either the sRGB or AdobeRGB color space. By default they’re set to sRGB, as that’s easiest. However Adobe RGB is a slightly wider color space, so many serious photographers choose to set their cameras to it. If you do that, though, you have to embrace color management. That means understanding and using software that can take advantage of color management.
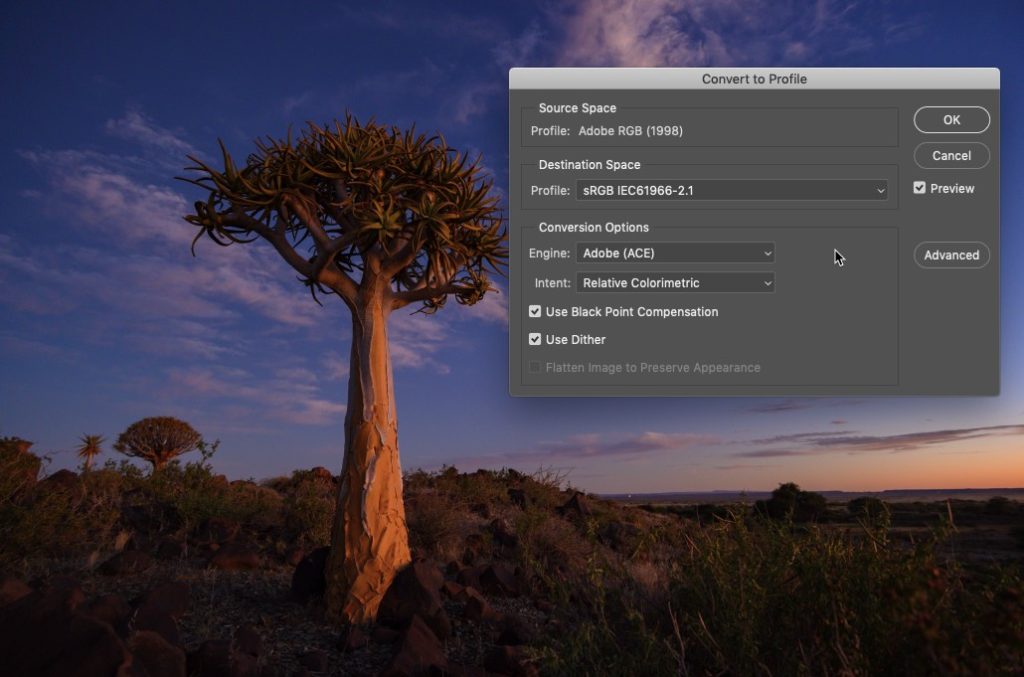
If you choose to shoot in Adobe RGB, then you must also know when to convert to sRGB.
When doing your own printing, you’ll need to choose the printer and paper you’re using. That too is a color space conversion.
The other place that conversion is very important to photographers is when printing. Since you’re not printing to a backlit RGB device (what your monitor is), then before printing the image has to be converted to the color space of that printer’s ink and paper combination. If you don’t know what that will be (sending to an online service, for example), then the best option is to simply convert to sRGB and let the printer do the conversion. If you’re doing your own printing, then that conversion takes place in the printer dialog when you choose the printer profile (ink and paper combination). If working with a better lab (either online or locally), and they offer a printer profile, then you want to download that from them and use it to “soft proof” your image before printing. Soft proofing emulates how the image will change when printed using a certain print/ink/paper combination. By seeing how it will change before you send it to print, you can then adjust the image again to correct any changes you see. When printing to glossy or semi-gloss surfaces, those changes can be slight or none. If you choose to print to matte, or rough surfaces, they can be drastic, mostly a loss of saturation and contrast. That’s when soft proofing ahead of time can save you time and money.
Almost all compact cameras simply capture in the sRGB space, without any choice of AdobeRGB. But if you have one of the rare compact cameras that shoot RAW files, or you shoot RAW files with your SLR, then you have the option of choosing the color space you want to use after the fact, when processing that RAW data.
Software
In digital photography we originally had different software for different jobs. A browser was what we used to download our photos, look quickly through them, mark our favorites and delete or copy them to another location. An editor was software that let us make changes to a photo, whether color, tone, cropping or anything else that actually changes the photo from the original capture. And a catalog created thumbnails (or previews) of our images and tied them into a database of the metadata (EXIF and IPTC/XMP information) which was searchable. Those three types of program still exist today, although many photographers are moving toward all-in–one solutions, like Lightroom, Mylio, Photoshop Elements, Photos or others.
Just as I try to choose the best tool for the job when creating photos (lens, camera, filter, tripod, flash, etc.), I prefer using the best tool available when working on those photos afterwards. For me that usually means Photo Mechanic (www.Camerabits.com) as my browser and Adobe Camera Raw (it’s part of Photoshop) as my editor.
And for keeping track of my pictures, as well as having them available whenever I need them on whatever device, I rely on Mylio.
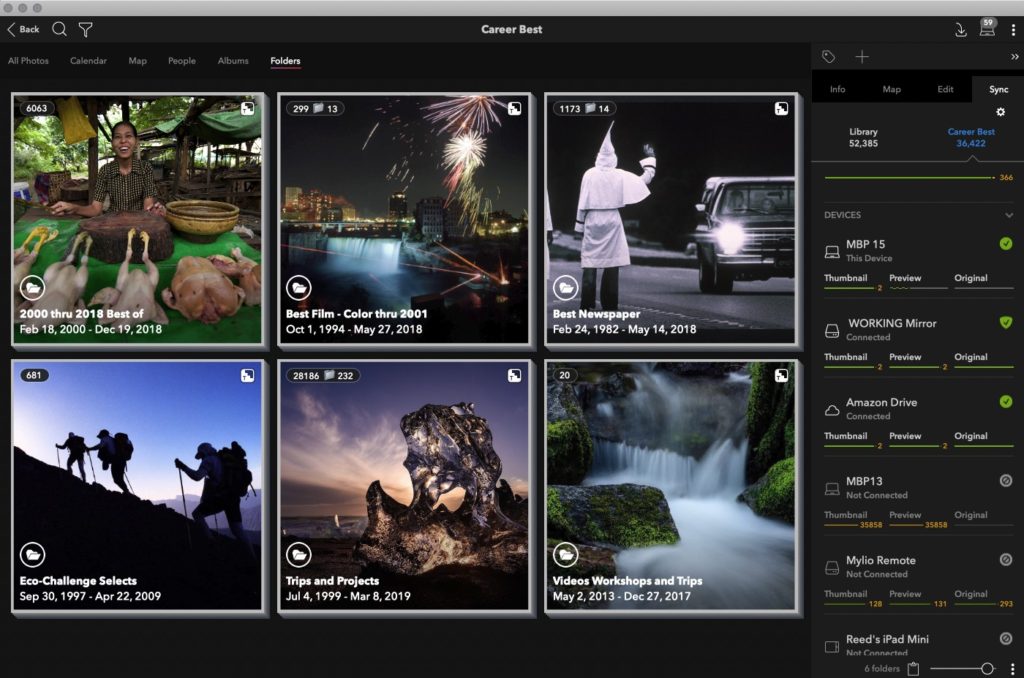
I rely on Mylio to archive, catalog and make all of my images available on whatever device I’m using.
Lightroom’s a great tool if I need to make some simple edits to a lot of photos quickly. However, at times I also use Lightroom or Adobe Photoshop itself, or other tools because they’ll do a better job. When are those times? If I shoot an event where I have to output a lot of photos fast and don’t need the absolute best quality, I’ll use Lightroom. While it’s a very good all-in-one tool, it’s still not as powerful as Photoshop. But for getting through a lot of photos that might need a crop or a slight adjustment in tone or color, it’s very capable and quick. I use Photoshop when I need its layering capability. In other words, if I’m compositing multiple images, making a collage or poster, adding borders or text or need to do serious retouching work. If I’ve shot an HDR image, I use Pinnacle Imaging System’s HDR Express or HDR Expose, or perhaps Photomatix or Skylum’s Aurora HDR. And for time lapse sequences I like Apple Quicktime Pro (for both Mac and Windows).
How to use Edit Software
When working on photos with software there are two critical things you want to do. One, work non-destructively whenever possible. And two, always strive to work toward a “Master” file and then save it (non-destructively again) at that point.
Non-destructive editing means that when you make changes to a picture (color, tone, cropping, etc.) you’re not actually changing pixel values. How does that work? Essentially by working in a virtual space. In other words, while you’re seeing those changes as you make them, that’s done for your view only. Those changes don’t become permanent – actually changing pixels – until you save or export that photo as a new image (generally at that point as a TIFF or JPEG). This type of editing is called metadata edits, as the changes are recorded as text information in a database or catalog. And just as important, you’re always able to go backwards or change the edit you made without starting from the original file. Programs that employ this type of editing are Lightroom, Adobe Camera Raw (when saving as DNG), Photos and Mylio among others. You can also work non-destructively in Photoshop and Photoshop Elements by taking advantage of Layers. Using Adjustment Layers and saving the result as a PSD file or layered TIFF gives you the ability to go backwards or change the edit you made, and the changes aren’t made permanent until you save the file out as a new JPEG or TIFF.
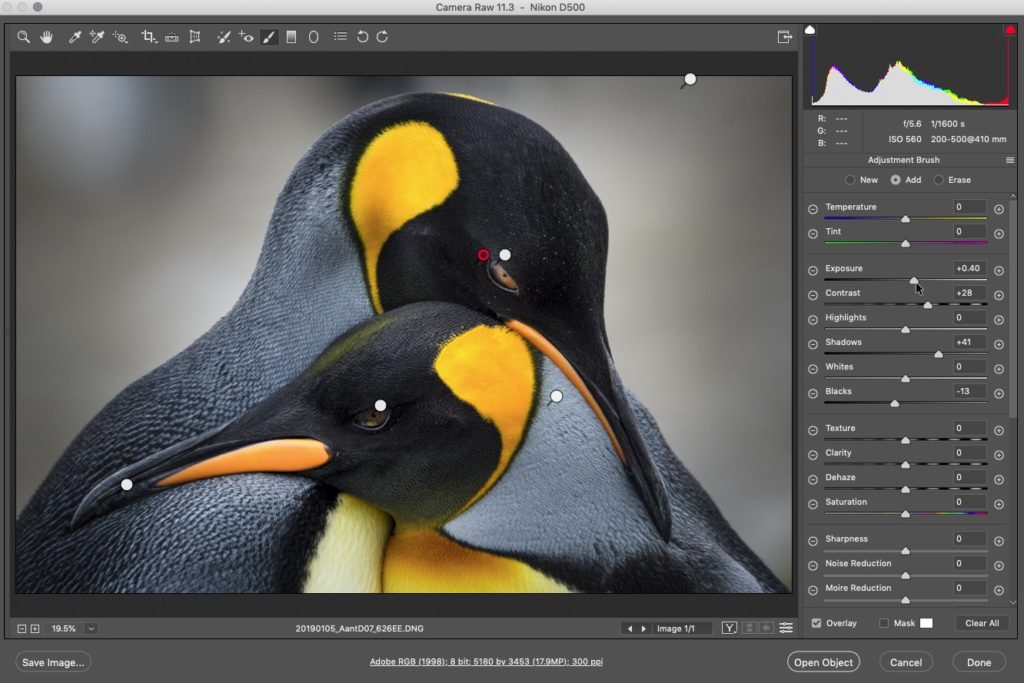
As Adobe Camera Raw has gotten more and more powerful, it’s become my edit tool of choice.
A “Master” file is what you have when you’ve finished whatever changes you’ve applied to make the picture look as good as possible. From that point on any further changes or adjustments will be based on output. Starting from that Master file, you can then down-size for web or screen display, up-size for printing, sharpen or soft-proof. But those changes are unique to that particular output, so should be done starting from the Master file. This way the Master file is always your starting point for anything specific you want to do with that image.
You’ll always start your edit on either a JPEG, TIFF or RAW file. With a JPEG, since it’s already a finished, compressed file, you should always be working on a copy, not the original. Any changes that you make and then save to a JPEG means a loss of information (which is inevitable working with JPEG files, even if you make the photo look better). This is why you never want to work on the original, only a copy of a JPEG. If you make changes to that and save it, you can never go back to the original capture. However, there’s no damage done simply by opening, viewing and closing a JPEG file, or copying it to another hard drive or other device.
Few cameras still offer the option to create TIFF files when you’re shooting pictures. The only advantage a TIFF has over a JPEG is that no compression is applied. That means you’ll be creating extremely large files. This is why few people bother shooting TIFFs any more. If you want the best possible quality from a digital camera, you set it to capture RAW files. If you want the smallest file, and fastest workflow, you shoot JPEG.
At some point in your life as a digital photographer, you’ll choose to shoot RAW files. By doing so, you’re having the camera record the most complete set of data it can from your captures. That data is essentially unprocessed information from the sensor, and by itself is not a picture. Instead, it’s the ingredients for a picture. If you’re baking a cake, you first gather the ingredients you’re going to use. Those ingredients are like the data you capture with a camera set to record RAW files. You then use software to mix those ingredients into the finished file you want, just as in baking the cake you choose what ingredients and in what quantities to make your cake. As such, RAW files will mean a more complicated workflow, but the benefit is more flexibility in how you process your photos.
If you do shoot RAW files, you also have to understand that the software you use to interpret that RAW data is going to control how those photos look. As mentioned above, RAW files aren’t pictures, just data. So the software that then renders that RAW data into a picture will determine how that picture looks. For instance, if you have a NEF file from a Nikon camera, Nikon’s software (ViewNX-i or Capture NX-D) will process that data when first opened the same way it would create a JPEG file in camera. Any other company’s software, though, will process that data differently, resulting in a different look. That difference can be subtle or strong. So the same RAW file (whether Nikon, Canon, Sony or any other) will look different if processed with Adobe, Apple or other third-party software than it will when processed by the manufacturer’s software. Let’s be clear – I’m not saying it will be worse, just different. You should choose the software for processing RAW files with just like the same way you do when buying cameras and lenses, based on what it will do for your photography.
Backup
The introduction of digital to photography changed it in countless ways. One of those was how we make and store backups of our images. With film, any copy (print or film) is/was a derivative work, with an inherent loss of quality. With digital, on the other hand, you can make as many exact duplicates of that original capture, with no loss of quality. Now that we can do that, there’s no reason to ever lose a photo again. The challenge is in having an appropriate number of backup copies and keeping track of them.
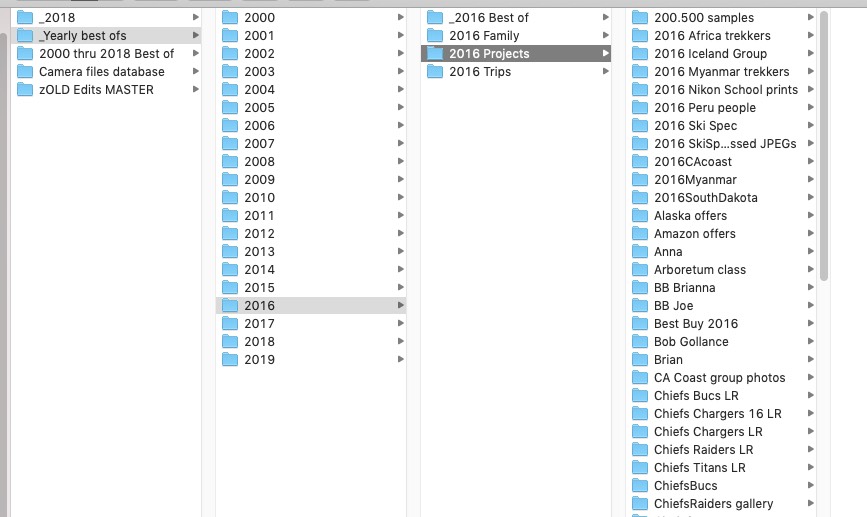
I organize everything using folders, then by date/year so everything sorts chronologically.
That’s why it’s so important to have a good workflow, which is one that makes sense and works for you. For me that means I do everything date-based with folders. I also make it a habit to create collections of my best work. For every year starting with 2000, I have a “Best of” folder for that year. And those folders are what are most important to me, and most valuable. Since they’re not all that large, they’re also easy to keep backed up. I have four main copies of them. One that’s on a mirrored hard drive attached to the main computer on my desk. One burned to DVDs (now Blu-ray discs) in my office, and and a third spare hard drives stored in a waterproof case in my basement. The fourth is in the cloud, and Mylio takes care of that for me.
Since making Mylio part of my workflow in 2015, it automatically takes care of backing up everything that’s important for me, from my smartphone pix to my commercial jobs.
Travel
I travel a lot, both nationally and internationally. And almost always carry a laptop with me, from deserts to jungles to the top of Mt. Kilimanjaro in Africa.
Here’s what I look for when doing that:
Size and weight – I’m usually willing to sacrifice speed and power for size and weight. I do that because I want a laptop that weighs no more than three pounds. Aside from not wanting to hurt my back, it’s becoming more and more difficult to carry large bags onto planes. And I don’t want to check anything that valuable. Because laptop screens are more difficult to do critical editing on, I try not to do much of that while on the road. My current road machine is an Apple MacBook Pro (13-inch), which has a surprising amount of power for a small computer. Its i7 processor helps, especially when you factor in the 16GB of RAM. Despite a 13-inch screen, it’s still got a lot of resolution, which is the main reason I chose it over one of the AIR models. For a lot less money, you could get something like a Netbook (often around $300) which won’t have power, but still can be a good way to travel with a lightweight, inexpensive computer. That’s what I chose to carry on an 8-day climb of Mt. Kilimanjaro in Africa, because its battery would last the entire time. The other option here could be one of the Apple MacBook Airs, which are excellent, though pricey, machines, or a Microsoft Surface tablet.
Battery life and Hard Drive – These are the other two main considerations. Good battery life is important because you’ll often be away from power for extended times (cross-country or international flights, for instance). I think 4 hrs. is a minimum for this type of computer, 7-8 is even better. And since you’ll be downloading photos, from higher and higher-resolution cameras, more hard drive space is always better. 256GB is what I’d consider a bare minimum, and SSD drives are better because they’re both tougher and more energy efficient.
Ports – Since we’re downloading more and larger files, I’d definitely want to get a machine with at least one USB 3/USB-C port (which should be standard on all new laptops). That, paired with a USB 3/C card reader, will make your downloads go much, much faster And of course, there are portable hard drives with those interfaces as well, which means backups will happen much faster. And, newer technology will continue to offer newer, and hopefully faster systems.
While great for showing photos, a tablet’s normally limited capacity and power also limit their usefulness.
And now there are tablets too. With the popularity of the Apple iPad, and even more powerful tablets like the Microsoft Surface, photographers are starting to use them too. However, keep in mind their limitations. Often more limited storage, power and editing capability and slow downloads can be their biggest drawbacks. Having said that, they’re a great way to show photos, and a lightweight way to stay in touch, and entertained, while on the road.
Finally, one category of storage that still exists, but is becoming a smaller part of the market, is “digital wallets.” These are essentially small cases with an integrated hard drive and card reader that allow you to download images from cards to the hard drive. More expensive ones have screens that you can then use to review your images. The ultimate in portability, they traditionally have have no ability to edit images or get on the internet. I used one (with two extra batteries) for a week-long raft trip in Alaska so I could backup my cards to it each night. But thanks to smaller laptops and dropping prices (of the laptops), digital wallets have been slowly fading away. However, they’re now being replaced by portable, battery-powered hard drives with built-in card readers. These devices, like the My Passport Wireless Pro series, from Western Digital, have massive capacity, can download your cards (SD), and create an ad-hoc network to allow you to access the photos from a tablet or smartphone.
(For more detailed information on traveling as a photographer, read the PDF on my website here)
And, for more information on specific topics, go to my blog page and search. There’s a good chance I’ve written a story there that applies to what you’re interested in.