Composition

DISTANCE TO SUBJECT
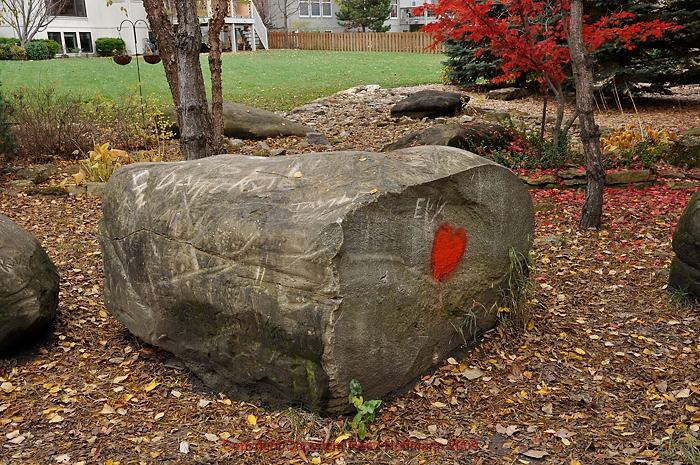
The red painted heart and initials scratched into the rock might make a nice picture, but they’re such a small part of the photo they’re lost like this.
Smart photographers know that most photos can be improved by getting closer. Getting closer will make your subject bigger in the frame, and can help prevent problems with edges and backgrounds. While you can’t always move physically closer to your subject, you can often change lenses or zoom in to move virtually closer. A good exercise to try when out shooting is to make the picture you think you want, then move closer, shoot, move still closer, shoot again, and do that until you simply can’t get any closer. And if you can’t get closer physically or with a lens, then one you get it on the computer, crop till it hurts!
RULE OF THIRDS
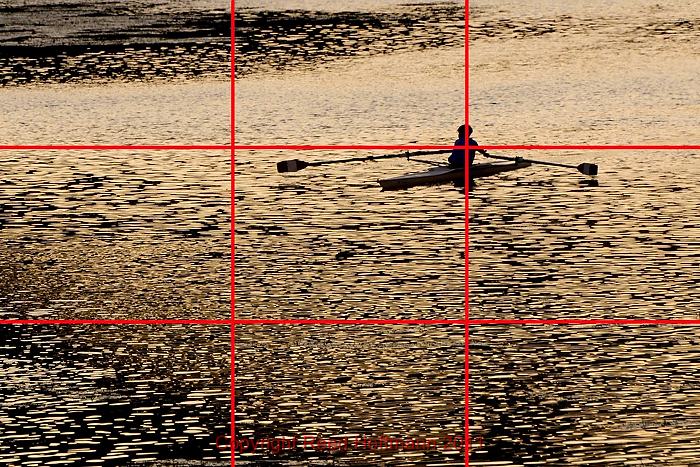
Careful placement of the rower in the upper right quadrant leaves open space to see where he’s headed, and takes advantage of the pleasing patterns in the lower water.

Normally we try to avoid bisecting the photo with a horizon line, but in the case of a reflection it’s often the best thing to do.
Sometimes you have a horizon in a photo, and then you should think about where you want it. Center, up or down. Most of the time photos look better if the horizon is high or low. Again, play with this and see where you prefer it. The time you almost always want it in the center is when shooting a reflection, where you’re playing off the symmetry of the scene.
FOREGROUND/BACKGROUND

The car is the subject of the photo, and the dilapidated buildings in the background support the feeling of decay.
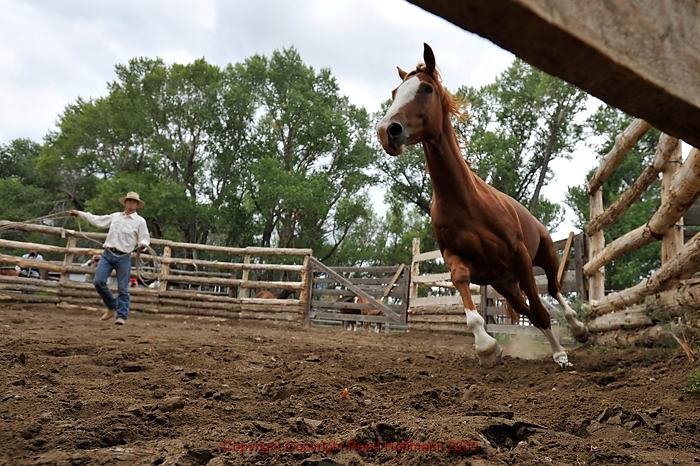
A problem common to wide-angle shots is that everything’s so small. What is it we’re supposed to look at? That’s one of the reason wide lenses are difficult to master – they capture so much it can be overwhelming. But that’s also their advantage. It allows you to have two pictures in one – a foreground and a background. The foreground will be larger, and so becomes the subject of the picture. Then the background supports it, by adding context – where it is, what’s going on – to the foreground subject. Add to that the ability to control focus and depth of field (see below), and wide lenses can be more powerful than telephotos. A true test of a photographer’s ability is how well they use their wide-angle lenses.
DOMINANT ELEMENT
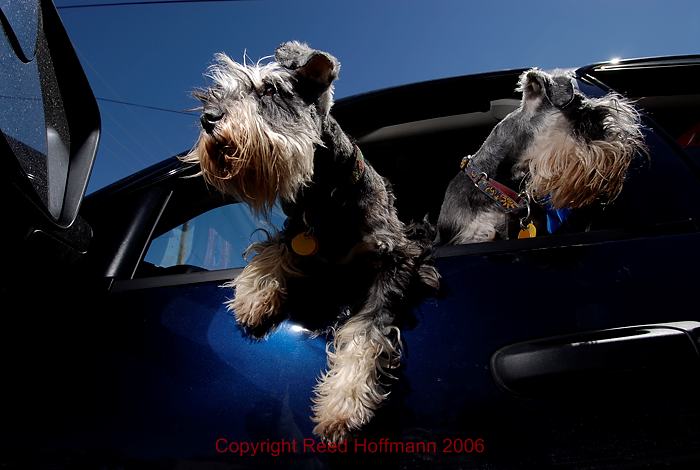
The dogs aren’t the only thing in the frame, but it’s obvious they’re the subject of the photo.
As mentioned above, having a foreground subject in a wide shot usually makes the picture more powerful. The size of the subject indicates to the viewer its importance. And you can take that idea and apply it to most of your photography. With any picture, you want the viewer to immediately understand what’s important. Having a dominant, or prominent subject is a key to helping them see that. So always keep that in mind when framing a shot, “what’s my subject, am I making that clear?” No matter the lens used, you should always have a dominant element in your picture. But remember that doesn’t mean it has to be the largest part of the picture – it just needs to be the most obvious.
FOCUS – DEPTH OF FIELD

Using a wide aperture and a telephoto lens I kept the focus on the gloves, particularly the right one, and the background is so far out of focus you’re not tempted to look at it.
There are many unique aspects to photography. These are the things that sets it apart from how we see the world through our eyes. The ability to stop, or freeze action, or to let action blur is one of them. Compositionally, you have to remember that the viewer will be drawn to what’s in focus in a picture. That’s a very strong signal that tells them what you want them to look at. Our eyes make it look like everything in front of us is in focus. With photography, you can limit that, and have only one place, or one area, that appears in focus. This too is a key to composition – choosing what part of the photo is sharp with aperture and depth of field clearly states to the viewer that’s where you want them to look. You can read more about how to control depth of field in the “Light” section of the E-Learnings.
WATCH THE EDGES
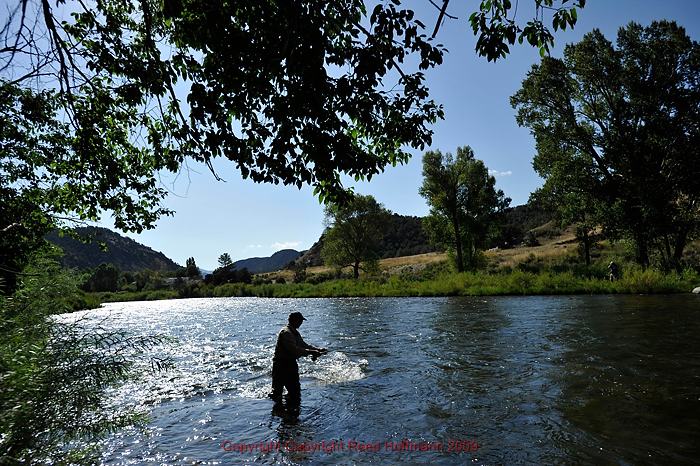
In this case the subject of the photo is small, but the dark elements around the edges of the frame work to push the viewer’s eye in to the fisherman.
One simple suggestion I give to students in workshops is this: “Take a moment and run your eyeball around the four edges of your viewfinder.” That’s a reminder to pay attention not just to the subject of the photo, but to what else you’re including. With photography you’re able to choose what you want to include, and perhaps more importantly, what to exclude from a scene. Again, look at your framing and decide if that’s’ what you really want to show. Does it add to or detract from the photo? If it’s not helping, change your angle, distance, or whatever’s required to eliminate it. And remember, elements at the edges can help frame your subject, directing the viewer’s eye in to it.
BACKGROUND
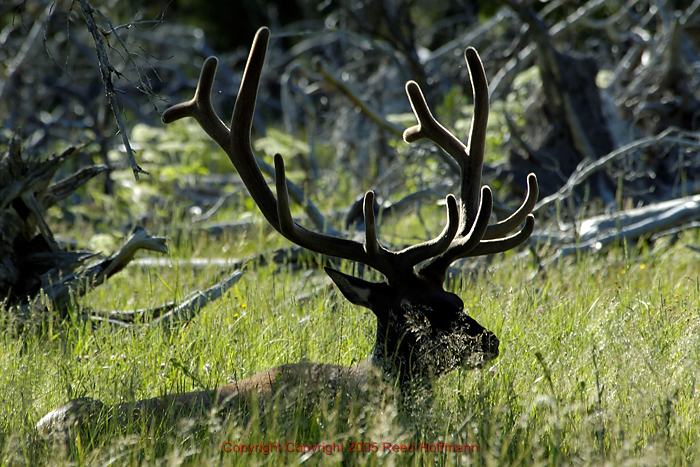
This has what we call a “busy” background, full of distracting elements that makes it hard to clearly see the elk’s antlers. And that hurts the picture.
This fits in nicely with the “Watch the Edges,” above. It’s easy to so focused (pun intended) on the subject of the photo that we forget what’s going on around it. More good pictures are ruined by bad backgrounds than anything else. We’ve all been warned to watch out for lines and poles and tree limbs growing our of people’s heads, but other things can create problem backgrounds too – people, faces signs, brightness, color – all can draw a viewer’s attention away from the subject of your photo. Once you know what your subject is, look at the edges(see above), then the background to make sure it’s not drawing attention away from the subject.
SIMPLIFY, SIMPLIFY, SIMPLIFY
PEOPLE
As human beings, we’re hard-wired to be interested in others of our species. Which means we’re interested in people. So as photographers, that means that if we’ve got people – even a single person – in our picture, the viewer will look at them. Regardless of what else is going on. And that’s true even if the person is in silhouette, or a very small part of the scene. This is very important for us to remember. Because if the person in the photo is unimportant to the photo, their mere presence will be a distraction to the viewer. In that case we’re far better off waiting for them to leave, or finding a way to shoot the picture that doesn’t include them. Sometimes people make the photo, but other times they break it.
COLOR
We normally talk about color as a component of light, but it’s important to remember it can be a compositional element as well. Color can attract the eye or be a distraction. A small bit of color in an otherwise bland scene will be the immediate center of attention. Strong, saturated colors have a different impact than soft, muted ones. And simply blocks, or patterns of color, can make pictures all by themselves. Finally, when an otherwise interesting picture has bad color – through color casts or other issue, then it’s best to lose the color completely and convert to black and white.
ANGLE
In all the talk about framing and distance and … what we haven’t talked about yet is what angle you use. The best advice is to avoid shooting everything from eye level. One thing we strive for in our pictures is variety, and shooting from low or high angles is one great way to add variety. Make it a point to get down on your knees regularly, and take advantage of your camera’s LCD to be able to preview the shot when you can’t get your eye to the viewfinder. And always be on the lookout for high places that allow you to shoot down.
Once you start actually thinking about composition – not just shooting pictures – you’ll find the process more fun as well as begin making better pictures. That’s a key reason photographers like to say they “make,” not “take,” pictures. It’s a reminder that good pictures rarely result from just pointing and shooting. Slow down, put some thought into what you’re doing, and you’ll be much happier with the pictures you make