
When is blur a problem if you’re using a tripod? When the subject is moving. And that’s what the earth is doing as it spins through space. So if you do a long enough time exposure that includes stars, then those stars are going to blur, creating streaks instead of pinpoints of light. There is, however, a solution – a star tracker. Used properly, it will move your camera to match the stars’ movement, allowing you to create photos you couldn’t otherwise.
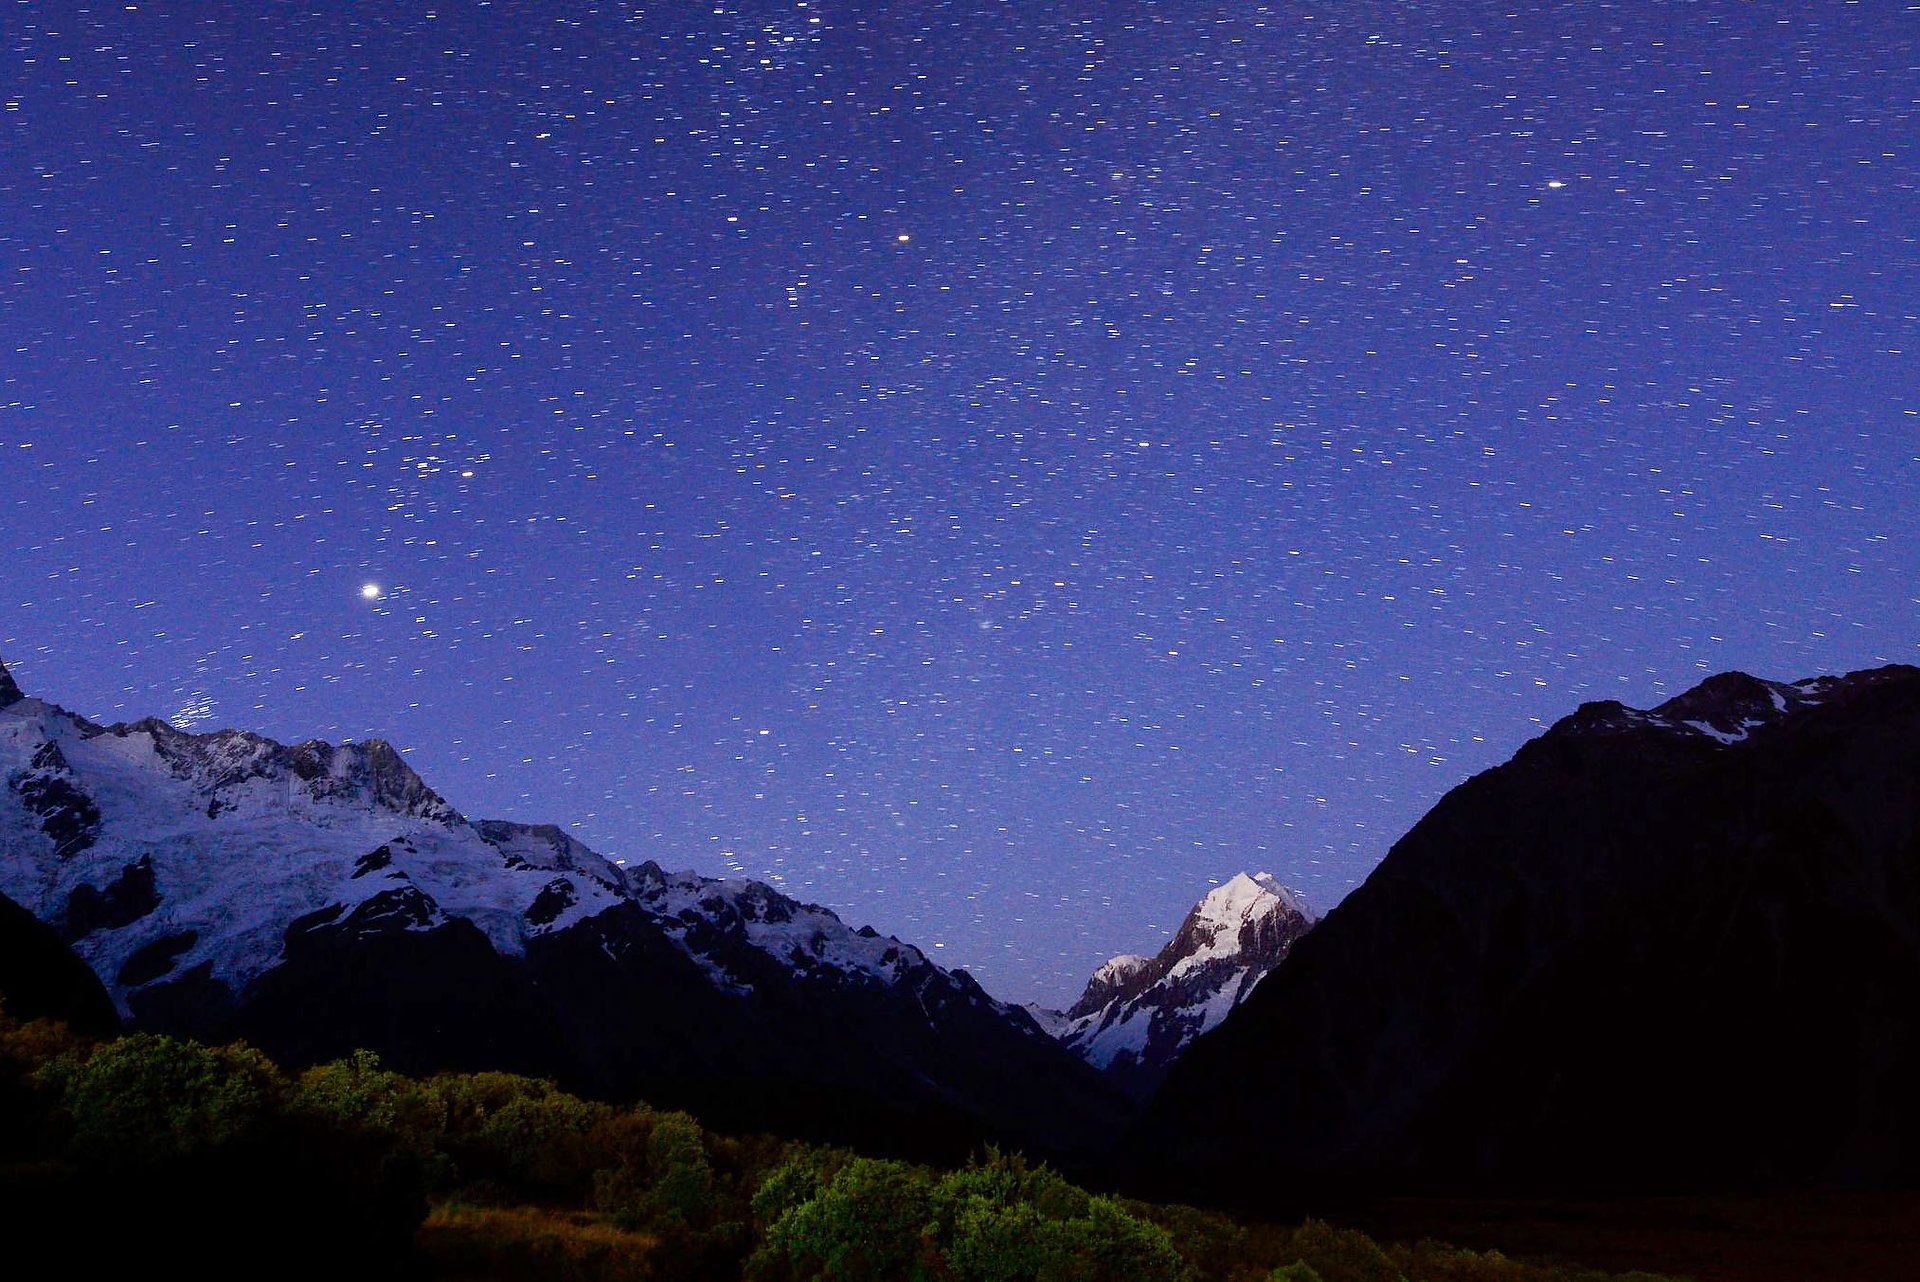
In this 60-second exposure of Mt. Cook in New Zealand, you can see how much movement is recorded by the “streaking” of the stars above it. Mt. Cook, of course, being earth-bound, is perfectly sharp.
Star trackers are nothing new to fans of astronomy or astrophotography, and I’ve known about them. But last year a new model came out that was less expensive and relatively easy to use. That made me decide to get one, since after all, I’ve enjoyed doing night photography for a long time. But when stars are part of the scene, I’ve been limited to, at most, a 30-second exposure (longer than that and star streaks become an issue). Because of that, and the dimness of those stars, I’ve had to use fast aperture lenses (more expensive) and very high ISOs (creating a quality issue with more noise than I’d like). A star tracker would let me change how I made those pictures and also reduce the noise issues.
So a couple of hundred dollars later I had the Move Shoot Move (MSM) Nomad and commenced figuring out how to use it. The basic concept is pretty simple: align the Nomad to Polaris (the North Star) using a smartphone mounted on the tracker, then replace the phone with your camera, turn on the tracker and start shooting. That only took me a few weeks to master, since it’s not as simple as it sounds.
While you could use a ballhead on top of your tripod to mount the tracker, you’ll struggle to get it aligned precisely enough. Not surprisingly, MSM sells a part that make alignment easier. That piece is called a “Wedge.” You’ll also need a way to mount the camera to the Wedge so that you can position the camera in whatever orientation you need for the photo you want to make. In my case, I added MSM’s “V mount” and a ballhead to the Wedge. Those two pieces allow you to position your camera in whatever orientation you need for the photo you want to make. Once the rig is aligned, as long as you don’t move the tripod, you can shoot in any direction you’d like, by adjusting the V mount and ballhead.
Once I had that gear, the last piece necessary was a phone app to assist in the alignment. Thanks to the internet, I found others doing the same thing, and following their recommendations purchased SkySafari Plus (you need the Plus version, not the basic one, available for both Apple and Android).
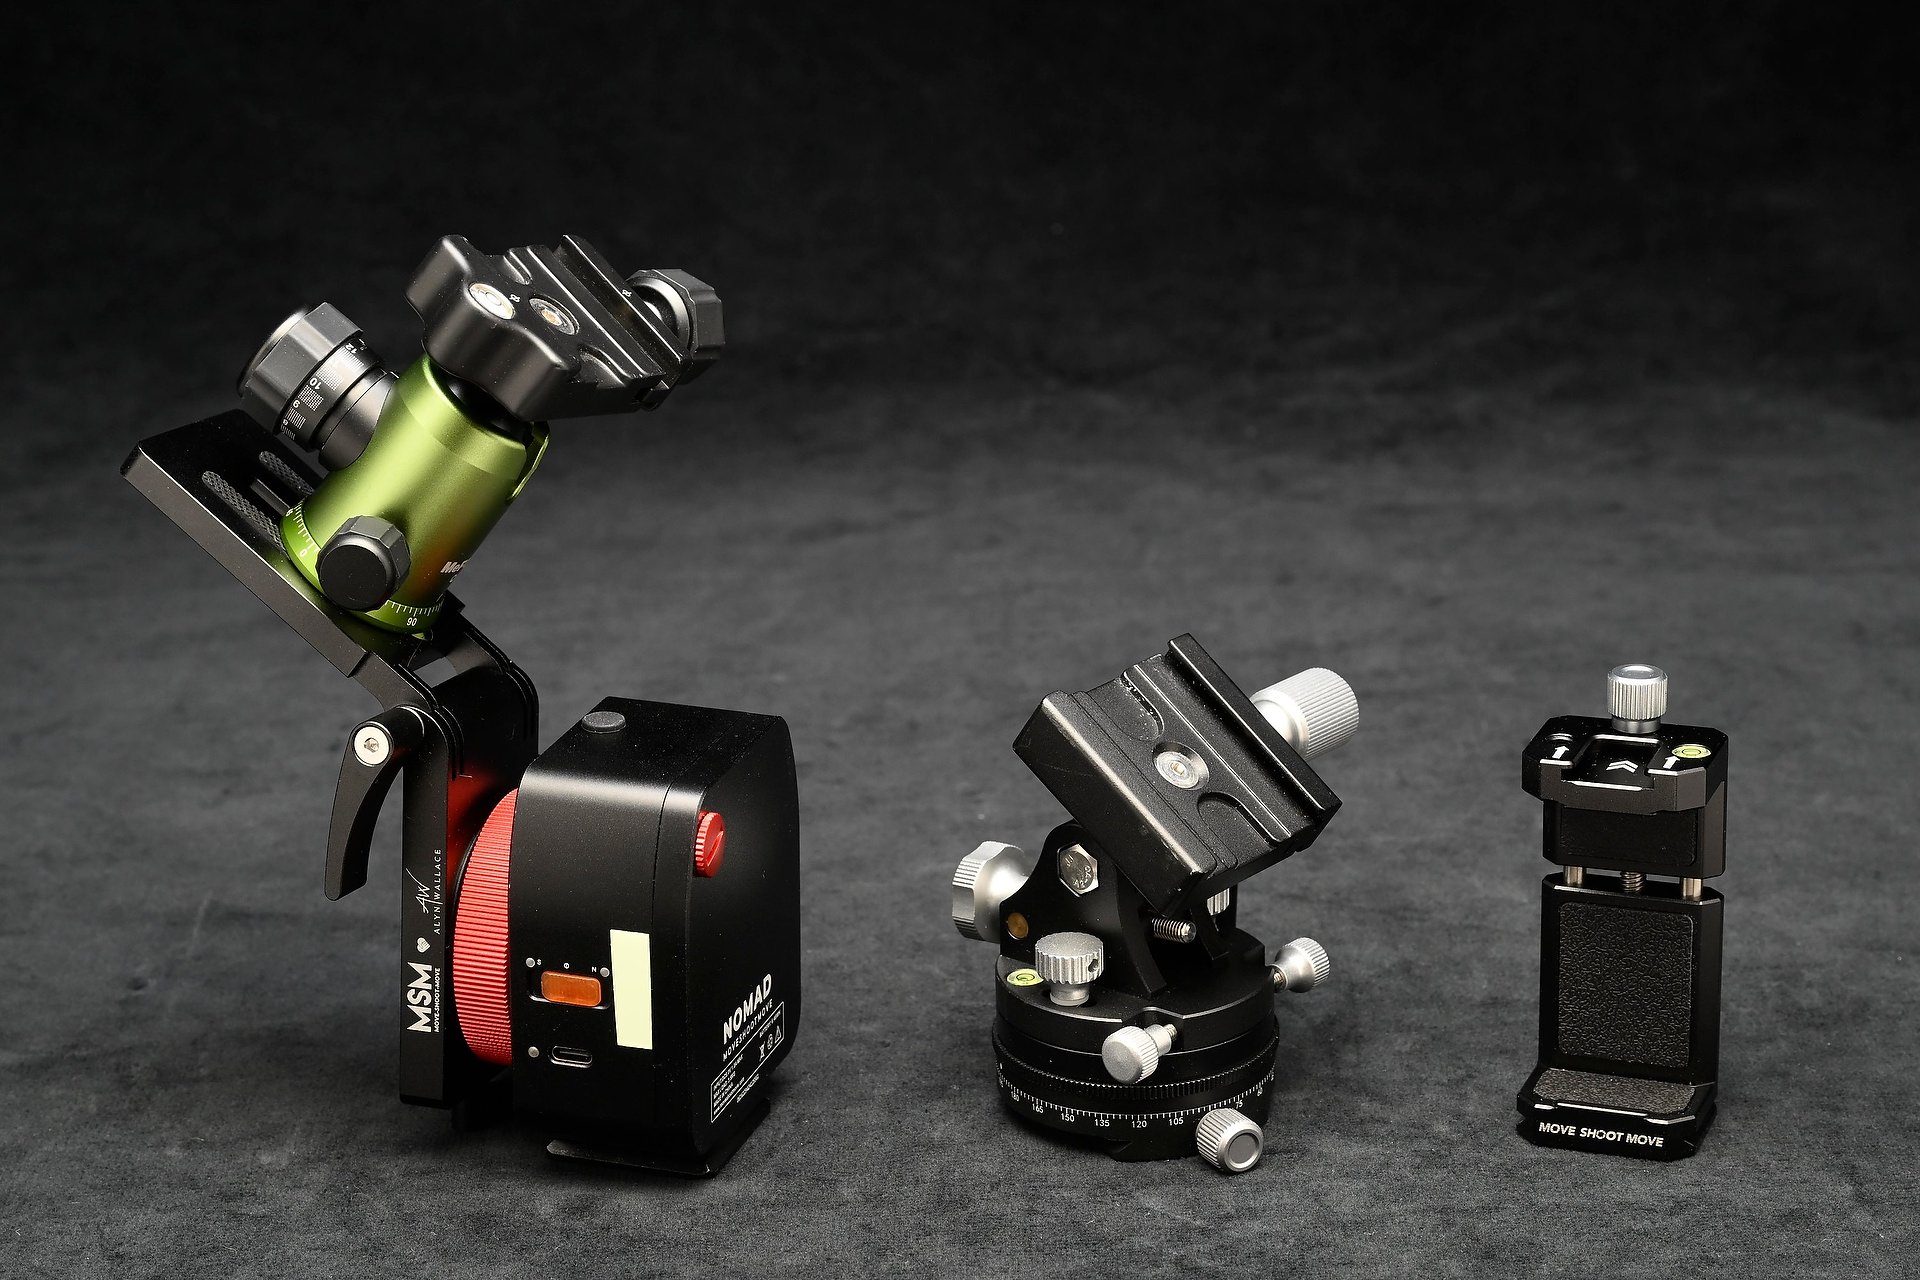
At right is the phone holder. In the center, the Move Shoot Move Wedge. And at left the Nomad (bottom part) with the V mount attached to it and a small ballhead attached to the V mount.
Before you can do anything else, you need to set up your tripod and level it (many tripods have a bubble level built in to assist with that). Once it’s level, DO NOT MOVE THE TRIPOD! If you do, you’ll need to go through the leveling process again, because if it’s not level the tracker won’t give you good results.

This zoomed-in screenshot shows what happens if your tripod isn’t level and/or your alignment with Polaris is off. Everything is blurred with a long exposure.
Next, with the Wedge mounted on top of the tripod, attach the phone holder and add your phone. The following part is what I struggled with until a good friend (thanks Jim!) pointed me to an excellent tutorial by photographer Eric Wilkes. He describes using Sky Safari Pro, but Plus will do the same stuff. Also, he’s in the southern hemisphere, so it’s easier for us here up north. Once I had the correct settings applied in Sky Safari Plus, it was a pretty simple process of having it “Locate” Polaris and then use the Wedge to precisely target it. That’s the most difficult part of the whole procedure.
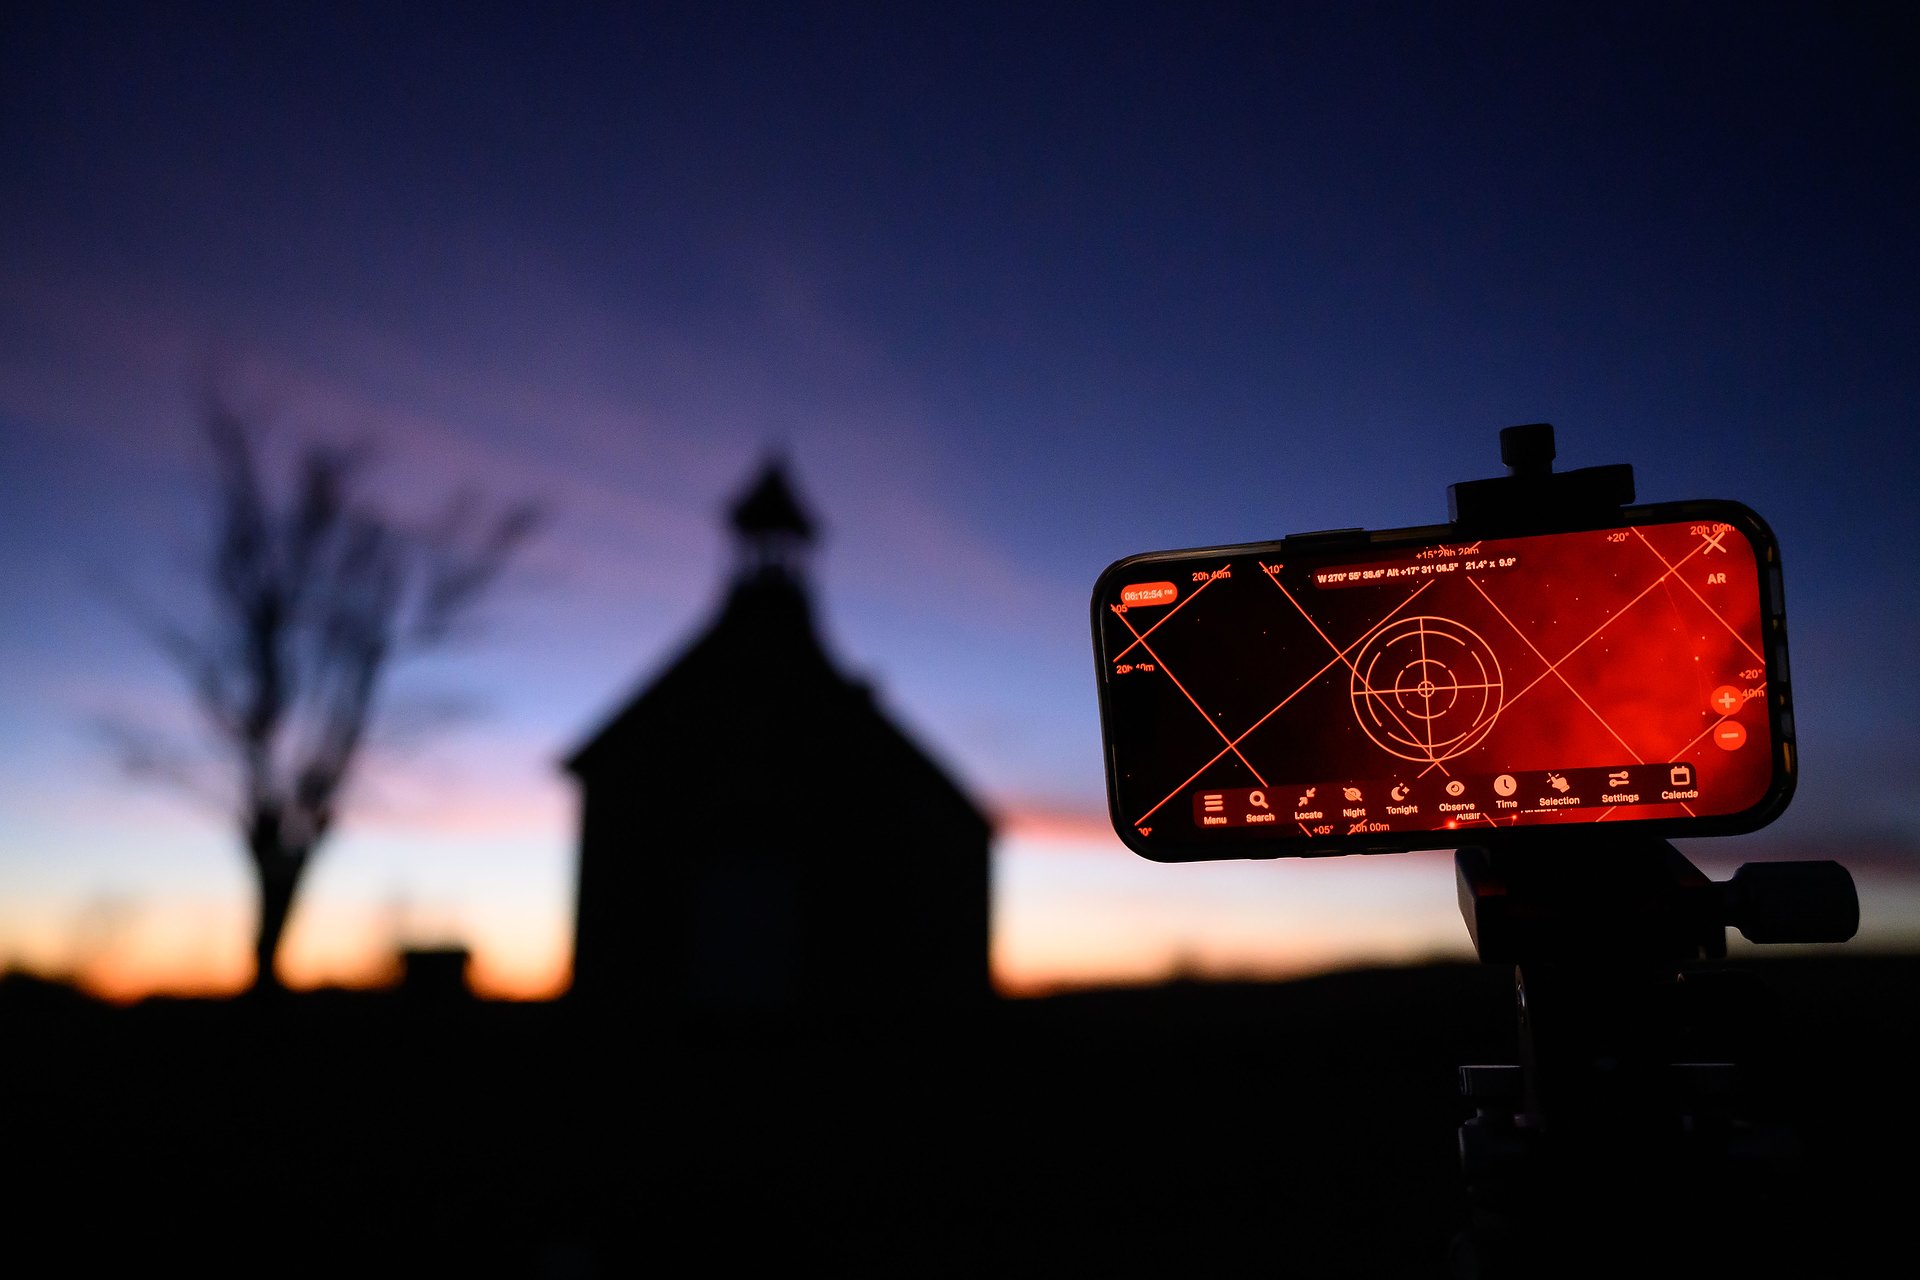
Sky Safari Plus running on my iPhone, being used to target Polaris. It’s attached to the phone mount, which is on the Wedge, atop my tripod. This is the setup used to align the rig with Polaris.
From there, you remove the phone (and phone mount) and replace it with the Nomad, complete with V mount and ballhead (see photo below). If you’re simply photographing stars, go ahead and mount your camera, focus, figure out the exposure you want, turn on the tracker (flip the switch to N, for northern hemisphere if you’re up here) and start shooting. Me, I prefer having a foreground subject, and that means a few more steps.
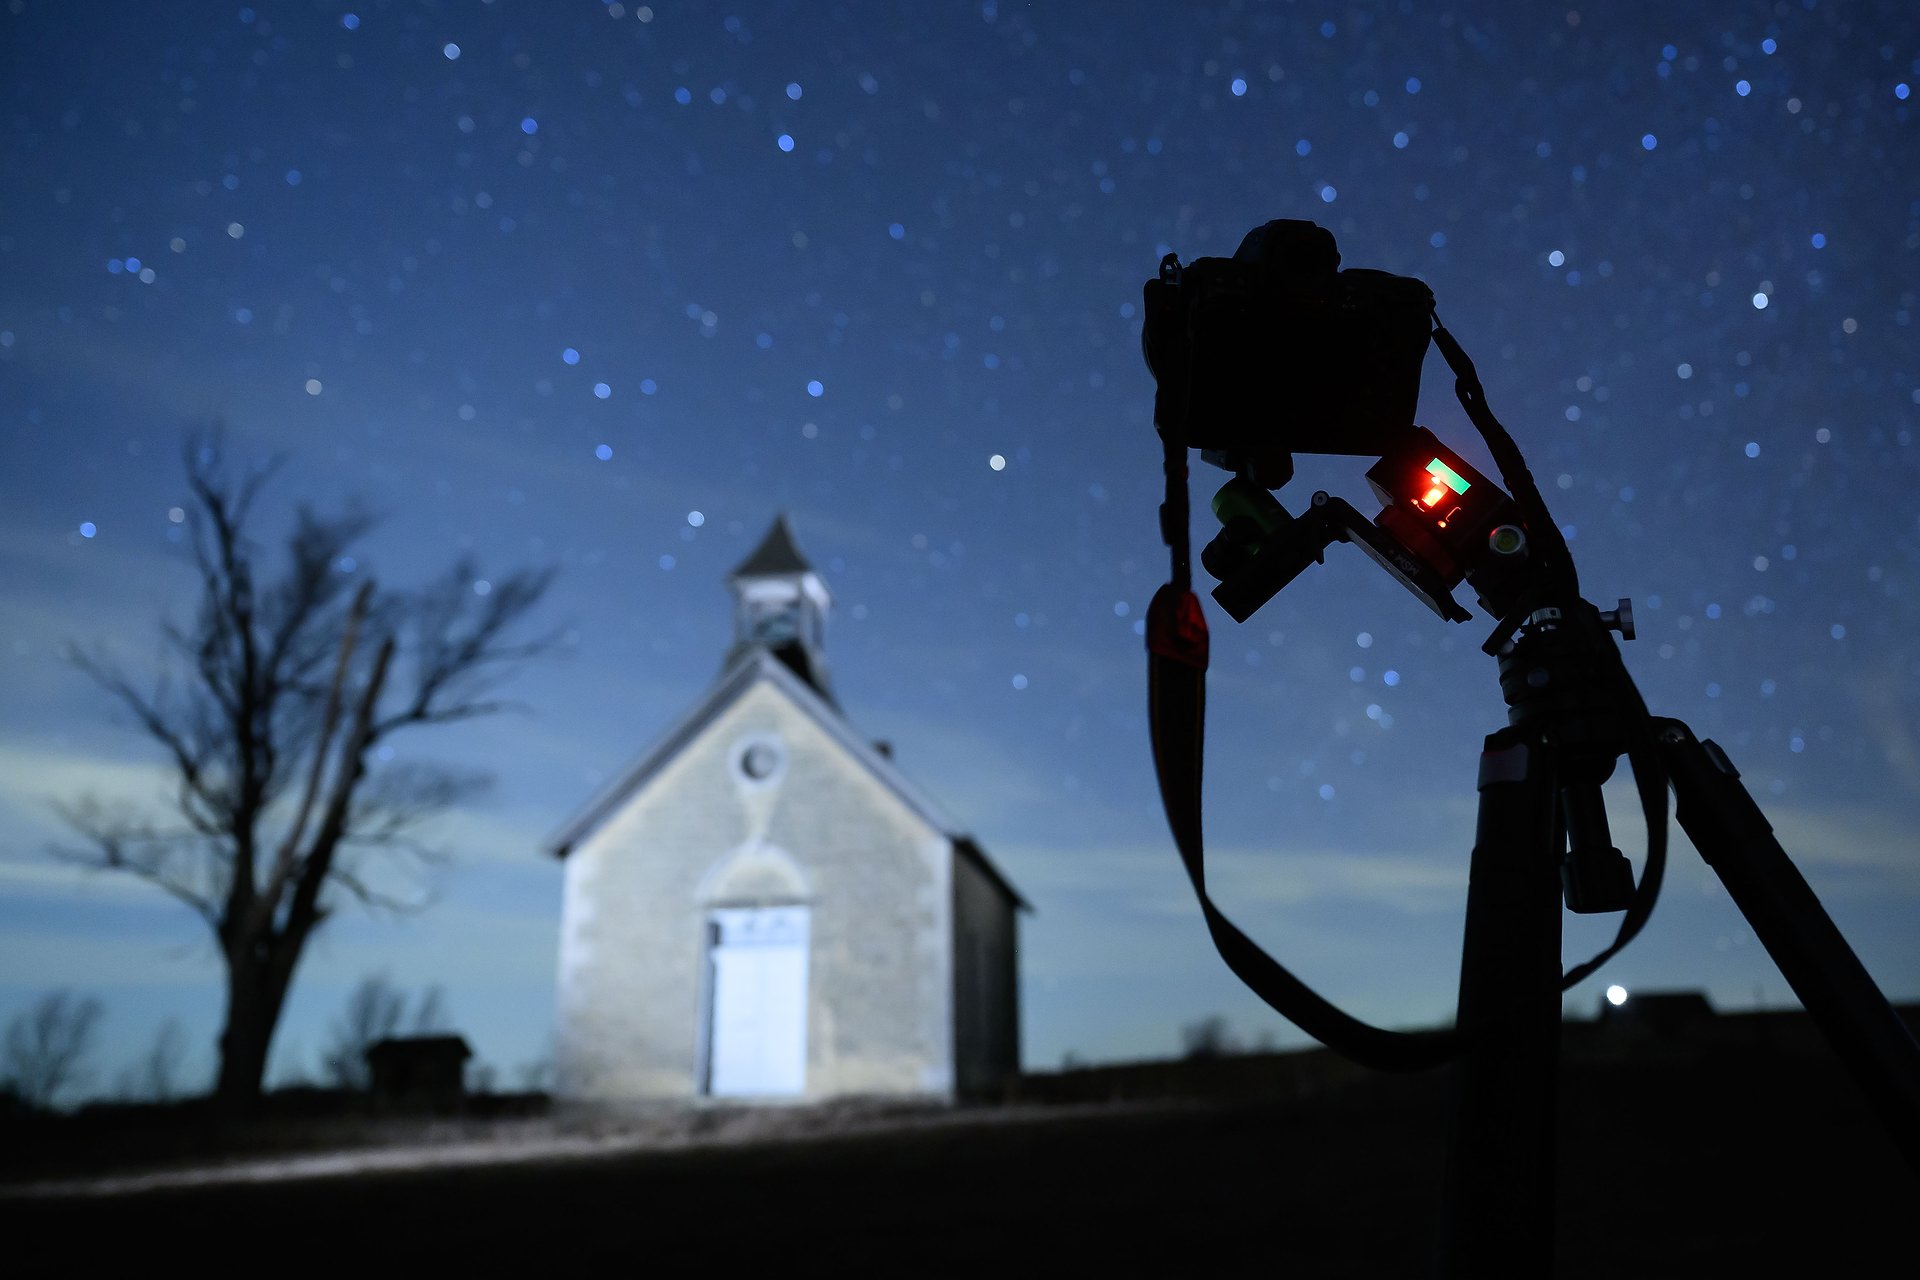
You can see the glowing light that shows the Nomad is on (attached to the Wedge), and the V mount rotated out so I can have my camera mounted to the ballhead on it. I’m lighting the old schoolhouse with a pair of Lume Cubes.
Remember, with the tracker turned ON, it’s slowly moving the camera to counter the rotation of the earth. That means anything in the frame here on earth is going to blur during a long exposure (in this case, a couple of minutes). That means you need to do one photo with the exposure set for whatever’s in front of you here on earth, with the tracker turned OFF. After you have that, a SECOND exposure of the sky with the tracker turned ON. Then later, in software, you’ll composite the two exposures into one picture, keeping the earth part from the first shot and the sky part from the second. Here’s the process, start to finish.
First, I decide on the composition I want so the tripod is in the right place before leveling and aligning. Then, after alignment with Polaris I remove the phone and mount the tracker and camera. I leave the Nomad OFF while I photograph the scene, concentrating on the foreground (ignoring the sky). Then, after turning the tracker ON, I make a second exposure for the sky. Now the camera will be slowly moving (very slowly!), so the foreground elements will blur, but the stars won’t.
At this point I have two exposures of the same scene, both done for longer periods of time than I would have used in the past. In this schoolhouse example, they’re both taken at 120-seconds. That allowed me to use a relatively low ISO (640) and have better image quality than a high ISO (avoiding the noise inherent in high ISOs). Of course, the frame without using the tracker shows significant movement (blur) in the stars, and the one using the tracker shows blur in the schoolhouse, tree and horizon.
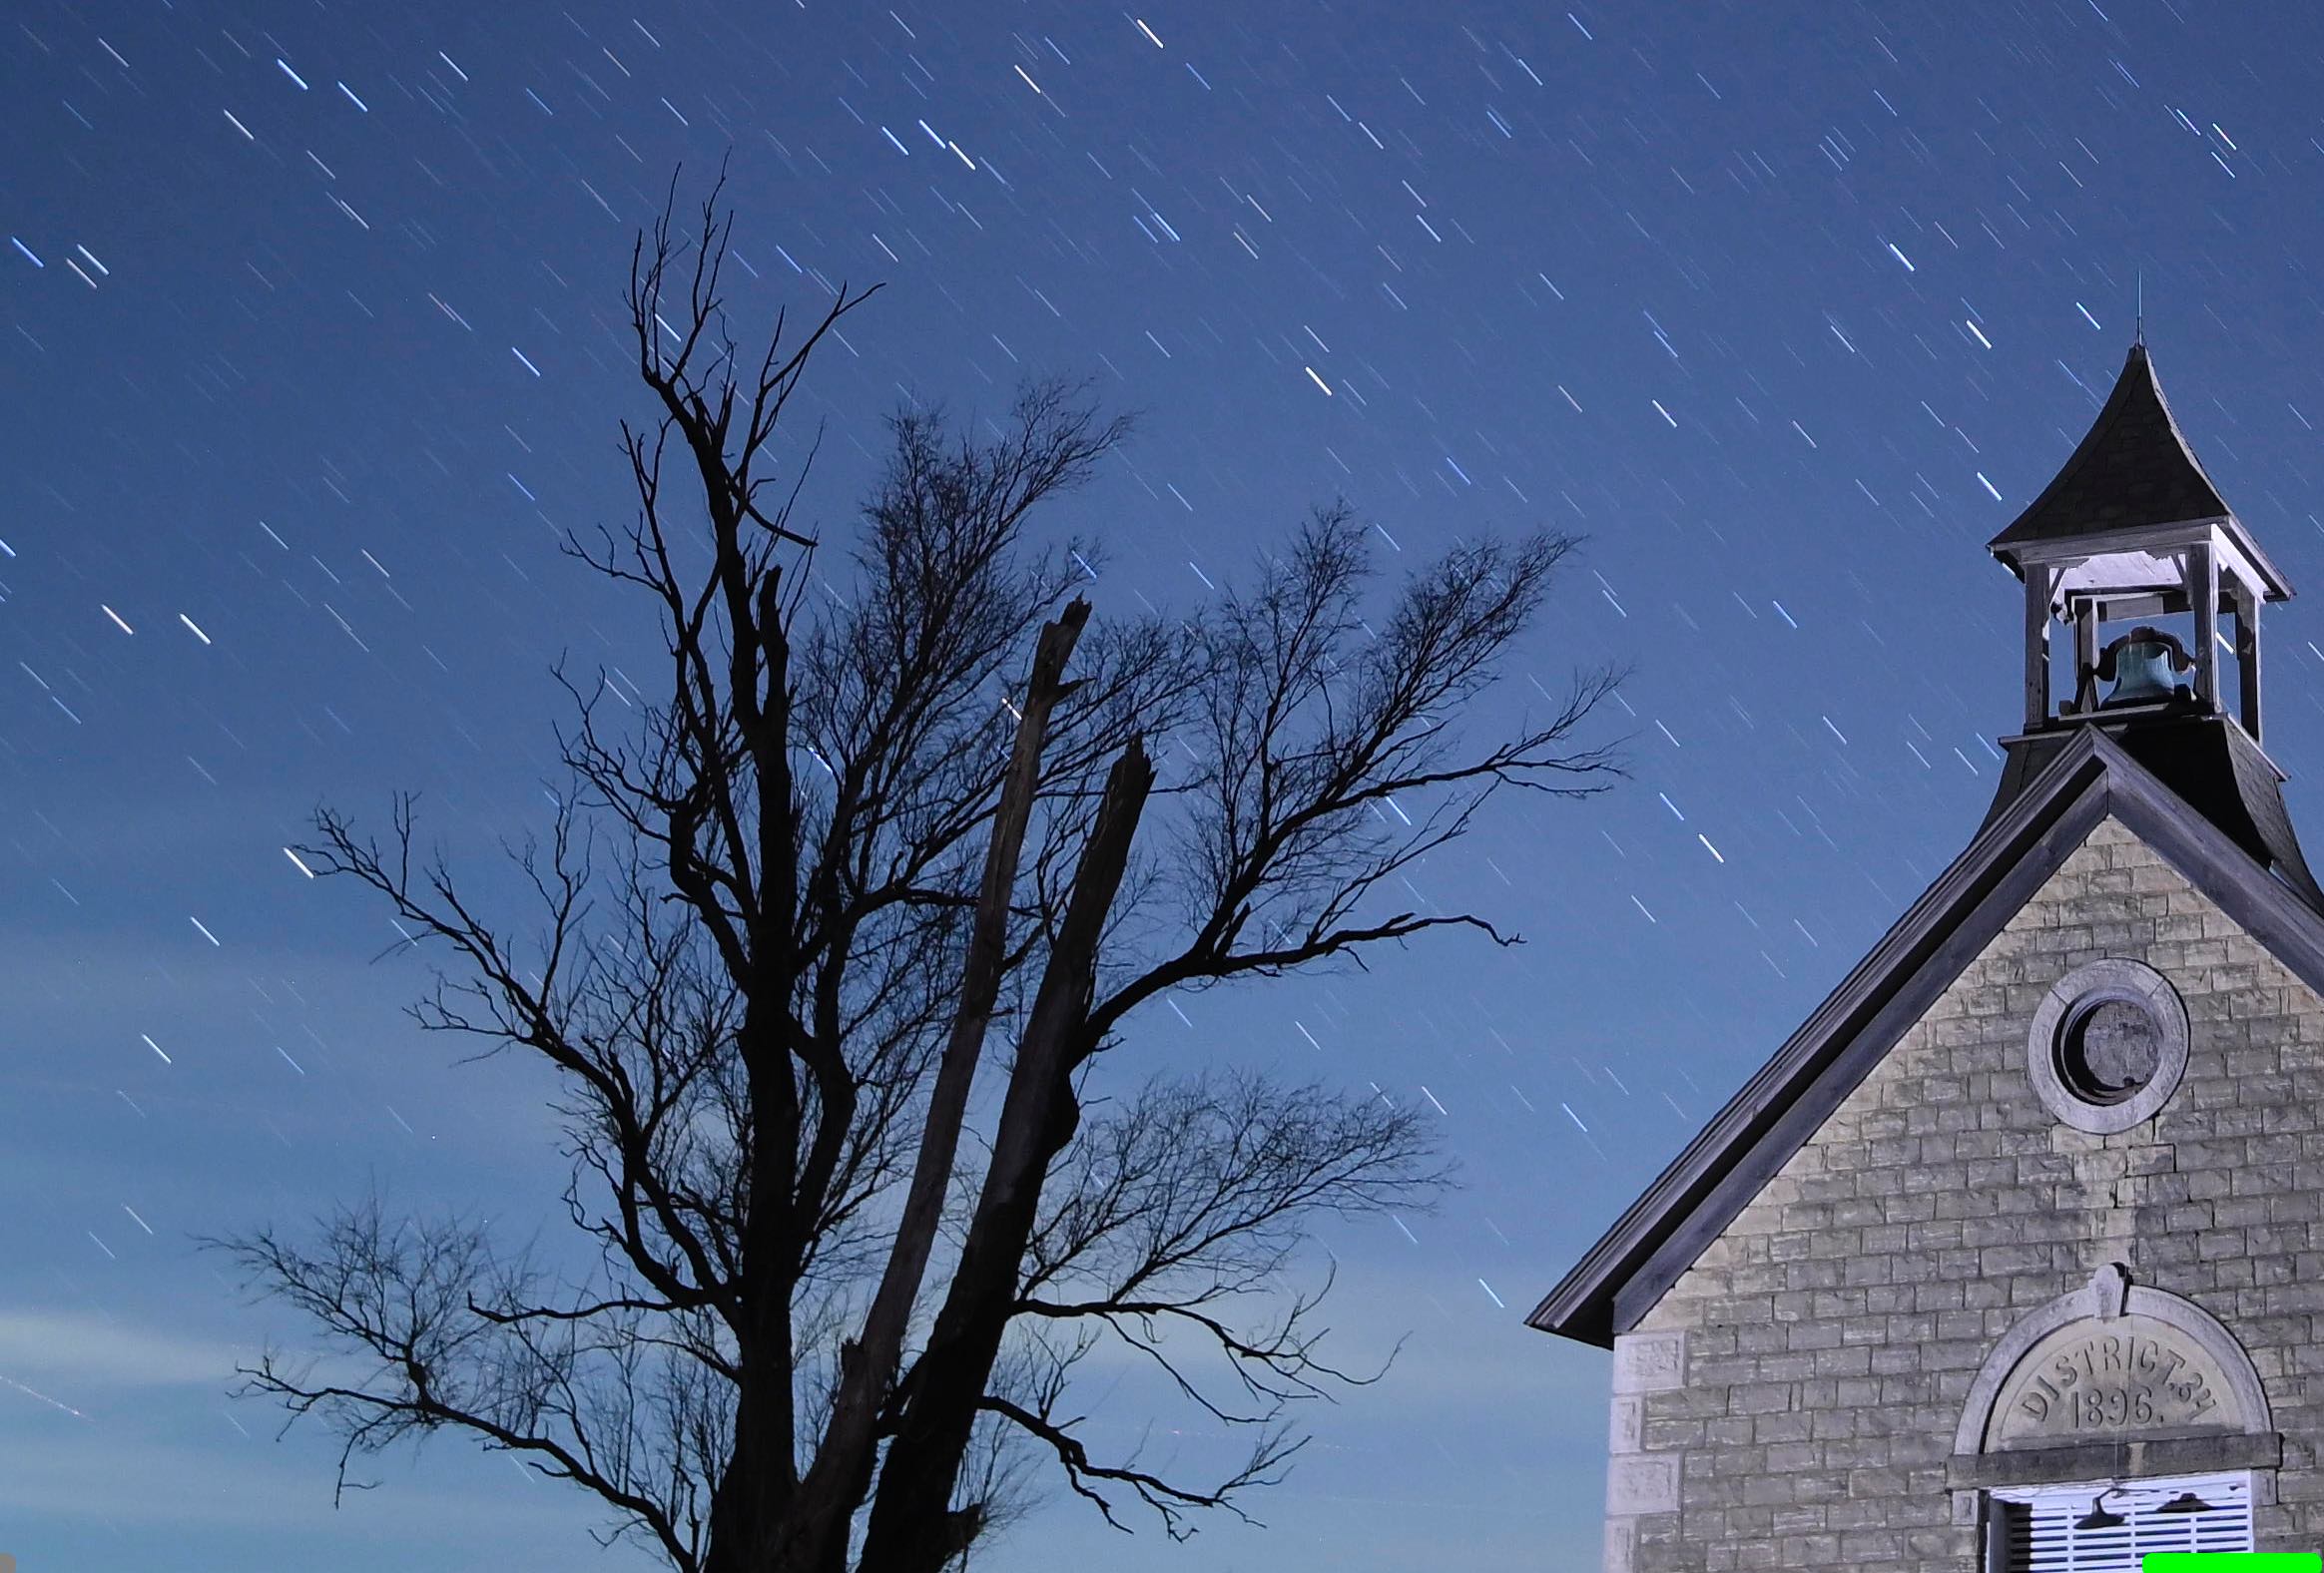
Here’s a zoomed-in screenshot of the two-minute exposure with the star tracker turned OFF. Great detail with very little noise in the foreground, but star streaks in the sky.
And here’s the two-minute exposure with the star tracker ON. As you can see, the stars remain pinpoints of light, but the earthbound subjects are blurred. That’s because the tracker is moving the camera during that exposure.
Once I’m confident I’ve got those two photos, the next steps happen at home. After downloading the images, I then composite them in Photoshop. The first part of that is easy, the second harder. With the two photos open in PS, I copy the one with the star trails and paste it on top of the one with the foreground blurred. Then, using the eraser tool, I erase the star trails from of the top image. That shows the pinpoint stars in the image beneath it, and I leave the sharp foreground untouched. It’s pretty simple when it’s just sky, but if you have objects like trees, it gets a lot tougher and time consuming. The end result, however, is worth it. I now have a foreground that’s nice and sharp as well as pinpoint stars. And both of them taken at a fairly low ISO, meaning a very clean (not noisy) image.

The final, composited image, using the two different two-minute exposures. Nikon Z8, Manual exposure, 3850K white balance, ISO 640, 120-seconds at f/2.2, Viltrox AF 16/1.8 Z lens.
While I won’t always want to carry and use the star tracker, it’s been a fun learning process and extends what I can do with my night photography. As I always like to say, if you’re willing to keep learning and trying new things, photography can be a great lifelong hobby.
Other
NOTE: I’m teaching an online Night Photography class for the Creative Photo Academy starting later this January. Message me if you’d like more information about it.
(If you like this story, please share it with your friends and let them know about the links on photography that I post on my business Facebook page. I’m also on Instagram and Twitter, @reedhoffmann. And if you’re curious about the workshops I teach, you can find them here. Finally, you can subscribe to this blog on my home page.)
Thanks Reed, Interesting blog & great night images!