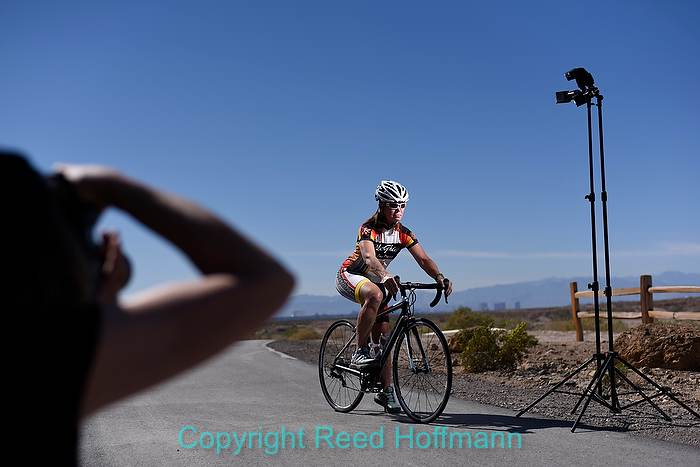
I love working with flash because it lets you change the light, which offers a new to make different pictures. And used properly, it expands what you can do creatively. Recently I taught a light workshop for Mentor Series in Nevada, and wanted to write about the process Tom Bol (the other instructor) and I used teaching flash.
We spent the first morning of the workshop inside, and as strange as it might sound, not shooting pictures. That’s because if you truly want to be effective with light, you first have to understand its qualities, and how they change when you use electronic flash. So our first couple of hours were spent in a classroom explaining that and showing examples. And the rest of the morning was devoted to the mechanics of flash – how to set the cameras and flashes to work together properly. That’s because one of the first lessons in flash is to get the flash away from the camera. For our group, that meant learning how to use Commander and Remote modes with our Nikon cameras and speedlights, and how to use Pocket Wizards (radio remotes) for the other cameras. After a break for lunch, we were off to our first shoot.
One of the most important lessons I learned when starting with flash was to keep it simple. I believed, wrongly, that the more lights used, the better the resulting picture. Of course what matters most is quality, not quantity, so we started simple. Which meant using direct flash, on a stand, away from the camera. One point I always make when teaching flash is that electronic flash is an incredibly short burst of light, which lets us do some neat things. Like stop action and break shutter sync.
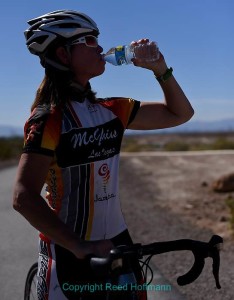
Setting up this shot of Amy, we started by finding an exposure that made the background look the way we wanted it.
Nikon D750, Manual exposure, ISO 62, 1/4000 at f/3.2, Nikon 24-120mm f/4 lens at 50mm. Photo copyright Reed Hoffmann.
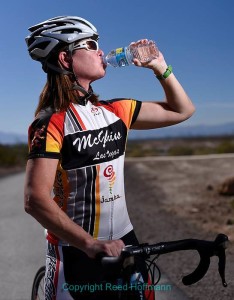
Then it was just a matter of adding the flash, on a stand direct from above and to the right.
Nikon D750, Manual exposure, ISO 62, 1/4000 at f/3.2, Nikon 24-120mm f/4 lens at 50mm. Photo copyright Reed Hoffmann.
Cameras have a maximum shutter speed they can use with flash (usually around 1/200 or 1/250 second). Above that you’d run into problems where part of the frame wouldn’t be exposed properly. But many of today’s cameras are able to break that limit. In Nikon’s it’s called Auto FP, on others sometimes High Speed Sync. That lets you shoot at higher shutter speeds outside in sunlight, and not use small apertures (so you can create shallow depth of field). You’re able to do that because the flash “pulses” the light. So for our first shoot using direct flash, we worked with higher shutter speeds both to allow shallow depth of field, and to stop action.
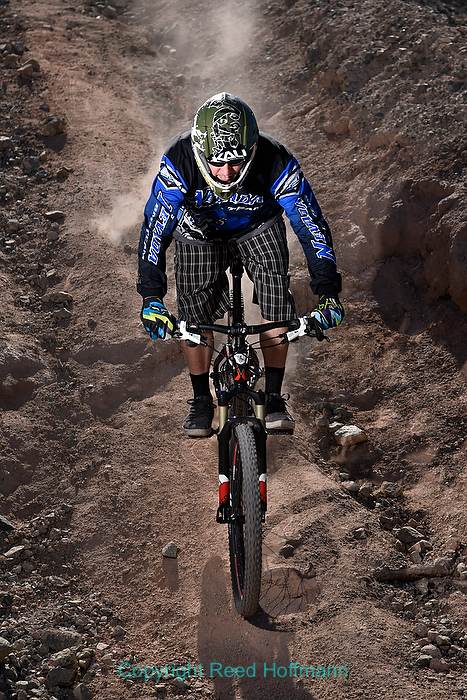
For this shot of Kevin coming down the hill, I’m triggering a light on the left side, so we can see his face and outfit. Using Auto FP lets me shoot at a high enough shutter speed (1/800) to stop the action. and again I’m using manual exposure.
Nikon D750, Manual exposure, ISO 100, 1/800 at f/5.6, EV -1.0, Nikon 24-120mm f/4 lens at 105mm. Photo copyright Reed Hoffmann.
Our second shoot was at a nearby ghost town (near Nelson, NV), and for that we changed things a bit. Now we wanted to change the size of our light sources. For flash, you do that by putting something between the flash and the subject. That meant we used either diffusion panels, umbrellas or soft boxes. That larger light source creates softer light, meaning softer shadows and better light for portraits.
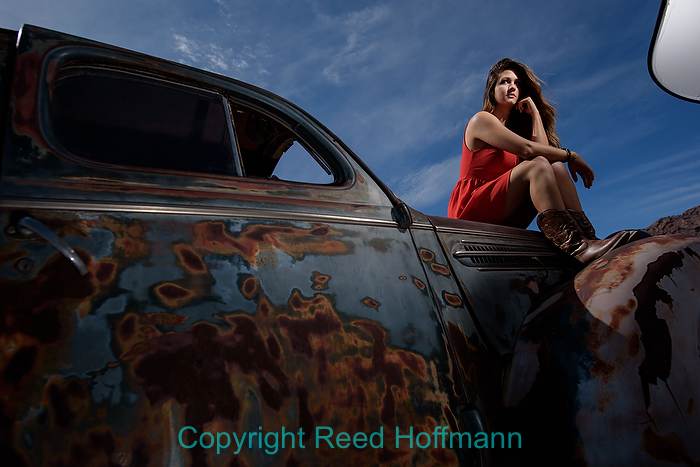
For this shot of Sofia at the ghost town, we softened the light by putting a diffusion panel (upper right) between her and the flash. Nikon D750, Manual exposure, ISO 50, 1/1000 at f/4.5, Nikon 20mm f/1.8 lens. Photo copyright Reed Hoffmann.
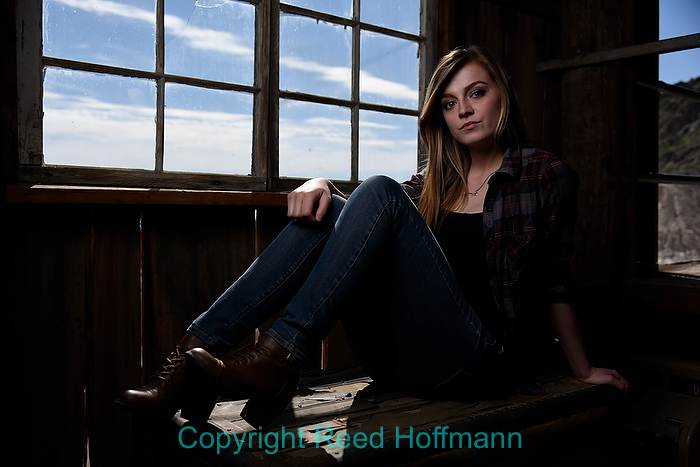
For this interior photo of Courtney, we first set exposure manually for the sky, then added light from a soft box on the left side. Nikon D750, Manual exposure, ISO 100,1/2000 at f/4.5, Nikon 24-120mm f/4 lens at 35mm. Photo copyright Reed Hoffmann.
Our third shoot was with models and neon, and had the students working with both hard (direct) and soft (light boxes) light sources. Hard light is a great way to separate a subject from the background (with rim, or edge light), and the soft light is used for faces. You can do this with just two lights, and is a great way to do people pictures.
For Carolin, we first set exposure for the neon, then added one light behind and to the right to separate her from the dark background. Nikon D750,Manual exposure, ISO 200, 1/250 at f/5, Nikon 24-120mm f/4 lens at 24mm. Photo copyright Reed Hoffmann.

Our next step was to add nice soft light to the front of her, by using a large soft box with another Nikon SB-910 inside it. Nikon D750,Manual exposure, ISO 200, 1/250 at f/5, Nikon 24-120mm f/4 lens at 24mm. Photo copyright Reed Hoffmann.
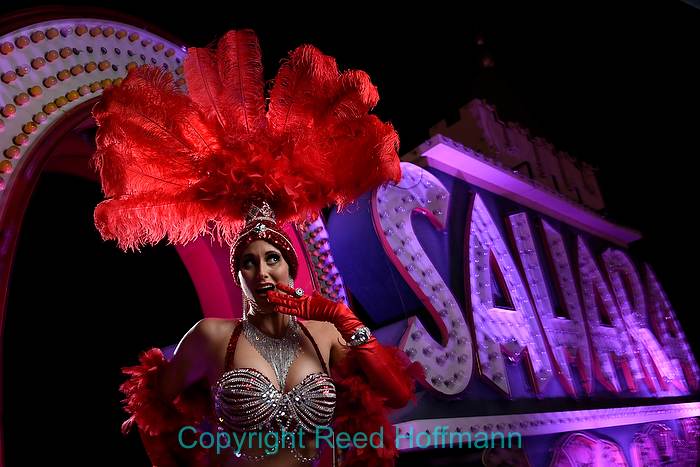
I always try to solve the technical (exposure, light) first, then concentrate on the creative. With exposure set for the neon, then one light hidden to the left (lighting her from behind) and a soft box to the right, everything was ready to let Carolin go to work and make some fun photos for us. Nikon D750, Manual exposure, ISO 160, 1/6 at f/5, Nikon 24-120mm f/4 lens at 27mm. Photo copyright Reed Hoffmann.
For the fourth and final shoot we went back to the ghost town, where the students broke up into small groups and took turns making portraits of each other. Tom and I had set out various gear to use, from stands and strobes to reflectors, soft boxes and umbrellas. Moving between the different groups, helping solve problems and making suggestions, it was impressive how much they’d learned in such a short time. In fact, I think some of the best photos shot that weekend were done that morning.
It was a fun workshop, as I love turning people on to what they can do with flash. As with most aspects of photography, you can read about it all you want, but to get better, you have to do it. And that was the final message I left with the group, “Don’t simply go home and look at the nice pictures you made this weekend. Find friends and ask them to model for you, find other subjects you can use flash with. Take what you’ve learned and keep working at it, or you’ll forget how in a few months.” And that’s universal advice for all of us, regardless of the photography we enjoy doing – get out and shoot!

