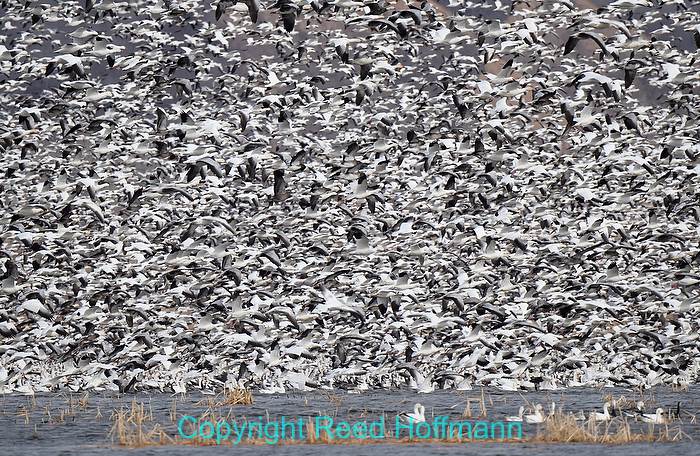
Last weekend the Kansas City Star had a story about the snow geese migration happening just north of here. My first thought after reading it was, “I’ve got to get up there.” I’d visited a few years back, but that time there weren’t many birds. This trip promised to be different. A million birds different.
For a couple of weeks, usually in March, a huge number of snow geese stop at Squaw Creek Wildlife Refuge on their migration north. So I called a friend, loaded the car and we headed north, on our own migration. I’ve posted a number of those photos here, and if you want to find out how I made them, keep reading. If not, then at least look into what migrations may be happening around you. This is the time of year for that in much of the country.
I always feel sorry for bird photographers. They want to take pictures of small, fast critters that don’t want people near them. The only way to do that and get good pictures is with big lenses. And big lenses are expensive. Very expensive. At the low end (not from the big camera companies) you can get a zoom that reaches out to 400 or 500mm for about $1000. But it won’t be what we call a “fast” lens, in other words having a wide aperture, and it won’t be one of the best-quality brands. To get that, like a 500mm f/4 lens, will cost many thousands more. And even lenses that long aren’t always enough. You can extend the reach of some of those lenses with an accessory called a “teleconverter.” A good one will give you good sharpness, if used with one of the expensive lenses. But a good teleconverter will run you hundreds of dollars too. And the cheap ones aren’t sharp
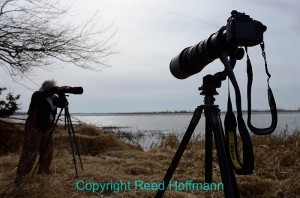
With the heavy lenses Leon and I were using, large tripods were necessary too. The unusual shape holding my lens on the tripod at right is the gimbal mount. Nikon D800,ISO 200, 1/3200 at f/5.6, EV -0.7, 14-24mm f/2.8 lens. Photo copyright Reed Hoffmann.
I’ve been lucky enough over the years to build up a pretty good lens collection. I have the luxury of owning an autofocus 500mm f/4 lens as well as an old model 800mm f5.6. The size of those lenses mean that you’re not going to shoot them hand-held very often, or for very long. Which means you want to use them on a fairly heavy tripod (lightweight tripods aren’t meant for that kind of weight). And, a “gimbal” mount will allow you to tilt and swing that large lens easily on top of the tripod.
For this shoot I took three telephoto zooms: the two mentioned above and the new Nikon 80-400mm f/4.5-5.6. I also brought along two teleconverters, Nikon’s TC-1.4 EII and their TC-20 EIII. Those won’t work on my old 800mm, but on the 500mm they change the focal length to a 700mm f/5.6 or a 1000mm f/8. And I can use them on the 80-400 as well, though I tend to only use the TC1.4, which makes it a 120-560mm f/5.6-8 lens. You lose light when adding teleconverters (changing your maximum f/stop), so that has to be taken into account also.
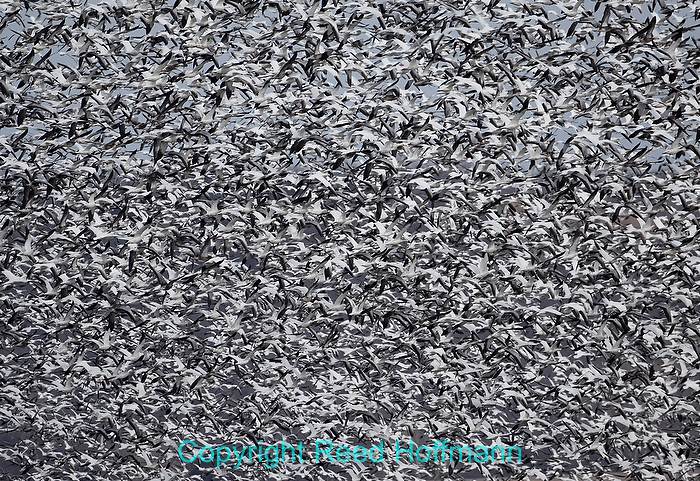
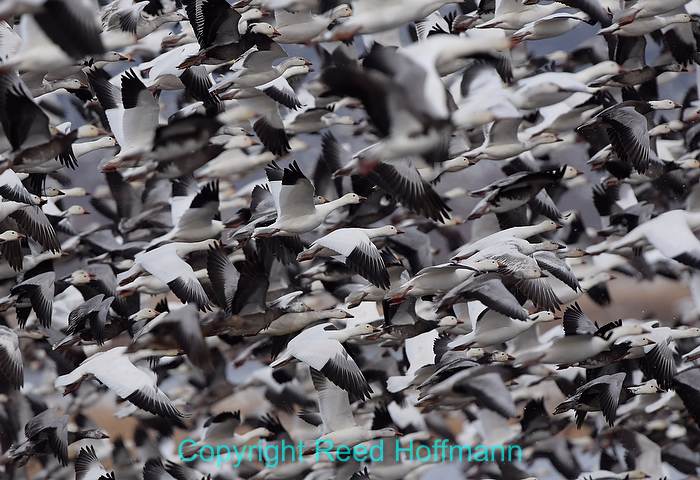
When a large group lifts off, there are so many that they completely block the view to the other side of the lake. Nikon D5300, ISO 200,1/1250 at f/5.6, 80-400mm f/4.5-5.6 lens. Photo copyright Reed Hoffmann.
Even with those long lenses, the challenge was still getting close enough. Yes, you want some photos that show the mass of birds, but one of two of those is plenty. After that you’d like to have pictures that are tight enough to show the beautiful details, shape, color, patterns, feathers. Those are only possible if you’re able to get closer or have a long lens.
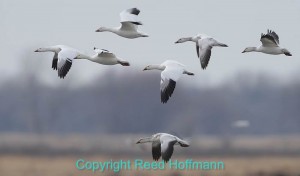
Birds in flight can be a real challenge to keep in focus. Nikon D800, ISO 200, 1/640 at f/8, 500mm f/4 lens with 2X converter for 1000mm. Photo copyright Reed Hoffmann.
Photographing birds in flight adds the challenge of staying in focus and stopping action. For autofocus settings I make sure to use C (Continuous, so it will try to maintain focus as the birds fly) and at least Dynamic 21.
“Dynamic” is Nikon’s system of trying to maintain focus on an erratically moving subject. To understand that, you first have to realize that any autofocus system can only focus on one spot at one time, regardless of how many AF points there are. That means it’s important to make sure your “active” AF point, or sensor, is on the subject when you start autofocus (normally by pressing down gently on the shutter button, and then light up briefly). Once it’s tracking the subject, if that subject suddenly moves so that point’s no longer on the subject, instead of automatically focusing on where the point is now, it first looks at the surrounding points to see if another point has the subject there. If it does, it hands off focus to that point. That’s a wonderful way to get a higher in-focus percentage with action photos. When you choose Dynamic on Nikon cameras, you can usually tell it how many of the points to work with. For instance, on my D5300 I can choose 9, 21 or 39. On the more expensive D800, which has more AF sensors, my choices are 9, 21 or 51. Most cameras also let you choose “Auto AF,” meaning the camera will choose where to focus. Since I prefer controlling autofocus, I rarely use that. But with flying birds, it might be worth a try since it will generally focus on whatever’s closest (within its group of AF sensors).
High shutter speeds let you freeze the birds in mid-flight, so you can see detail in their bodies. Nikon D5300, ISO 360, 1/1600 at f/5.6, 500mm f/4 lens with 1.4X converter for 700mm. Photo copyright Reed Hoffmann.
Stopping action is also important, so you want to use a high shutter speed. How high? With this kind of action I recommend at least 1/500 second. My preference is to use an automatic exposure mode when possible, and usually pick Aperture. If there’s a lot of light (bright daylight), then Shutter Priority (“Time Value” in Canon-speak), could work. But I’m not a big fan of Shutter Priority. That’s because setting it to 1/500, or even 1/1000 could limit me. Setting the camera for that high shutter speed can actually result in underexposed pictures. Why? If the light drops (heavy clouds come in, or I’m shooting into the woods), with the shutter locked at that speed, there might not be enough light then for a good exposure. That’s why I prefer using Aperture Priority. By choosing a wide aperture, I’ll get a fast shutter speed. And if the light drops for any reason, the shutter speed will drop, but I’ll still get a good exposure. But there’s another option to help maintain a fast shutter speed.
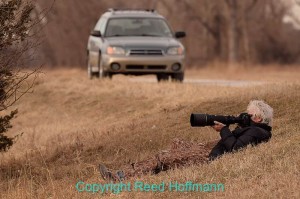
My friend Leon Butler finds a good position to shoot from that allows him to hand-hold his heavy lens. Nikon D5300, ISO of 280, 1/500 at f/6.3, EV -0.3, 80-400mm f/4.5-5.6 lens. Photo copyright Reed Hoffmann.
“Auto ISO” has been available on cameras for some time now, but I’ve never liked it. It lets the camera adjust ISO on its own, raising it as the light drops. Problem is, you don’t control when it does that. A few years ago, though, Nikon introduced something called “Auto ISO – Sensitivity Control.” It’s a twist on Auto ISO, giving the photographer control. When turned on, you choose the ISO you’d like to be at, tell it the shutter speed you want it to try to maintain, and give it the maximum ISO it can use to achieve that. At the wildlife refuge, I turned this feature on and set the cameras to a preferred ISO of 200, but allowed to go up to 400 ISO if the shutter speed was going to drop below 1/500.
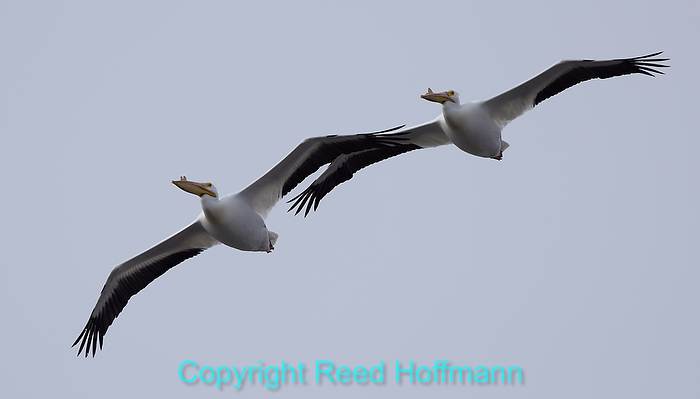
Pelicans are among the many species that are migrating through the refuge right now. Nikon D5300, ISO 200, 1/1600 at f/7.1, 500mm f/4 lens with 1.4X converter for 700mm. Photo copyright Reed Hoffmann.
I like to say, “Solve the technical problems first, then concentrate on being creative.” With autofocus and exposure settled, I could then spend my time thinking about what kind of pictures to make. Whenever I go out to shoot, I always try to tell a story. That means looking for some wide shots that set the scene, some medium shots to bring the viewer in, some close shots to show what’s particularly interesting, some details to add depth and a good closer to end the story. While shooting those I’m always trying to make sure that my subject is obvious to the viewer and the background doesn’t distract. In this case the wide shot is from a low angle showing our tripods and Leon at his camera, with sky and lake as the background. The medium shots show the density of the birds as they lift off, effectively blocking the view to the other side. The medium shots show patterns of a few birds in flight, and one of Leon shooting. The ending shot is of some backlit feathers, all that remains from a bird caught by predators. And the closer is of swans, silhouetted against the warm light at the end of the day, reflected in the water.
We had a great time and made some nice photos. But like most times I go out to shoot, I left wishing I’d been able to do more. As we drove home that night, I was thinking about the other shots I I could have made with more time, or another visit. So if you want to go to the refuge next week to hunt birds, count me in!
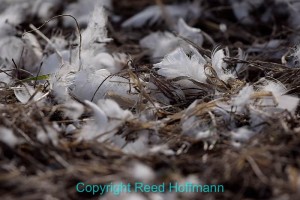
Predators in the area have no problem finding meals at this time, evident by the many piles of fresh feathers and bones that can be seen. Nikon D5300, ISO 200, 1/1250 at f/5.6, EV -0.7, 500mm f/4 lens. Photo copyright Reed Hoffmann.
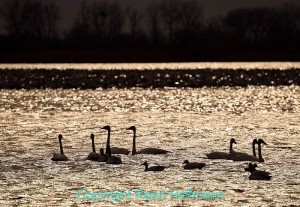
Trumpeter swans also grace the lake with their beautiful figures. Nikon D5300, ISO 140, 1/4000 at f/6.3, EV -1.0, 80-400mm f/4.5-5.6 lens. Photo copyright Reed Hoffmann.

