Computers are a fact of life for most people today, and that’s especially true for us photographers. What that inevitably means is a constant process of upgrading or replacing them. I did just that with one of my older laptops, thanks to a new SSD drive.
For well over a decade we’ve been told that one of the easiest ways to get better performance out of a computer is to increase the amount of RAM. Random Access Memory is the “fast” memory in your computer, as opposed to the relatively slow memory of the hard drive. If there’s not enough RAM for operations, the computer starts using the hard drive for memory, which slows everything down. So the old rule, still true, is that one way to increase speed is to increase RAM. And today, RAM is much, much cheaper than it was years ago. But there’s another way to increase speed, and that’s by changing the hard drive.
Most of us think of hard drives simply in terms of capacity. How many gigabytes, or now sometimes terabytes, they can hold. But they also affect the speed at which you can do things. Most hard drives are composed of spinning platters, and the faster they spin, the faster they can read and write information. The standard speed for a long time was 5400RPM. And then we started seeing, and could pay a premium for, 7200RPM drives. I started buying those for places where speed was most important to me, mainly inside my computers. For attached storage that I only occasionally used, those 5400RPM drives were fine. And then SSD drives started appearing (at somewhat reasonable prices).
Solid State Drives mean no platters, no moving parts (PCMag.com has a nice story explaining them here). That mainly resulted in a big speed boost in reading and writing data (plus some power savings). But this type of drive was very expensive. The first I had was a small one used as a boot drive (C drive) in one of my Windows laptops. But as with most things involving technology, the prices of SSD drives have fallen. Over the last couple of years I’ve been lucky enough to get a few of them. And the first 256GB SSD drive I got, I used to promptly replace the boot drive on another Windows laptop. Wow, what a difference in boot time!

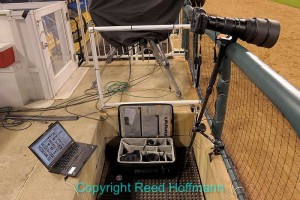
A baseball dugout’s not the friendliest place for a computer, so I’d rather not take my best laptops into places like this. Photo copyright Reed Hoffmann.
Which brings me to a replacement I just did. When I’m doing sports assignments for wire services, I always need to have a laptop there with me. And that laptop could be outside in the sun (and sometimes rain) or indoors in an unsecured (translate – easy to steal from) area. And that makes me nervous. So rather than use one of my newer laptops, I take along a six-year-old Macbook Pro. It’s got a good quality 15-inch screen, which is nice, but it’s slow. It takes several minutes to boot, and there are too many times where I’ve have to wait longer than I want for operations to finish. That’s a problem when you’re on deadlines that are sometimes measured in seconds. So aside from a new laptop, what was the best way to fix this? An SSD drive. And I happened to have an extra one I hadn’t been using lately.
If you’ve got a few tools and are a bit brave, replacing a hard drive isn’t too difficult. Find a good tutorial online, read it from start to finish, and if you’re up to it, give it a shot.
Before you start taking the computer apart, you have to decide whether you’re going to re-build the hard drive from scratch (install system, then programs and data) or clone it. Cloning does just that – duplicates the current drive onto a new one. If you go that route, make sure the software you use (it’s not just a simple copy operation) can make a “bootable” clone. In my case Carbon Copy Cloner does that very easily for Macs. Install it, hook up the new drive, set it to clone and leave it alone for a couple of hours. Of course, you need to make sure the new drive is large enough for the data. In my case, I was going from a 512GB 5400RPM drive to a 256GB SSD. But I only had about 150GB of data on the older drive, so no problem. And most importantly, once cloned, test that your computer can boot from it (with both Mac and Windows you can choose what attached drive to boot from). You don’t want to go to the work or replacing a hard drive only to find out you have to pull it right back out. I know this from experience.
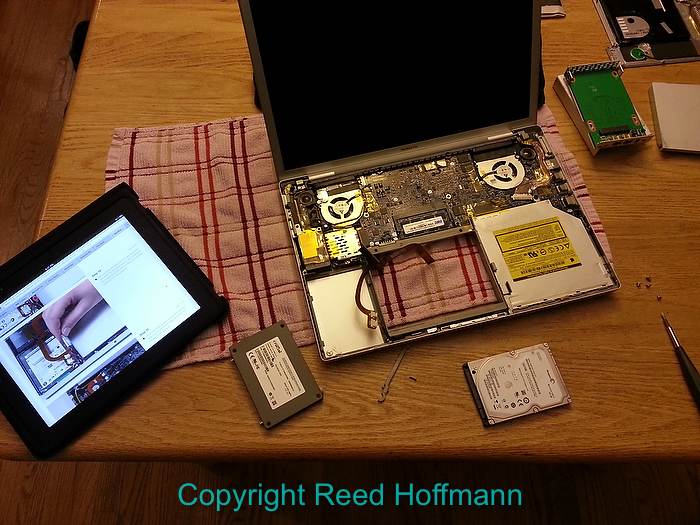
To replace the hard drive on this Mac first meant taking out about a hundred tiny screws (okay, maybe only 20-30, but it sure felt like a hundred!). Then you have to remove the keyboard, disconnect a couple of ribbon cables (mildly scary), and pull, then replace the hard drive. Luckily, I’ve done this on Mac and Windows laptops perhaps twenty times now, so pretty comfortable doing it. Start to finish took about thirty-minutes, and then the cross-your-fingers part. Once back together you press the power button and pray… Happily it booted fine, and wow, was it faster! Booted in less than a minute, and I could feel a definite improvement in speed of operations.

This is what my 6-year-old MacBook Pro looked like with the keyboard and hard drive removed, ready to install the SSD drive. I’ve got the iPad there with instructions on how to do it, courtesy the web. Photo copyright Reed Hoffmann.
Now my six-year-old Mac is behaving more like a three-year-old (a new hard drive can only do so much), and I’m hoping to get a couple more years use out of it. Perhaps it’s time to look into upgrading the RAM. It’s only got 4GB, and I can easily boost it to 8GB. Hmmm….

