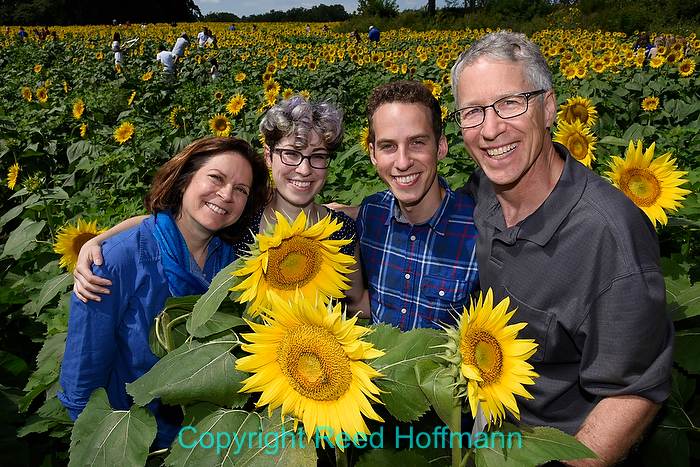
Here in Kansas City, we live less than an hour from a place that becomes an unusually eye-catching photo spot once a year: Ted Grinter’s Sunflower Field. When the flowers are at peak, the owners not only allow but encourage the public to come out and traipse around their farm and shoot photos among the rows and rows and rows of bright yellow blooms.
Seems like an easy shot, a no-brainer for a family photo. But it’s not as easy as you’d think.
With both of our kids coming home for the Labor Day weekend, my wife was determined to get a new family picture and thought those fields would be a great location. As usual, she was right.
As photographers, we like to work with early and late light. Those golden hours give light direction (low in the sky) and often warmth (color provided by the added atmosphere). However, there was no way we’d be able to get our kids out early, and we had plans for early evening. Which meant I’d have to work with harsh midday light. Here’s what I did…
As we walked out into the fields, I was looking for a good location for the photo. I wanted lots of sunflowers facing the camera, and a space we could stand in surrounded by blooms. Since the flowers are fairly tall, and there were going to be lots of people in the fields, I brought along a tall tripod. I planned to get the camera well above us to shoot down at an angle. That way we weren’t blocked by the tall flowers, and people behind us wouldn’t show up in the frame. I used a camera with a tilting LCD, the Nikon D750. Turning on Live View, I could see to frame and focus without having to get my eye way up to the viewfinder.
Another challenge was the light, and there are two traditional ways to deal with that. You can turn the subjects so the sun is behind them, which removes the harsh light from their faces. That wouldn’t work here, though, because I’d be shooting the backs of the sunflowers. So the sun was going to be in our faces, almost directly overhead. I brought along a flash, although you could also use the built-in flash that most cameras today have. By adding that “fill flash,” the light would fill in the harsh shadows in our faces. To make it look more natural, I reduced the output of the flash. The goal with fill flash is to lighten the shadows somewhat, not make them disappear entirely. The picture should look natural, so few people realize a flash was even used.
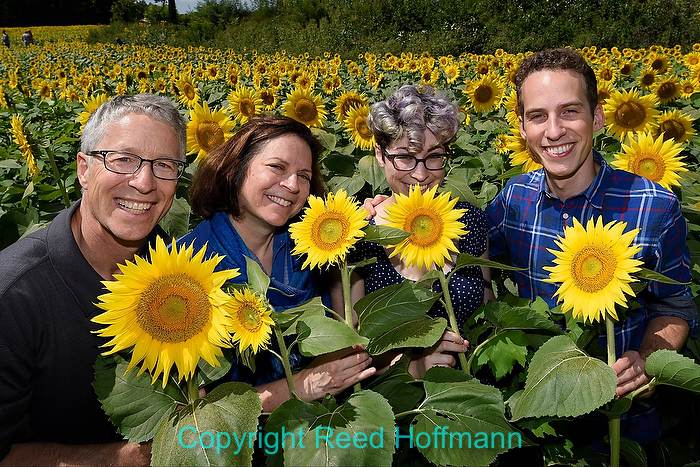
One of my favorite photos from the shoot, I placed the camera in close with a wide-angle lens so both us, and our sunflowers, would be large in the foreground. And note how the high angle shows off more sunflowers behind us. Nikon D750, Manual exposure, white balance of SUNNY, ISO 200, 1/640 at f/10, Nikkor 18-35mm lens at 22mm, Nikon SB-910 Speedlight at -1.3EV. Photo copyright Reed Hoffmann.
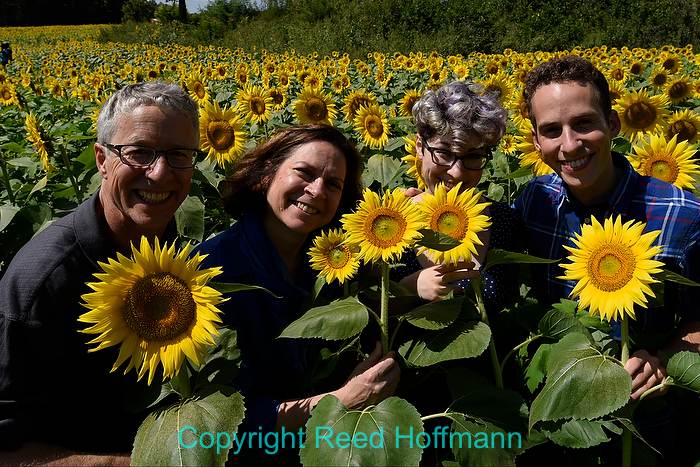
Here’s how the shot looks without flash – the shadows from the sun above us are heavy and hide much of the detail in our faces. Nikon D750, Manual exposure, white balance of SUNNY, ISO 200, 1/640 at f/10, Nikkor 18-35mm lens at 22mm. Photo copyright Reed Hoffmann.
Once I had everything set up, there was the problem of how to take the picture and also be in it. I often use the self-timer for that, and some cameras, like my Nikons, even allow me to set the self-timer to shoot up to nine pictures in a row, so you don’t have to keep coming back to the camera. In this case, though, I wanted more control over when the photos were shot. So I used a simple wireless remote (by Vello, about $60), which let me trigger the camera with a small transmitter in my hand.
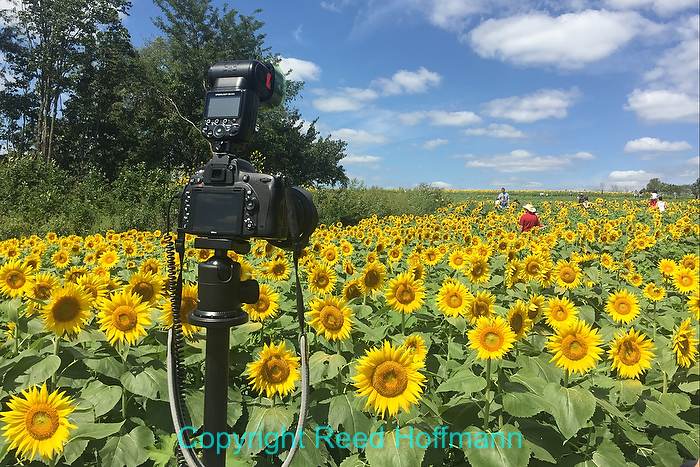
Here’s the setup I was using. Nikon D750 up high on a Gitzo tripod, 24-120 or 18-35mm lens, Nikon SB-910 speedlight and Vello radio remote. For framing the shot and checking the results, I tilted the LCD down so I could better see it. Photo copyright Reed Hoffmann.
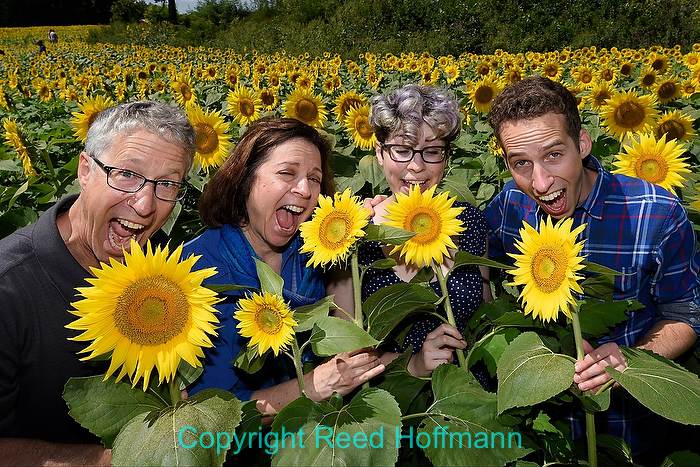
The final ingredient, and it’s an important one, was this: I shot LOTS of pictures. And not just in one spot. We set up, shot a series of photos, then moved to a different location. I’d guess we worked in about four or five areas. After all, when doing a family picture like this, the hardest part is getting everyone together. Taking a few more minutes to shoot extra photos, changing background and exposure, can only mean better odds of getting at least one picture you all really like. And be sure to make the shoot fun for the family too. Let them goof around for some of the photos. For us, those are almost always our favorite ones.
A hundred years ago, family pictures were a rare and special event and became cherished heirlooms. Today they’re still cherished but too often done quickly with smartphones. Do a little planning, take a little time when everyone’s together, and make something special. You’ll end up with something worth hanging on the wall, and your kids and grandkids will thank you.
(If you like this story, please share it with your friends, and also let them know about the links about photography I post on my business Facebook page)

