With Christmas and Chanukah around the corner, odds are you’ll be spending time with family the next month. Good luck! Everyone takes pictures then, but how many people take the time to make really nice photos? With a little planning, you can add some high quality portraits to the family album (or website, or Facebook, or…). I did that over Thanksgiving with my family, so let me show you a few different ways you can do the same thing. I’ll start with the simplest, and then show more complicated ways to achieve good portraits.
Light and background are the two most important things you control when doing portraits. If it’s not too cold, the easiest thing is to take people outside. Find an area with a “clean” background (not distracting with

At f/5.6, this busy background is pretty distracting. Nikon D600 with 85mm lens, ISO 400, shutter speed of 1/320 at f/5.6.

Opening the lens to f/2 essentially hides the background. Nikon D600 with 85mm lens, ISO 400, shutter speed of 1/2500 at f/2.
buildings, or poles/trees coming out of people’s heads). Using a telephoto lens (anything over 100mm) at a wide aperture (f/5.6 or lower, like f/4) will help keep the background out of focus. Very “fast” lenses, like f/1.8, will be even more effective. And the closer you are to your subject, the more out of focus that background will be.

Having the subject in full sun gives you harsh light and can cause squinting. Nikon D600 with 70-200mm lens, ISO 400, shutter speed of 1/4000 at f/2.8.
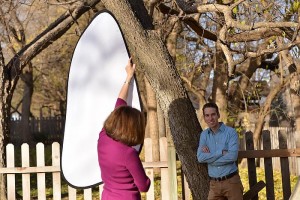
Holding a diffusion panel between the subject and the sun turns that harsh light into even, soft light.
If you can find an area of open shade to put them in, all the better. Sun in people’s faces will create harsh, unpleasant shadows, and often cause the subject to squint. If you do have to shoot in open sunlight, try turning them away from the sun, so it backlights them and their faces are now in shadow. There are a couple of simple accessories that can really improve photos taken in these situations.
Reflectors and Diffusers are two of my favorite tools to control light, and great when shooting portraits outdoors in the sun. They’re inexpensive, lightweight and easy to use. A diffusion panel is just a large white piece of cloth (in a frame) that you place between the sun and your subject. By doing that you’re changing the size of the light source from a small one (the sun is far away and thus a small light source, like a spotlight) to a large one (the size of the panel). That means softer light, and makes a big difference. When the light passes through white fabric, the result is

Turning your subject from the sun avoids the harshness, but can result in heavy shadows. Nikon D600 with 70-200mm lens, ISO 400, shutter speed of 1/1250 at f/4.

Turning her further from the sun, then adding the light off a gold reflector creates a warm glow. Nikon D600 with 70-200mm lens, ISO 400, shutter speed of 1/1600 at f/2.8.
a soft, but still bright, light. Reflectors, on the other hand, are great when you turn your subject away from the sun, because they can then be used to “reflect” some of that light back into the face. They come in different surfaces, and I prefer the ones that have a zip-off cover that lets you choose between silver, white, gold or a combination. With a reflector, turn your subject away from the sun and have the person holding the reflector “reflect” the sunshine back into the subject’s face. For either diffusers or reflectors, it’s much easier when you have someone help by holding them.
If you have to shoot indoors, you may have a couple of options as well. If you’re lucky, there will be an area near a large window you can work in, where the light coming from the window creates a nice soft light. In that case, you’ll probably want to shoot from a tripod, as your shutter speed can end up fairly slow. If window light won’t work, then you need to use flash.
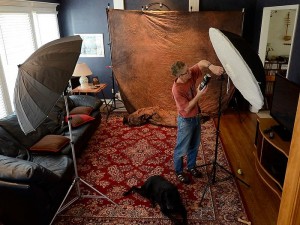
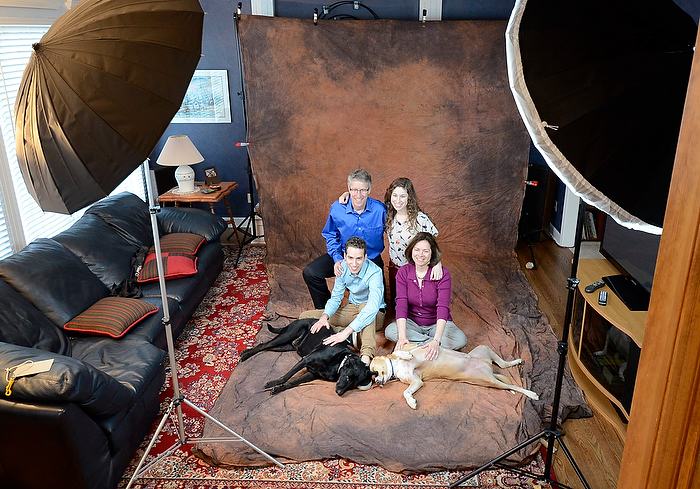
Here I am turning our living room into a studio. I’ve put up two stands to hang a backdrop, and then two more stands with 51-inch umbrellas. The one on the right has a white cover on it to further soften the light coming out of it, and each one is powered with a Nikon SB-900 speedlight.
I’m a big fan of flash (often called “speedlights”) because it gives me complete control of the light source. However, by themselves they’re small light sources (the front of the flash), meaning they give harsh light when used directly. So our first challenge with strobes is avoiding direct flash.
The simplest thing to do is use “bounce” flash. This requires an accessory flash (not one built into the camera), because you need to aim your flash at the ceiling or a nearby wall. Bouncing that light off another surface turns your light source into a larger source, meaning softer light. However, you need to keep two things in mind; the distance to the surface, and the color. If the ceiling or wall is too far away, too little light will return to light your subject. And if it has color, your subject will pick up some of that color. Warm colors (like light yellow) can look good, cool colors (like green) can look bad. The downside to bounce flash is that it lights up the entire area, so while you have softer light, you don’t have much control over where it goes.
The advantage of a light modifier, like an umbrella or softbox, is
that you gain more control over the light, and where it goes. Umbrellas tend to be pretty inexpensive (many under $50), plus you’ll need a light stand plus a bracket to connect the two together (another $50). Most times you can set the umbrella off to one side (about 45-degrees from the subject) and fairly close, and get great light. Then you’ll need some way to trigger the flash. If you don’t have that ability built in (many Nikon, Sony and some Canon SLR cameras have this), then a simple sync cord connecting the camera to the flash will get the job done. Easier, but a bit more expensive, would be a flash trigger where the transmitter mounts on the hot shoe and the receiver is connected to the flash. Some simple ones cost under $100, and avoid the possibility of tripping over cords.
A soft box is more expensive than an umbrella, but allows still more control. That’s because by putting the flash in a “box” with dark sides, you’re able to position the front to more carefully limit where the light goes.
And if you have more than one flash, you can be more creative in how you use it. One thing you can do is position both lights to the side, but set one to use less power (put out less light). That will add some shadows to the light in your subjects’ faces, adding more of a three-dimensional look and a feeling of depth to the picture. Or, you could put the flash behind them to add light to the background, or aim the second light at the back of their head to create a “hair light.” One word of caution – more lights doesn’t necessarily result in better pictures. Sometimes the best look is created with just one light. Play with what you’ve got and look at the results. Digital makes that easy with the LCD.
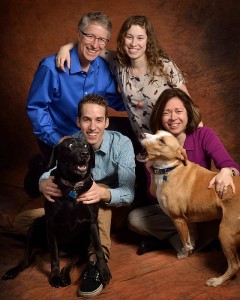
Adding the dogs to the family photo made it tougher, and resulted in a lot of bad pictures. But we only needed one good one, and the fun factor in this photo made it our choice for our holiday card.
Backgrounds indoors can be more challenging than outdoors. For one thing, you usually can’t get far enough away from your subject(s) to have an out of focus background. And most backgrounds indoors will have stuff in them. Sometimes that can be nice, placing the family in a place they’ve lived for many years and has good memories, like near the fireplace. Other times it doesn’t work so well. In those cases, an easy solution is to hang a bed sheet behind the group. You can also buy large muslin backdrops for under $100, that create a nice, professional look.
When taking the pictures, try to stay relaxed and playful, as that will help your subjects be more relaxed as well. Most people aren’t comfortable in front of a camera, so one of your primary jobs is to help them loosen up and look natural.
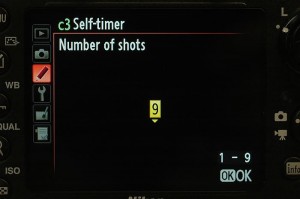
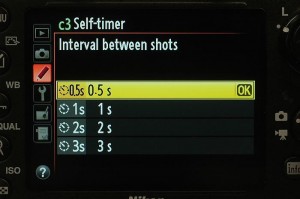
Finally, don’t forget that you should be a part of family portraits too. The easiest way to do that is by using the self-timer. Many Nikon cameras today offer a feature where you can set the self-timer to shoot up to nine frames in a row, up to three seconds between each shot. For our family shots, I set the camera to do just that, so I could press the shutter, move into the scene, and then let the camera run off nine frames. The three-second delay was essential to make sure the speedlights had time to recycle.
As I’ve gotten older, I’ve become more conscious of the importance of family
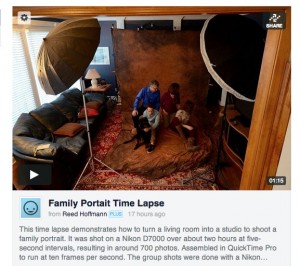
To watch a fun one-minute time-lapse of me turning our living room into a studio for family photos, click on the screenshot above.
pictures. I suppose that has something to do with facing my own mortality. But families these days tend to be very busy, and getting everyone to set aside the same block of time can be a challenge. Despite my being a photographer, it had been two years since we’d done a family picture. So I decided to use guilt. My birthday was a few days before Thanksgiving, so all I asked for from my family was an hour of their time to do family photos. How could they say no?
We all have lists of things we want to get done over the holidays – shopping, cards, cleaning, parties, etc. Be sure and add “Family photos” to that list. It’s a great opportunity to practice your photography, and will make a great addition to your family’s history in pictures.

