My education in lighting began back in 1980 with a pair of what we called “hot lights” (Lowell Tota-lights). Designed for TV location lighting, in addition to being bulky and putting out a lot of heat, they also regularly blew fuses in people’s homes. Fun times! Their strength was in being able to see where the light was going. Which is the key to learning how to use strobes. After I figured that out, I was allowed to start using flash and put those hot lights away and never looked back. Until now.
When you start shooting video, you quickly realize that all the cool things you can do with flash in still photography no longer apply. If you want any of that, you need constant light sources. Like those old hot lights. But with the introduction of LED lighting, there’s now a much better option. Now you can have the light without the heat, and even use batteries to power them. So over the last couple of years I’ve bought several LED lights for video, but recently used them while shooting stills.
The advantage of flash over constant light sources is power. While brief, flash has the ability to put out a LOT of light, letting you use small f/stops, stop action and even use flash in sunlight. Constant light sources don’t have that kind of power (at least not the ones we’re likely to use). Which means you often have to push up ISO just to get a decent shutter speed. With early digital cameras, doing that resulted in poor quality. But times change, and we’re now able to shoot at high ISO’s and get great quality. So it’s time to re-think constant light sources.
A few months ago I taught a Mentor Series photography workshop in Nashville. As part of that, people were offered the opportunity to pay for an extra day and start the workshop early, to do more shooting with a smaller number of students. We did that in Nashville, and were scheduled to take pictures at Nelson’s Green Brier Distillery. Looking at their website, I could see it would be a fun place to shoot, but pretty boring with just the available light. Which gave me an idea. This looked like the perfect place to bring some of my LED lights, and it was. That way I could create more interesting light for the portraits we’d be shooting, and at the same time teach how to work with different qualities of light (to learn more about those, read this).
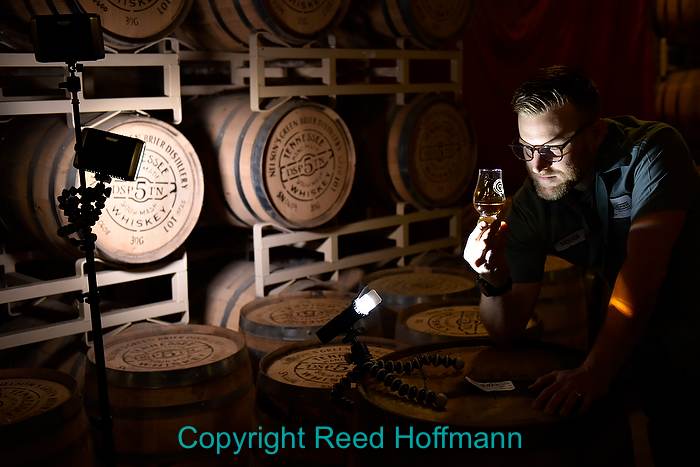
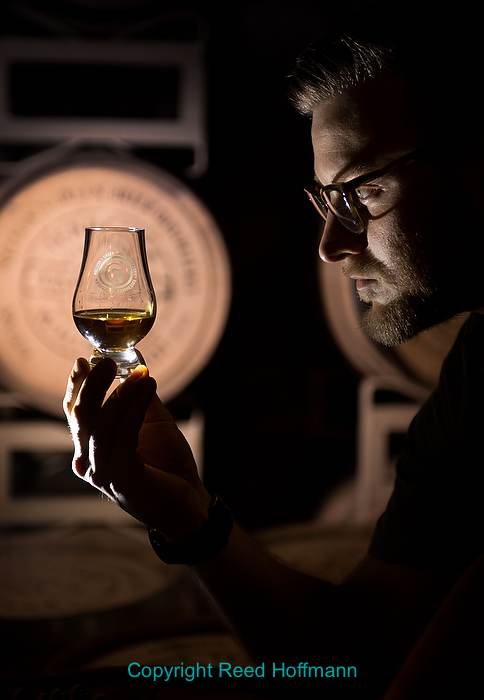
One good way to approach lighting it to only light what you want the viewer to see, letting the rest of scene go dark.To create that look here I used both Lite Panels to illuminate the background (one on top of the light stand at left, one hung on it with a GorillaPod), and the small spotlight to light up Brian’s face and glass of whiskey. Nikon D810, ISO 1000, 1/320 at f/2.8, Nikkor 24-70mm lens). Both photos copyright Reed Hoffmann.
As with any light, the further from the subject, the less light that reaches that subject. Since we’d be doing a number of portraits, and planned on having the subject in the foreground, I knew we could have the lights relatively close most of the time. And since they put out constant light, everyone could be shooting at the same time, instead of one at a time (as we’d have to do if setting up strobes). For ISO, we found that 1000 was a good starting point, giving us a fast enough shutter speed to avoid blur. The final technical challenge would be white balance. A quick test with our cameras showed that the Fluorescent white balance setting looked pretty good with the lights in the warehouse. The two primary LED lights I brought (Croma Lite Panels, bought for $200 each on sale) allow you to adjust the color temperature from 3000K to 5000K. Standard fluorescent is around 4200K, so I simply dialed both lights to their Kelvin mid-point.
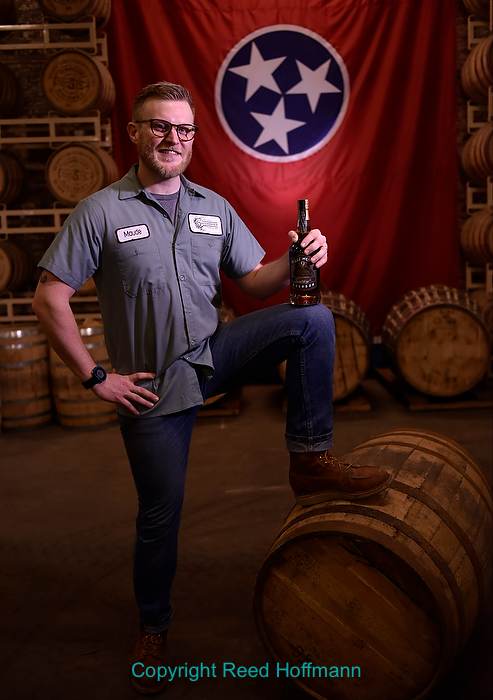
For these two photos, I used one Lite Panel off to the right to light Brian, and the second to add light to the lower part of the Tennessee flag. In the top photo, you can see that careful positioning of Brian’s left hand and bottle of whiskey hid that second light. The lower photo shows the setup. Nikon D810, ISO 1000, 1/125 at f/2.8, Nikkor 24-70mm lens. Both photos copyright Reed Hoffmann.
From that point on it was simply a matter of deciding where the lights should go and how to pose the subject. Brian (who works there and was acting as our model) was great, and it was easy to adjust the lights for direction by simply watching where the light went. If we needed more or less power we could either dial it up or down on the lights (they also have a power dial) or simply move the lights closer or further away. I had two of the Croma’s, and also brought along a small LED spotlight (rechargable via USB, by Ikan). We used that as a backlight in some situations and as a spotlight in others. I brought one compact light stand and a couple of Joby GorillaPods (to either add a second light to the stand or position a light behind the subject).
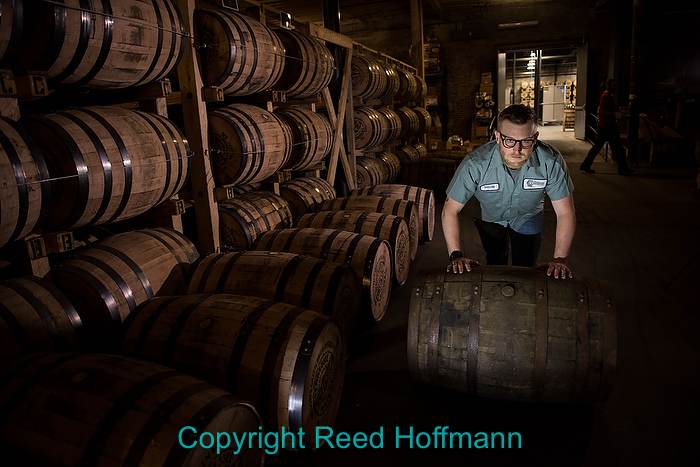
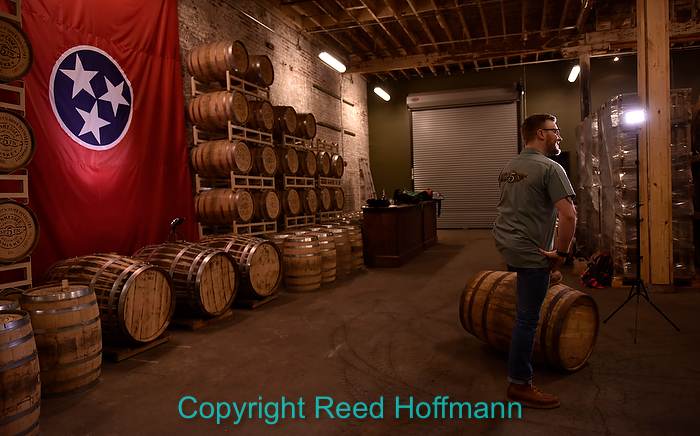
With flash you can stop action, but not with low-power constant light sources. To create this “action” shot, I posed Brian so he looked like he was rolling the barrel, when in fact he was standing still. Nikon D810, 1000 ISO, 1/80 at f/2.8, Nikkor 24-70mm f/2.8 lens. Photo copyright Reed Hoffmann.
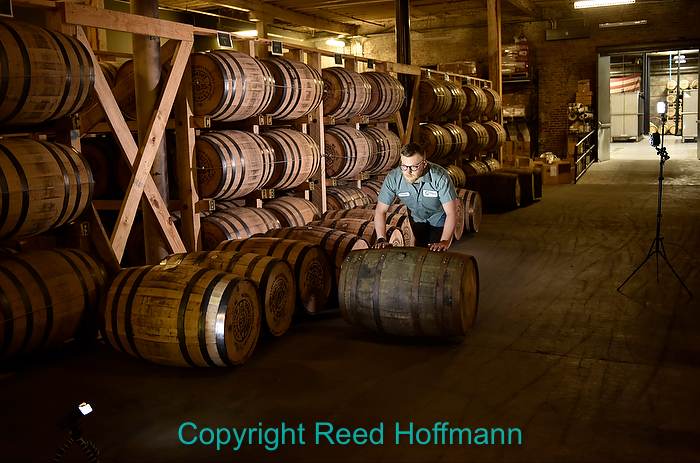
Part of the reason for the slower shutter speed and wider aperture was because the lights were further away, meaning less power. You can see the spotlight on the ground in front of Brian, and both Lite Panels on the stand behind and to the right, angled to light the row of barrels. Photo copyright Reed
All in all it was a lot of fun, and took me back to those early days of learning how to light. I’d forgotten how nice it was to simply move the light and watch what happens. Plus, these LED lights are easier to use, adjustable for both power and color temperature and, don’t get hot. Even better, since they run on six AA batteries, we didn’t blow a single fuse (they can also be powered by AC, and at a much lower draw than those old lights). It’s been over thirty years since I last used constant lights for stills, but it won’t be another thirty. In the future, for certain assignments, these LED’s will be the first gear in my bag. And not just for shooting video!
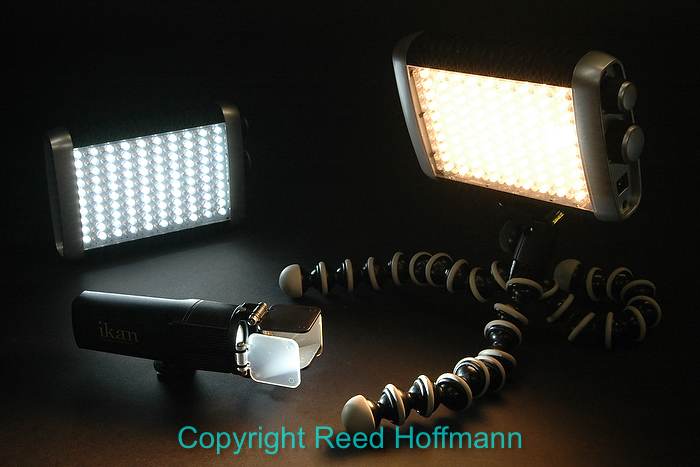
Here are the three lights I used for this shoot. The two Croma Lite Panels (one dialed to 3000, looking orange, the other at 5000, white) and the little Ikan spotlight. Plus one of the Joby GorillaPods. Photo copyright Reed Hoffmann.
(if you like this story, please share it with friends, and also let them know about the photography tips I post on my business Facebook page)


