Having lots of menu choices and switches on our cameras today is both good and bad. It’s great to have options, but can be difficult to figure them out. Nowhere is that more apparent than with autofocus.
Over the last six months I’ve had several shoots with time to play with those AF options, and now have a deeper understanding of how to get the most out of them.
The first opportunity was last summer, spending three weeks in the Arctic teaching photography on two cruises. In November I led a long trip to India. And finally, in December I spent a week in Colorado. The key with all of them was that I was able to shoot the same kind of action over and over (birds in the Arctic, people in India and skiers and skaters in Colorado) while trying different settings. That, combined with what I already knew about those settings, led me to this sad conclusion: there is no one best autofocus option. Which actually makes sense. If there was, why have a bunch of options? So what you need to do is understand what AF settings work best for what types of action. And that’s just what I hope to explain in this story, at least for Nikon cameras.
To start with, it’s important to realize that autofocus settings break down into two main choices:
1 – How the AF system is going to work.
2 – Where the AF system is going to focus.
Let’s start with the “How.” In Nikon cameras, that comes down to choices between AF-A (Automatic), AF-S (Single Servo) and AF-C (Continuous).
AF-A is “point-and-shoot” mode. If you set your camera that way, then the camera decides whether to use AF-S or AF-C. I’d rather decide that myself.

If you leave your camera in AF-A mode, it has to decide if your subject is moving or not, and then choose whether to track or lock focus. Nikon D7200, Aperture Priority, ISO 200, 1/1600 at f4.5, EV -1.0, Nikkor 70-200mm f/2.8 lens at 112mm. Photo copyright Reed Hoffmann.
AF-S is what’s referred to as “Single Servo.” It expects you to be shooting static (non-moving) subjects, and by default won’t let you shoot a picture until the camera decides the subject is in focus. That’s fine for landscapes and portraits, but does have the drawback of the camera deciding when you can take a picture. I rarely use it.

AF-S uses a single AF sensor (or point). It’s good for non-moving subjects, like this musician in India. Nikon D7200, Aperture Priority, ISO 400, 1/200 at f3.5, EV -3.0, Nikkor 70-200mm f/2.8 lens at 80mm. Photo copyright Reed Hoffmann.
AF-C – The “C” stands for “Continuous,” meaning the camera is free to continually adjust focus in an effort to keep the subject sharp. This is my preferred setting, as it also means the camera is in “Release Priority,” meaning it will shoot anytime I press the shutter button (you can also change AF-S to be “Release Priority” in Custom Settings). More importantly, the camera will try to track a subject in motion, and maintain focus. I like that because I don’t have to change my AF settings (from AF-S to AF-C) whenever I think I’m going to shoot action. The downside of this is that the camera will never “lock” on a subject and stop attempting to focus (like in AF-S). To counter that, I do something referred to as “back-button focus.” I take focus activation off the shutter button and make it so the only time the camera will focus is when I’m pressing a button on the back (done through Custom Settings, either “Autofocus” or “Controls”). In this way I separate the act of shooting (shutter button) from focusing (back button), and also make it easy to choose between continuous focus action (holding the button in) or focus and stop (by taking my thumb off the button). So in this way, having the camera set to AF-C means that as long as I hold down that back button the camera will be watching for movement and trying to adjust, but as soon as I let go of the button, the focus is turned off, or “locked,” at the current distance.
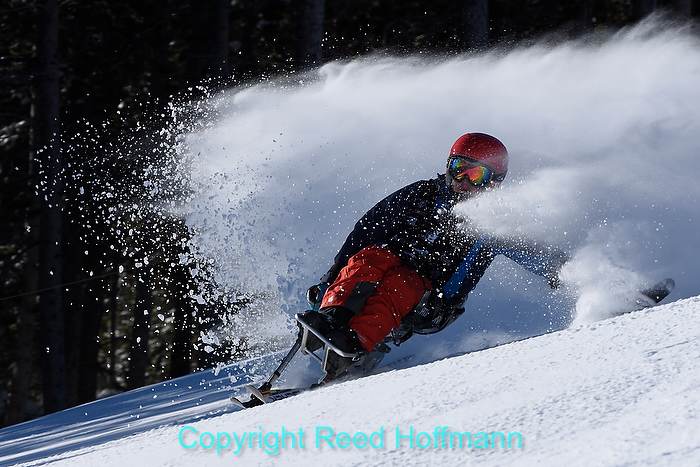
For action shots, AF-C is the way to go. The camera and lens did an excellent job keeping this skier in focus. Nikon D7200, Aperture Priority, ISO 200, 1/800 at f/8, EV -0.7, Nikkor 70-300 mm f/4.5-5.6 lens at 220mm. Photo copyright Reed Hoffmann.
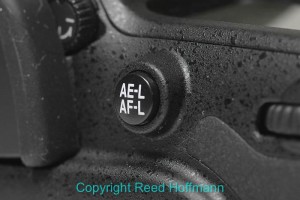
I can program my cameras to change focus activation to a button on the back, like the AE-L/AF-L button on my Nikon D7200. Photo copyright Reed Hoffmann.
Here’s how that works in real life. If it’s a non-moving subject, I simply press that back button, let the camera focus, then release the button and shoot. If the subject’s moving, I keep that back button pressed in so the AF can follow the subject, maintaining focus while I shoot.
Now that you understand “How,” it’s time to focus on the “Where.” Before I get into that, though, it’s really, really important to understand one more thing – no lens can focus in more than one place at one time. That’s simply not possible (at least not yet). So while your camera may (and probably does) have dozens of autofocus sensors, it can only focus in ONE spot at a time. Meaning that while it’s possible it’s using several sensors to try to locate and hold (or track) focus, it can still only use one at a time to actually focus.
With that bit of technical mumbo-jumbo out of the way, let’s look at the choices Nikon gives us for deciding where the lens will focus. I’m going to list all the options offered across Nikon’s entire lineup of digital SLRs. Not all of the cameras will have all these choices. And, in all but the auto modes, the camera will start with one point (sensor), and you can shift which sensor is active by using the thumb pad on the back of the camera. From now on I’ll refer to that as the “active” sensor.
Auto – This is essentially point-and-shoot mode. The camera looks at all of its AF sensors and generally uses the one that’s on whatever’s closest to you. Why do I say “generally?” Because the number of points touching something, and the distance are also taken into account. Despite that, you can think of this as “closest-subject-priority” autofocus. Which means that most of the time, whatever’s closest to you that a sensor is on is where the camera will focus.
My Usage – I sometimes choose this, and suggest it to students, when action will be unpredictable and isolated (like a bird in flight).
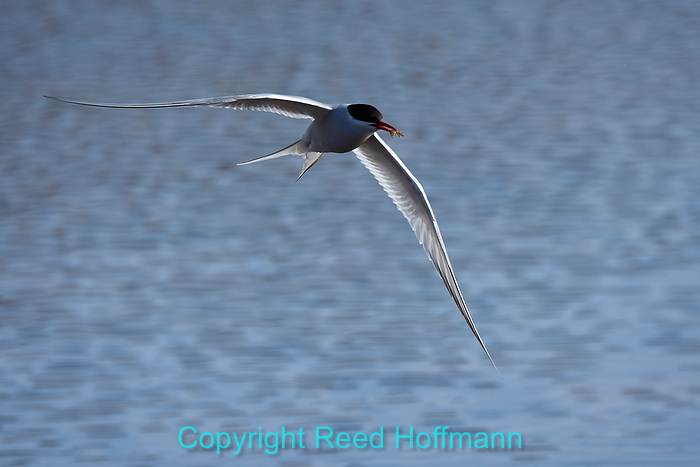
This is a perfect example of when to use “Auto” autofocus. There’s nothing between me and the bird, so the camera can easily focus on it without me worrying about getting an AF sensor on it. Nikon D7200, Aperture Priority, ISO 400, 1/2000 at f/8, EV -0.7, Nikkor 80-400mm f/4.5-5.6 lens at 400mm. Photo copyright Reed Hoffmann.
Single Point – If you choose this, the camera will only ever focus in one place – wherever the active AF sensor is. This is the fastest AF mode because the camera only has to do one thing – focus where that sensor is. But it’s also difficult to use, because if you move the sensor off your subject, the camera will change focus. So following an erratic subject, especially if they’re a small part of the frame, can be difficult.
My Usage – I rarely use this one because it means I have to be very, very careful about keeping it on the one spot I want in focus.

If your subject’s not moving much, then it’s easy to use Single Point to keep them in focus (and yes I was a little nervous shooting this!). Nikon D750, Aperture Priority, ISO 200, 1/125 at f8, EV +0.3, Nikon 16-35mm f/4 lens at 26mm. Photo copyright Reed Hoffmann.
Dynamic, 9, 21, 39, 51 – This is where things get a bit confusing, but also more interesting. In any of these settings, the camera is still focusing where the active sensor is. But, what makes it different from Single Point is that the camera is also paying attention to some of the surrounding sensors. Which ones? That depends on what you’ve chosen. For instance, if you pick Dynamic 9, then the camera is using one sensor as the active sensor, where it’s going to focus. But it’s also watching the surrounding eight (for nine total). If the subject you’re tracking with that active sensor suddenly disappears, instead of changing focus immediately (which is Single Point behavior), the camera instead sees if that subject is now under one of the other sensors in the group. If it is, the camera will briefly hand off tracking and focus to that other sensor. The key word here is “briefly.” You’re expected to get the active sensor back on the subject. If you don’t, THEN the camera will shift focus to whatever the new subject is.
My Usage – This has been my go-to AF setting for a number of years now, usually choosing Dynamic 21. Sort of in the Goldilocks, “not too cold, not too hot” way of thinking. It gives me a relatively large area to work with, as long as I can get that active sensor on the subject to start with. And, it tends to give me pretty fast AF performance as well.

When I’ve got a fast-moving subject, I love to use Dynamic, and my default is 21-point. That way as the puffin jumps off the cliff I can concentrate on keeping it in the frame, and worry less about having a single point on it. Nikon D7200, Aperture Priority, ISO 400, 1/500 at f/5.6, EV -0.7, Nikkor 80-400mm f/4.5-5.6 lens at 350mm. Photo copyright Reed Hoffmann.
3D – When you use Dynamic, the camera expects you to get that active sensor back on the subject. With 3D it doesn’t. In other words, in 3D, once the camera’s tracking with the active sensor, it will attempt to keep that subject in focus regardless of where they are in the frame, as long as at least one AF sensor is on the subject. It also takes the color of the subject into account. This lets you shift your framing for the composition you prefer, and the camera will shift the sensor to match. However, this is only true as long as the autofocus is active. As soon as you release it (by releasing pressure on the shutter button or the rear focus button), the camera resets back to whatever active sensor you started with. This focus mode is also slower than the others, so not the best choice for fast action.
My Usage – For slow moving subjects, or portraits where people are talking and I want to keep the focus on the near eye. 3D lets me change composition while maintaining focus, which is great, but it’s not the fastest of the AF choices.
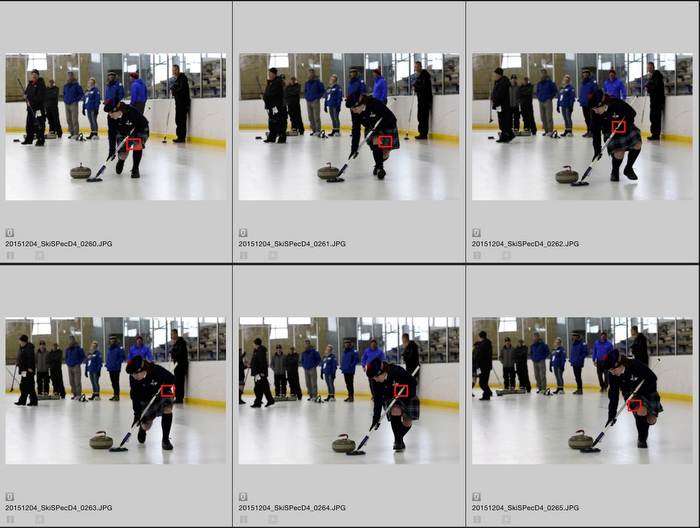
Nikon’s ViewNX-i software can show you what point the AF system was using. In this case, you can see how that little red square says on the sweeper as I concentrate on my framing. (Screenshot from software)
Group – The newest option, only on the most recent higher-end cameras, Group is essentially a combination of Dynamic and Auto. It uses five points, but acquires and tracks whatever’s closest to you out of those five. This is especially handy for shooting fast action at a distance, where your subject’s a small part of the frame. Instead of having to worry about getting that one point on a small subject, only one of those FIVE points has to be there.
My Usage – When shooting the D4S, because of its speed, this is what I often use. It seems to work particularly well for sports like football and baseball, where I’m at some distance from the action and thus am more likely to miss with a single AF point.

A perfect time to use Group, as I want to make sure the focus stays on the two birds flying over the small island.
Nikon D7200, Aperture Priority, ISO 200, 1/1250 at f/8, EV -0.7, Nikkor 80-400mm f/4.5-5.6 lens at 370mm. Photo copyright Reed Hoffmann.
“Focus tracking with lock-on” – This is one more menu choice, found in Custom Setting, that you should look at and think about. Since it’s normal that things may come between you and your subject, Nikon has designed some tolerance for that into their AF systems. In other words, the if the camera is tracking a subject and suddenly it doesn’t “see” that subject any more, it will hesitate before changing focus. That means that if something blocks your view briefly (pole, person, etc.), the camera won’t immediately change focus to that object. On some of their more advanced cameras, you can adjust that tolerance, or amount of time it waits, from longer to shorter or even off.
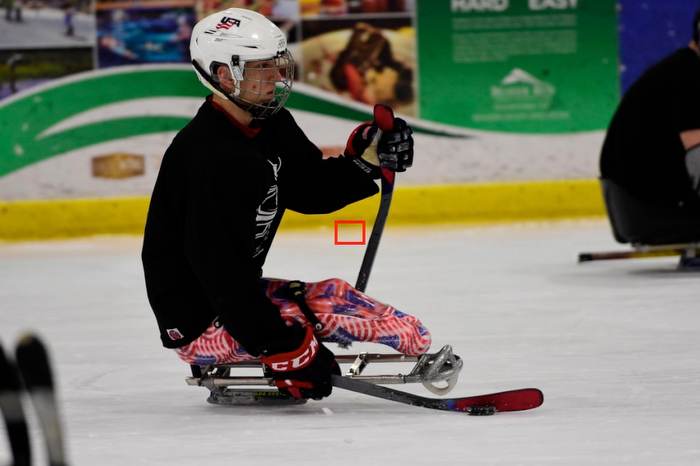
Again a screenshot from Nikon ViewnNX-i, you can see that the autofocus sensor is actually missing the subject, but the subject’s still in focus. That’s because I’m using Dynamic 21, and the delay is set to Normal, so it maintains focus on the subject briefly, giving me time to re-frame. (Screenshot from software)
Unfortunately, autofocus performance isn’t just about settings and menus. There are a few other things that affect it as well:
Quantity of light – The brighter the available light and the faster the lens (widest aperture), the faster any AF system will perform. Which means that the less light you’ve got (indoors, night), the slower you can expect autofocus to be. In those conditions it’s even more important to use a “fast” lens, not for exposure, but to help AF.
Subject – Autofocus needs contrast and detail to be successful. The less you have of those, the harder it will be for the system to focus. That’s why it often “hunts” when in low light, or struggles to focus on dark colors or solid tones (like black areas, or a blue sky).
AF module and camera – Autofocus performance (which means speed to most of us) is also dependent on the “module” the camera has and the processing power of the camera. A more expensive camera will often have a more powerful autofocus module (more sensors and/or additional “cross-type” sensors), and more powerful processors to run the calculations it does. For example, Nikon’s most powerful (and expensive) camera, the D4S, has the Multi-CAM 3500FX module and 51 sensors. The D5500, a very capable mid-level camera, has the Multi-CAM 4800DX module and 39 sensors. Of course, one reason the D4S has to be so much faster is it can shoot twice as many frames per second as the D5500.
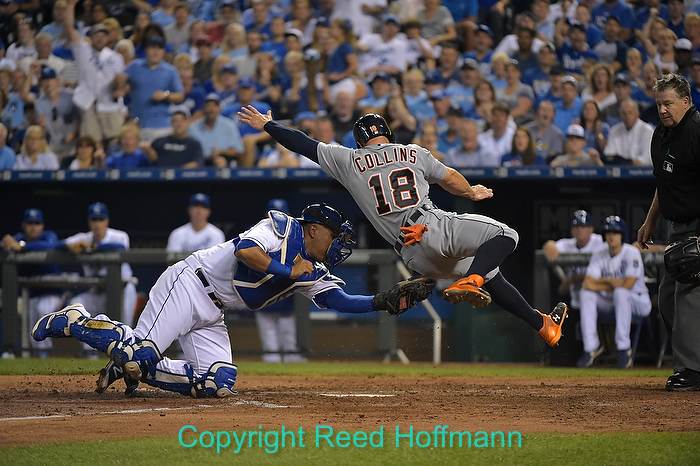
When I’m shooting fast action, I want the most powerful camera I’ve got. In this case it’s the Nikon D4S, ISO 5000, 1/2000 at f/4, Nikkor 200-400mm f/4 lens. Photo copyright the Associated Press.
Also, in any discussion about focus, manual focus should be included. There are times when turning off the autofocus is the best, or perhaps even simplest, choice. For instance, if I know the spot that action’s going to take place, and I can pre-focus there, I’ll do simply that. Why risk the chance that autofocus might miss when you can pretty much guarantee a sharp picture? The other time I regularly switch to manual focus is for night photography. Due to the lack of light, it’s usually easier to do that than struggle trying to get autofocus to work.
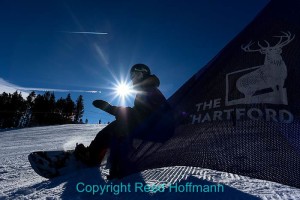
Because the subject is blocked until the last millisecond, I’ve pre-focused manually to where I think he’ll be.
Nikon D750, Manual exposure, ISO 400, 1/2500 at f/7.1, Nikkor 20mm f/1.8 lens at 20mm. Photo copyright Reed Hoffmann.

Night photography is the other time I’ll almost always turn off autofocus. I usually find it easier in that case to focus manually. Nikon D3S, ISO 2000, 30 seconds at f/5, Nikkor 24-70mm f/2.8 lens at 26mm. Photo copyright Reed Hoffmann.
And finally, it’s always good to remember that no AF system is perfect. You can buy the most expensive camera with the most powerful autofocus system and pair it with the most expensive fast-aperture lenses made. Take that combination out in bright sunlight to shoot action and guess what? You’ll still miss some. But you know what else? You won’t miss as many. As with most things in life, you get what you pay for. Better gear will mean a higher percentage of in-focus shots. But that doesn’t mean you can’t do a good job with what you’ve got. A little knowledge, a lot of practice, and you might surprise yourself with the pictures you make.
———————–
If you’re interested in more information on Nikon’s AF systems, here are links to some other stories:
D4 technical manual – http://nps.nikonimaging.com/technical_solutions/d4_tips/autofocus/
Nikon article on predictive AF – http://www.nikon.com/about/technology/rd/core/software/caf/index.htm
Autofocus stories on Nikon’s education site – http://www.nikonusa.com/en/learn-and-explore/query/h4l7gjc2/autofocus.html
(If you like this story, please share it with your friends, and also let them know about the links about photography I post on my business Facebook page)

