On a recent workshop in the alps, we had a sunset shoot scheduled for the Matterhorn. As impressive as the Matterhorn was, my eye was caught by something else there – an observatory.
Our group had taken the cog railway to the top of Gornergrat for the evening session. At 10,000-ft, that peak has great views of not just the Matterhorn, but an entire vista of high mountains. In addition to the views, there’s also a café and hotel. And built off one corner of that hotel is an observatory.
One thing I preach when teaching photography is the importance of “different.” It’s rare you’ll have the opportunity to make a truly unique picture, so the rest of the time you need to try to find a different way to shoot your subject. For me, on top of Gornergrat, that observatory was my opportunity.
As the light started to fade into sunset, you could see there was a light on in the observatory. Problem was, the last train would be leaving before it got dark enough to really see that against a dark sky. And that meant I needed to shoot a series of images to create an HDR composite.
All cameras have a limited range of light they can capture. That’s why we’re often forced to choose between exposing for the bright areas or the dark areas in photos. Especially in high-contrast situations, you’ll rarely be able to expose a single frame and get detail in all areas. HDR stands for “high dynamic range,” and means you’re going to shoot several frames of the same scene, but change the exposure for each frame. Then, using software, you combine those frames to create a single image that’s able to show more detail, in those light and dark areas, than you could with a single snap.
Some cameras have an HDR feature built in, but that usually means only two or three frames, and you have little control over how they’re combined. It’s a good way to start with HDR, but if you do much of it, you’ll eventually be shooting individual frames and merging them yourself.
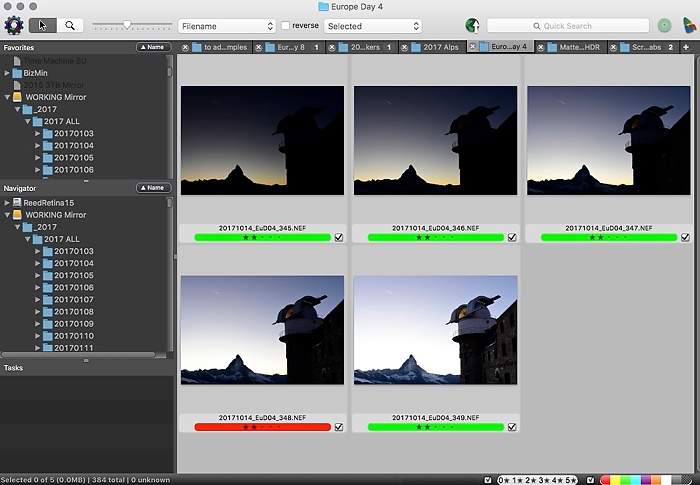
I set my camera for a five-frame, five-stop bracket sequence, Aperture Priority at f/5 (you want the shutter speed to shift, not the depth of field), turned on “Continuous High” frame rate (to have less movement between frames), braced myself and held down the shutter button. If you’ve got a tripod, you should use it. In my case, though, no tripod meant doing it hand-held. The darkest exposure captured the rich sunset behind the Matterhorn, the lightest the most light in the observatory. Now I needed to blend those five together.

Here are the three Nikon NEF files that I’d use to make the HDR composite.
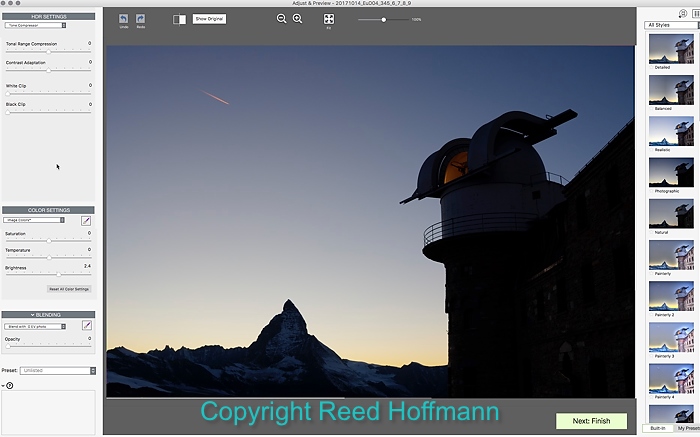
To assemble an HDR, I often use HDR Expose 3 by Pinnacle Systems because it does a great job of creating a realistic look. But this time I decided to try another popular program, Photomatix Pro. After loading the five images into it, I started by choosing from a group of presets, then made manual adjustments. My goal in this software is not a finished image, but one that preserves the highlight and shadow detail I care most about. For me that usually means letting some of the shadows go black, to retain some contrast in the photo.

This is as far as I went with the five images using Photomatix Pro. Photo copyright Reed Hoffmann.
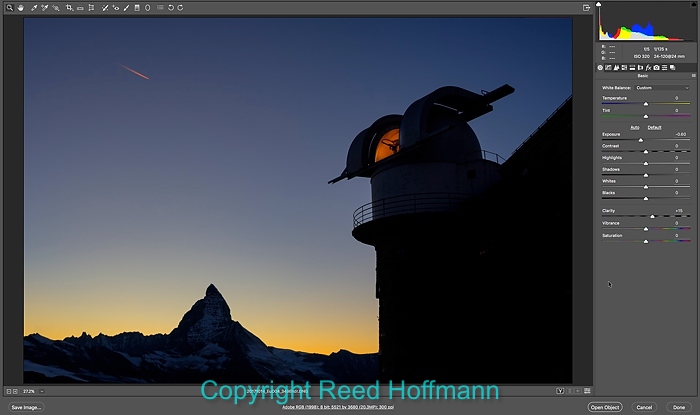
After doing the basic work in Photomatix, I opened the image into Adobe Camera Raw, my primary editor, for the final touches. When I’m done there I saved the file as a DNG so I could go back and re-edit whenever I chose.

Opening the composite into Photoshop, I did the rest of the editing using Adobe Camera Raw, then saved the image out as a DNG. Photo copyright Reed Hoffmann.
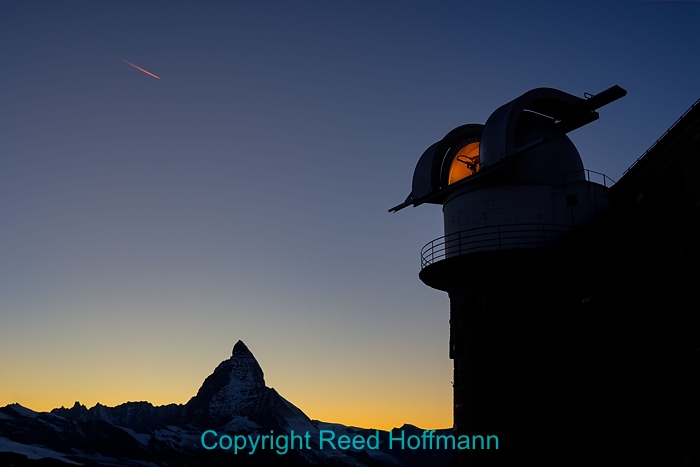
I was pleased with the resulting image, and having the contrail in the sky above the observatory was an added bonus. While I’m a fan of HDR, I only use it occasionally. As with anything else, it can be overused. Photography, like most crafts, involves learning to use a variety of tools, and then trying to pick the right one for what you want to do. In this case, HDR was that tool.
(If you like this, please share it with your friends, and let them know about the links about photography I post on my business Facebook page. I’m also on Instagram and Twitter, @reedhoffmann)

The finished HDR composite of the observatory on Gornergrat with the Matterhorn in the background. Nikon D7500, ISO 320, f/5, 1/500 to 1/30 second shutter speeds, Nikkor 24-120mm lens at 36mm. Photo copyright Reed Hoffmann.
