The last few months I’ve had a number of assignments I haven’t had time to write about, so here’s a story about the first of them. This shoot was for a local company, Brookside Optical. Leon, the owner, called and asked if I could shoot a series of eyeglass frames needed for new store displays. He arranged for a model, Hannah, and we decided to use his home as our location. He has a large, open basement with a high ceiling, which would work well for the studio I planned to set up. And Leon could help out by holding reflectors and making creative suggestions as the shoot progressed. Despite planning to set up that studio, we didn’t use it right away. One thing I always stress when teaching is to remain open to possibilities – don’t get tunnel vision, so focused on one photo you forget to see what else there might be. While we had planned on setting up a studio, it was a bright sunny day. So rather than go straight to the basement, I thought we’d try taking advantage of the strong available light on the main floor first (it was too cold outside to shoot).
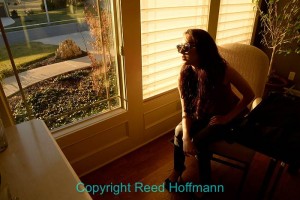
Hannah in the dining room, by the window we’d use for both lighting and background. Nikon D610, ISO 100, shutter speed of 1/13 at f/13, 24-120mm f/4 lens. Photo copyright Reed Hoffmann.
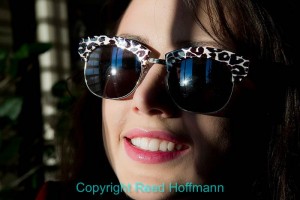
Playing with the sun and hard shadow from the window, I used a small aperture to emphasize the starburst of the sun in the lenses. Nikon D610, ISO 100, shutter speed of 1/40 at f/16, 24-120mm f/4 lens at 92mm. Photo copyright Reed Hoffmann.
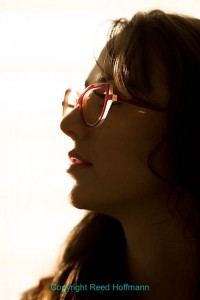
Shooting against the window, and overexposing, I could let the eyewear really pop out of the photo. Nikon D610, ISO 100, shutter speed of 1/250 at f/4, 70-200mm f/2.8 lens at 200mm. Photo copyright Reed Hoffmann.
Photography revolves around subject, light and background. Hannah was my subject, which left light and background for me to work with. I chose the dining room as our first location because it offered strong light coming in through the windows. For a background I could either shoot into that light or use the heavy shadows it was creating against the wall as a background. When working with hard, single-source light like that, you can choose to shoot either a silhouette or work with the hard shadows it creates. We did both, and that gave us some nice photos that would be quite different from the studio work we’d do downstairs.
Moving to the basement, I unpacked my portable studio. First up was the backdrop stand, with one of the two muslin cloth backdrops I’d brought. The Inverse Square Law affects every photographer who works with artificial light. If you don’t understand it, you won’t be able to take advantage of it. In simplest terms it says that the closer your light to the subject, the faster the fall-off of that light behind the subject. That means by simply changing the distance of the light to your subject, you can choose how much the background is visible in the exposure. (Click here for a more technical explanation) That meant I could change the look of the background two ways – one by changing the background itself, and the other by moving the light nearer or farther from the subject.
Next, I set up the lights. If I’m not lighting a large area (auditorium, ballroom, arena), I prefer to work with accessory flashes, what are often called “speedlights.” My two lighting kits have a total of about seven Nikon speedlights, from the SB-600 to the SB-910. Despite having a bunch, I learned long ago that the secret to good lighting wasn’t quantity, but quality. I prefer to work with just one to three lights when possible. Since quality is what’s important, that means light modifiers, accessories that help me change the size and/or spread of the light. Once the backdrop was up, I assembled two soft boxes, got out an umbrella and pulled out a snoot and a grid. Soft boxes change the size of the light source from small (the flash head) to large (the fabric front of the box). Umbrellas also turn the light into a larger source by reflecting it back out. And larger light sources means softer light (shadows aren’t has hard or dark). Snoots and grids let me create a narrow shaft of light that can be directed to a small area. Now that my tools were ready, it was time to start looking at the frames Leon needed shot and decide the best way to do that with Hannah.
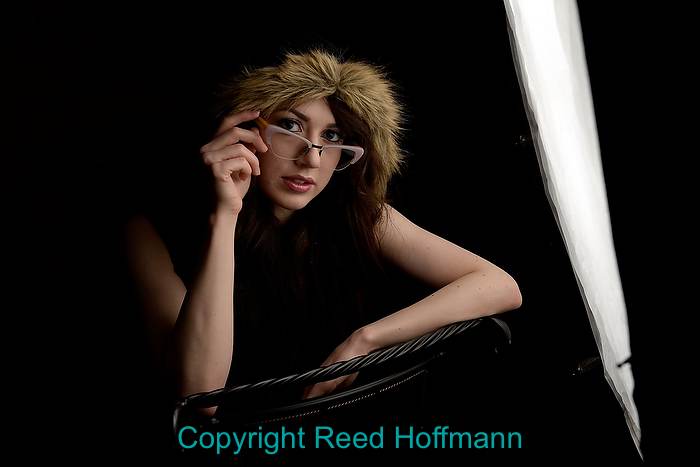
With just one large softbox close to Hannah, I get a very large, soft light on her, perfect for a simple shot like this. Nikon D610, ISO 100, shutter speed of 1/160 at f/5.6, 24-120mm f/4 lens at 27mm. Photo copyright Reed Hoffmann.
As always, it’s important to remember what purpose your pictures will serve. In this case, it was all about selling the frames, so Hannah, the model, was secondary. My goal then was to make pictures that would clearly show those glasses, in interesting ways. I started with one large soft box, very close to Hannah. Having it close helps me in two ways. One, the closer the light source, the larger it is in relation to the subject. The larger the light source, the softer the light, like being near a window. And second, having it close to her means the background will probably go black. That’s the Inverse Square Law doing its thing. Next I added a spotlight to the back of her head, off to one side. Using a speedlight with a grid, so I could keep it in a tight beam and then adjust its power depending on how bright I wanted that backlight/hairlight to be.
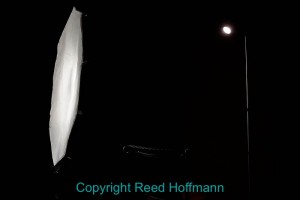
By putting the softbox on one side and the backlight behind and to the other side, I’d be crossing my lights to help separate her from the background. Nikon D610, ISO 100, shutter speed of 1/160 at f/6.3, 24-120mm f/4 lens at 34mm. Photo copyright Reed Hoffmann.
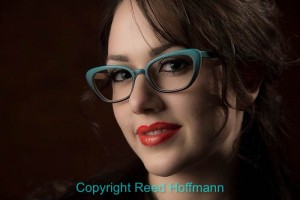
Here’s the result of that lighting set-up, main light on the left, backlight coming in from behind to highlight her hair and neck. Nikon D610, ISO 100, shutter speed of 1/250 at f/6.3, 24-120mm f/4 lens at 120mm . Photo copyright Reed Hoffmann.
Most of the shots used that combination, although sometimes I brought a second softbox in to add light to the shadow side of her face. And occasionally I simply put a reflector on that side, very close, to kick in some extra light. Either of those steps made the lighting less dramatic, giving it a different look. And moving her closer and further from the backdrop changed whether the backdrop was visible, adding some extra color, or even depth, to the scene.
A few years ago I added a simple ringflash to my lighting kit. A ringflash mounts to the front of the camera, not surprisingly in a ring around the lens. Traditional ones have multiple bulbs in that ring, while mine simply mounts on an existing speedlight which “feeds” light to the ring. Since all of the light is coming from around the lens, it produces a very flat light that is a popular look for fashion or portraiture. Plus, the catchlight in the subject’s eyes is ring-shaped, which is again different. Keeping my 50mm lens at a wide aperture (between f/1.8 and f/2.8) created a very shallow depth of field. That combination produced some nice images, and with the right glasses the photo really jumped off the screen.
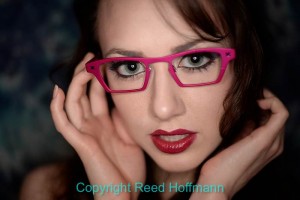
As you can see, the ringflash creates no shadows, which is part of the unique look it gives. Nikon D610, ISO 200, shutter speed of 1/160 at f/1.8, 50mm f/1.8 lens. Photo copyright Reed Hoffmann.
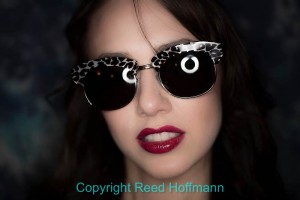
Thanks to the lenses in these sunglasses, you can easily see the shape of the ringflash around the lens. Nikon D610, ISO 200, shutter speed of 1/160 at f/2.8, 50mm f/1.8 lens. Photo copyright Reed Hoffman.
Finally, any time I’m doing a shoot like this, I try to have a little fun and give the model some shots that are beyond the particular assignment we’re working towards. In this case that meant asking Hannah to lie down on the backdrop and arranging her hair so it looked like it was floating. Standing right over her and shooting down with the ringflash produced some nice images. We even shot some without glasses so Hannah would have more variety for her portfolio.
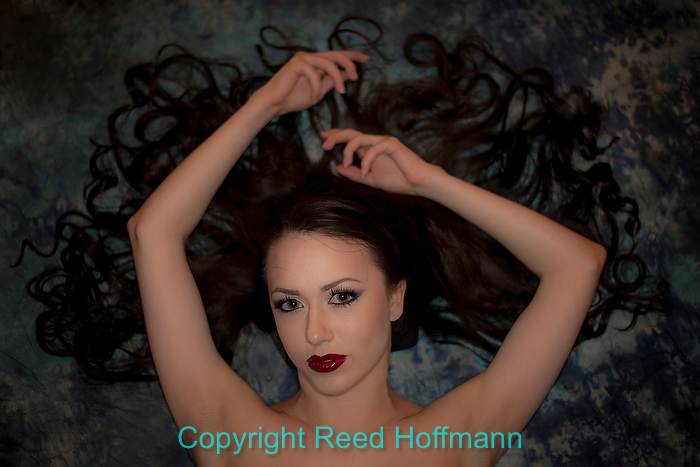
This was one of my favorite photos from the shoot, done at the very end as we were trying something new. Nikon D600, ISO 400, shutter speed of 1/160 at f/2, 50mm f/1.8 lens. Photo copyright Reed Hoffmann.
I’m a huge fan of using lights (flash, in this case) because they let you add another dimension of creativity to a shoot. No longer constrained by what’s available, you can let your imagination take over and make your own light. Once you begin to understand how to control the qualities of light – size, shape, distance, power – you can really start having fun. After all, if you’re not having fun with photography, why do it?
(For this shoot I used a Nikon D610 and three Nikkor lenses. The primary lens was a 24-120mm f/4, the second was a 50mm f/1.8, and for a few shots at the beginning I used a 70-200mm f/2.8. My main softbox was a Westcott Apollo Orb, and the smaller secondary one is made by Interfit. The Rogue Grid was from ExpoImaging, and the snoot was from Honl Photo)


