One of the great advantages of digital photography is that we’re able to control every step of the process. From capture to output, if you’ve got editing software and a printer, you can manage each step the image goes through. There’s a downside to that too. It takes time. That’s why sometimes I sacrifice quality for speed.
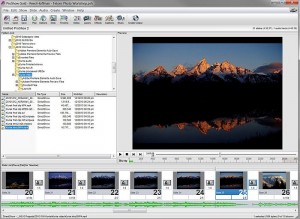
Last week I was assembling a slideshow of images and music from a workshop I led in the Tetons this fall. Not only is it a nice way to remember the trip and share it with friends and family, it’s also good marketing to show people interested in future trips (and I plan to share them soon on Vimeo – more on that in a later post).
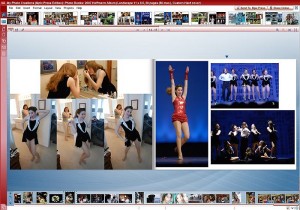
And a few days ago I was creating a family album by collecting photos from the year and running them through a book creation program. I’ve been doing that since 2000, and love the resulting books (I’m currently using MPix.com for this). A lot of these photos are snapshots, not works of art.
In both cases I chose speed and convenience over best possible quality. With the slideshow, for instance, I first used Photo Mechanic (my favorite browser) to select the images I wanted and imported that group into Adobe Lightroom. Then I started to adjust each of them (tone, color, crop, etc.), after which I’d have Lightroom process them out as JPEGs of the proper size and quality. And as I began working through them, I stopped and thought, “why am I taking all the time to do this?” I’ve always tried to live by the “shoot it right” mantra,” meaning I try to get the image right in-camera. And most of the time I come at least close to doing that. If I’m going to make a large print of a picture, then I certainly want to go in with editing software and make sure that final image is exactly right. But for a picture that’s going to be seen for 3-5 seconds in a slideshow, do I really need to do all that work? And my answer was, “No.” Which meant I went back to Photo Mechanic, selected that group of photos, and told Photo Mechanic to output them as highly compressed JPEGs, maximum size for HD display (1920 pixels max width, 1080 pixels max height), convert to sRGB and add some sharpening. And in a few minutes the photos were ready for the slideshow. Time saved? Well over an hour.
I then took that same philosophy when creating the photo book. The family photos were good enough without editing, and the book software was able to tweak those that needed any help. Which saved me time in building the book.
This is one of the main reasons I argue with people who say, “Just shoot in RAW and fix everything later.” Why spend all that time on the computer if you can get it right in the camera? Put a little more effort into the creation side of your photography, work to control the camera to capture the image the way you want when you push the shutter button. And then don’t forget to think about how the image will be viewed later, when you’re prepping them on the computer. If they’re going to be seen small or only briefly, make a conscious decision over how much time to spend getting them ready. You may decide like me that every photo doesn’t have to be a masterpiece – sometimes good is good enough.


