
Most people like those photos that show moving water as a cottony blur, and I’m often asked how that’s done. On our recent vacation to Colorado we hiked past several streams which gave me a chance to make some photos that demonstrate how to get that look.
To begin, let’s think about what needs to be done to achieve that. The key of course is using a very slow shutter speed. Shutter speed controls how action is recorded, so the slower the shutter speed, the more any action will blur. That means this is an exposure problem we’re working with, and goes against what is normally done.
In photography we’re always working with the exposure triangle of ISO, Shutter Speed and Aperture (f/stop). The three are connected. If you change one without changing the other two, the resulting photo will be darker (underexposed) or lighter (overexposed). If you want the amount of exposure to remain the same, then when you change one of the three, you have to change one of the other two also
The trick to a picture like this is a really long exposure. In this case it was five-seconds. Nikon D200, ISO 100, five-seconds at f/14, 70-200mm f/2.8 lens. Photo copyright Reed Hoffmann.
Most of the time we’re trying to avoid blur, as that often ruins pictures. In bright light (like sunshine), that’s not a problem because there’s so much light that a short (high) shutter speed is easy to get. As there’s less light, getting a fast shutter speed usually means raising the ISO. Alternatively we could open the lens to use a wider aperture, but once the lens is wide open, ISO is our only remaining choice.
On those occasions where we actually want more blur, then we need to do the opposite. We have to use those exposure controls to make the shutter speed as low, or slow, as possible. And that means working with the remaining two variables, ISO and Aperture.
To get the slowest possible shutter speed, we first set our ISO as low as possible (on many cameras today that means 100 or 200) and close the aperture to the smallest opening (highest f/stop number). I usually shoot my cameras in Aperture Priority exposure mode, so after lowering the ISO, I then dial my f/stop to the largest number (with SLRs that’s usually around f/22). You can do this with any camera – SLR or compact – that lets you control exposure. But sometimes doing this isn’t enough, because you need a REALLY slow shutter speed for the prettiest shots.
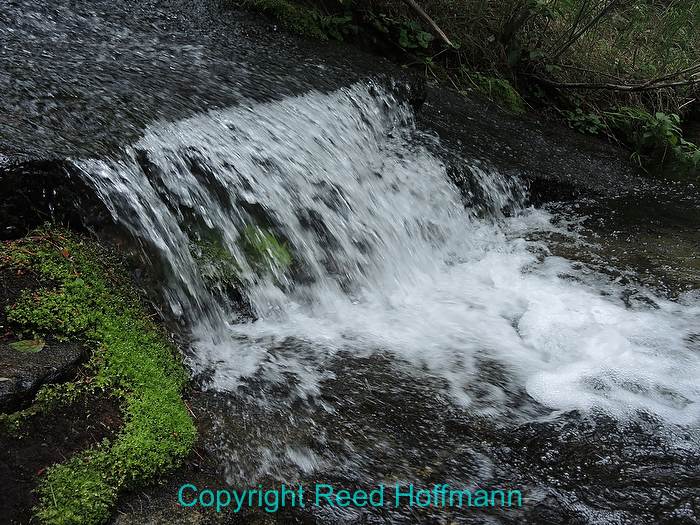
This is shooting the camera at its default settings, where it’s going to try to keep the shutter speed fairly high to avoid blur. Nikon Coolpix P7700, ISO 80, shutter speed 1/125 at f/2.8. Photo copyright Reed Hoffmann.
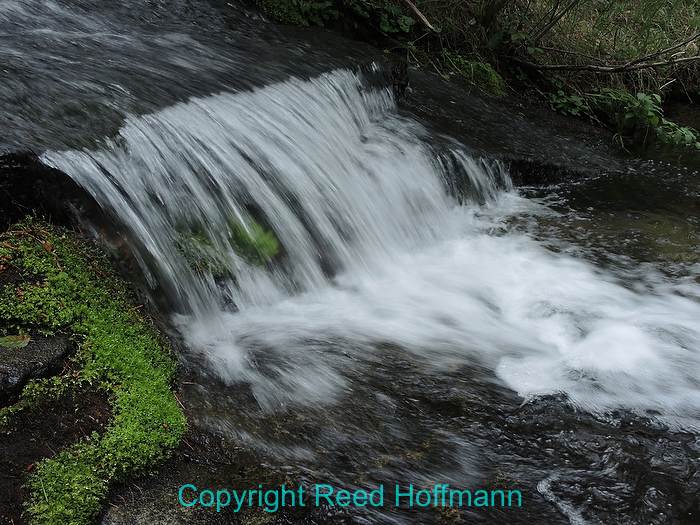
By putting the camera in Aperture Priority, I was able to close the aperture to its smallest setting, f/5.6 with this compact camera, to get a slower shutter speed. Nikon Coolpix P7700, ISO 80, 1/30 at f/5.6. Photo copyright Reed Hoffmann.
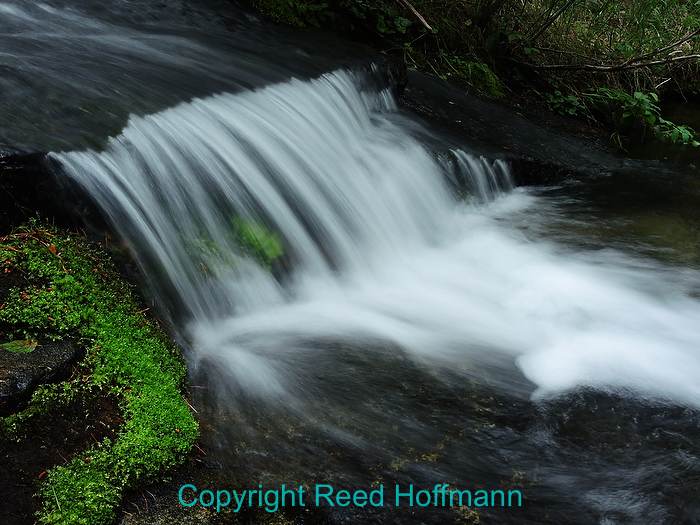
By turning on the built-in neutral density filter, I was able to lower my shutter speed an additional three stops. I also switched the Picture Control setting to Vivid to get more contrast and saturation. Nikon Coolpix P7700 with ND filter turned ON, ISO 80, 1/3 at f/5.6. Photo copyright Reed Hoffmann.
You may have noticed that most beautiful of those photos aren’t shot in bright sunlight. That’s because the more light you’ve got, the harder it is to get a slow shutter speed. So shooting in the shade, or better yet during a heavy overcast day, is what you really want to do. Better yet, how about early or late in the day, when the sun’s not even above the horizon? The less light you’ve got, the slower (longer) a shutter speed you can use. And the longer the shutter speed, the more the blur.
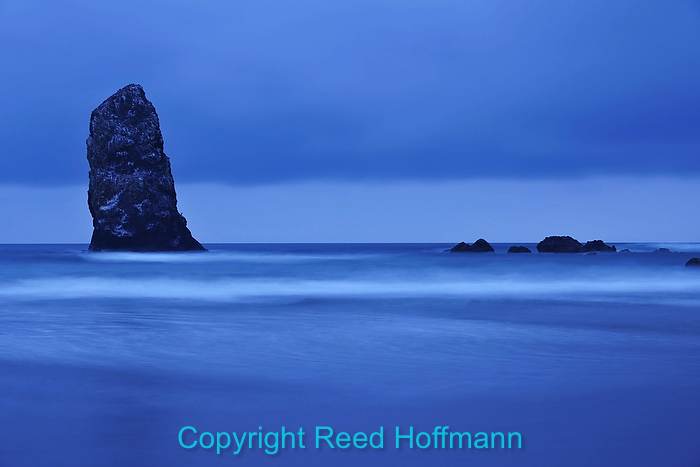
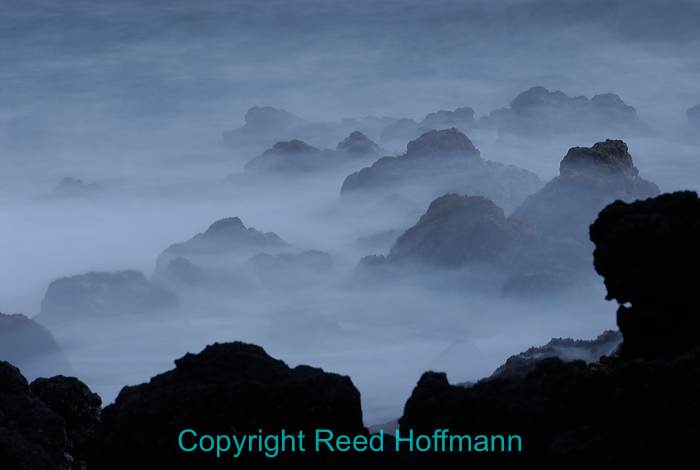
This shot of Haystack Rock on the Oregon coast didn’t need any filters to get a slow shutter speed because it was shot after sunset, when there was already very little light. Nikon D3X, ISO 200, eight-seconds at f/8. Photo copyright Reed Hoffmann.
But what if you’ve done all that, and still can’t get a REALLY low shutter speed? After all, the best shots are done at one-second or longer. In most of those photos, the photographer’s using a “neutral density” filter. That’s a filter that’s neutral – no change in color – and dense, meaning it blocks light. Simply stated, it’s a dark gray filter. When trying to create blur and get a really slow shutter speed, a neutral density filter is your best friend. You can get them in fixed densities for under $100, or pay several hundred and get one that’s variable. As you turn it (like a polarizing filter), it gets darker and lets less light in. These filters help you shoot at really slow speeds. If you’re buying one, get the darkest you can find. After all, you can always raise your ISO or open your aperture to let more light in if you need to.
Some compact cameras have built-in neutral density filters, like the Nikon Coolpix P7700 I took on vacation. Turning it on in that camera lowers my exposure three stops. In my examples, after doing everything else (lowest ISO, smallest aperture) that lets me go from 1/30 second down to ¼ (which means it’s a three-stop ND). One note about using compact cameras to do this: because of the smaller sensors used in these cameras, the lens design is different. Part of that difference means much greater depth of field at wider apertures than with SLRs. The bottom line on this is that with most compact cameras, your minimum (smallest) aperture may only be f/5.6 or f/8. Of course that reduces your ability to use a small aperture to get slow shutter speeds, which makes that built-in ND filter a real necessity.
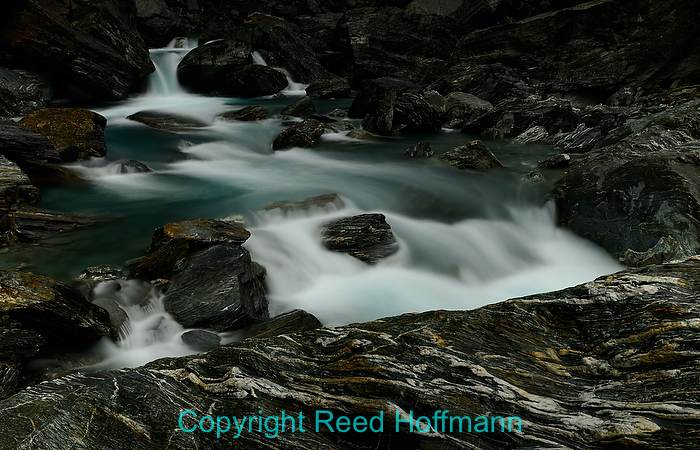
This is one of my favorites, of a river in New Zealand that we were shooting in the rain. The patterns of rock in the foreground made it special. And I used a variable neutral density filter to get a slower shutter speed. Nikon D800, ISO 50, three-seconds at f/16. Photo copyright Reed Hoffmann.
And of course, once you get to those really low shutter speeds, perhaps 1/15 or lower, you’d better have a tripod. If you’ve got image stabilization technology (Nikon calls theirs VR) in your camera or lens, then you might be able to shoot hand-held at slower speeds. But again, for those really long, multi-second shots, you’ll need to be on a tripod.
Exposure is one of the foundations of photography, and many photography problems and solutions revolve around it. Whenever you’re trying to figure out how to do a shot, or troubleshooting what went wrong, always start with exposure. And that’s all that’s involved in making a beautiful blurry-water shot – a good understanding of exposure and how to control it.