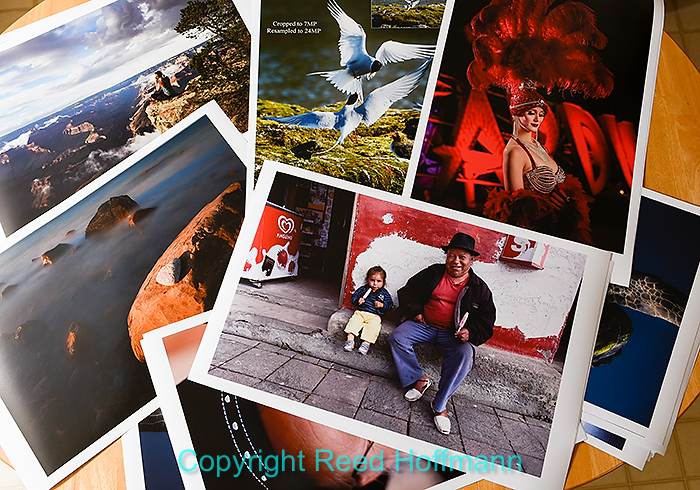
An old friend once told me, “It’s not a picture until you can hold it in your hands.” There’s some truth to that. Having a physical print to touch, to be able to change its angle to the light, move it closer and further from your eyes – there’s something special about that. Which is why I always urge people to print some of their favorite photos. That’s what I’ve been doing the last few days.
I’m getting ready to start my fourteenth year teaching Nikon School, and that means making prints. While the classes are mainly taught in lecture form, with a projector and screen to show pictures, Nikon and I both understand the value of prints. So every year I make a bunch of new 16 X 24-inch prints from some of my favorite photos to display at the schools. And it seems that each year, the process I use to do that changes.
When I started using a computer in photography it was in the early 90s, scanning negatives to prep them for publication using software. That was done with an early version of Photoshop. And when I started shooting digital full time in 1996, Photoshop remained the tool for working on those images. As I began teaching digital photography, both at newspapers and in workshops, I taught Photoshop too. But about ten years ago I started using Photoshop less, thanks to editing software made by Nikon, called Nikon Capture.
In time, Capture NX came out, using Control Point technology by Nik Software, and that became my primary editing software thanks to its power and ease of use. But Nik was eventually bought by Google, and last year the latest version, Nikon Capture NX 2 was discontinued (although it’s still available). So I needed to replace it. While many people have adopted Lightroom, I’m not sold on that workflow. So I moved back to Photoshop, and now use ACR (Adobe Camera Raw) as my first editing step these days.
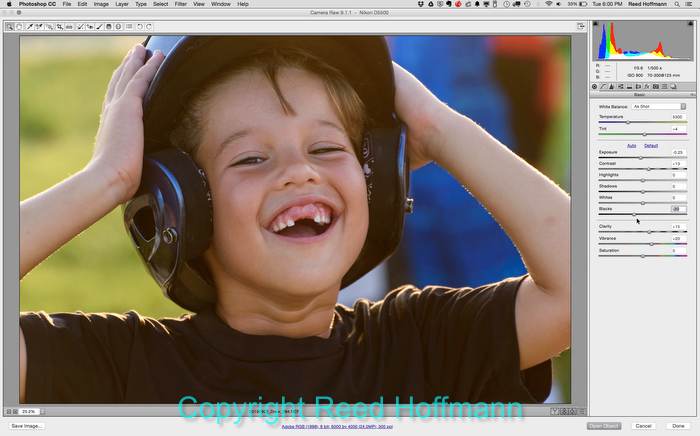
The first step I take in the edit process is to open the image into Adobe Camera Raw (ACR), then optimize it as much as possible using the tools there.
This year my process of prepping images to print goes like this:
1 – Open the Nikon file (usually a NEF, Nikon’s raw format) into Adobe Camera Raw (part of Photoshop CC). Make most adjustments there.
2 – Now open that file into Photoshop. If it needs further enhancements, I do that with the “Google Nik Collection,” which includes Viveza, which gives me Control Points again.
3 – After that I re-size the image to fit a 16 X 24-inch sheet of paper, using Photoshop’s “Image Size” dialog. If I’ve cropped a lot of the image out, I then
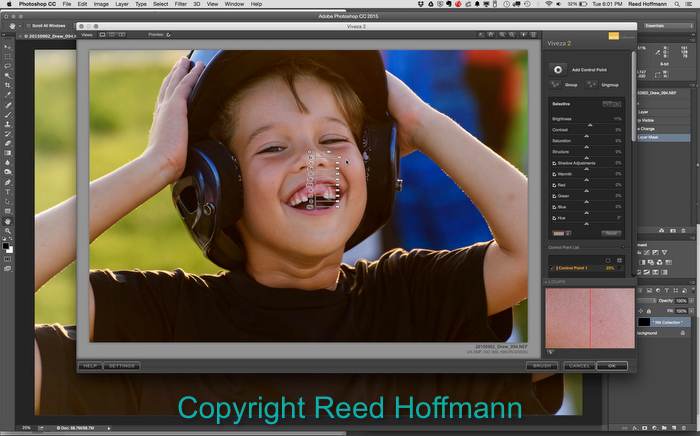
If I want to make further adjustments in Photoshop, I’m likely to use Viveza, a plug-in that’s part of the Google Nik Collection.
resample up to 300 PPI using that dialog. If not, I simply set the size I want and leave the PPI alone, as long as it’s above 200.
4 – If the image has been shot at a high ISO, or shows noticeable noise for some reason, I then use the Dfine plugin (also part of that collection) to reduce it.
5 – Finally, I add some sharpening using “Sharpener Pro,” another part of that Nik collection (since there’s a loss of some sharpness going to ink on paper, most professionals add a little sharpening before printing).
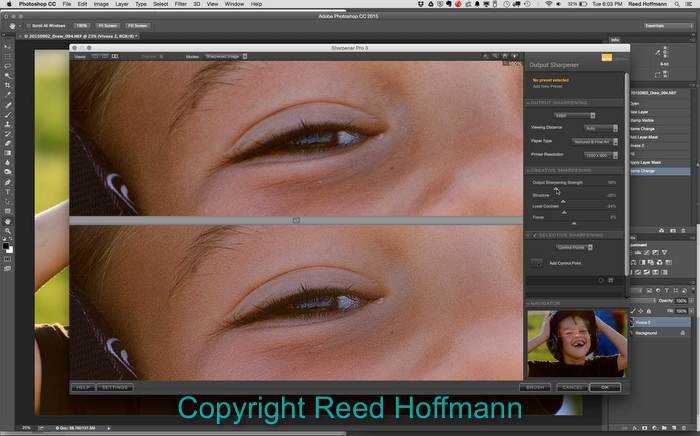
When printing anything larger than 8 X 10, I always add a little sharpening to counter the loss that occurs during that print process. I use Nik Sharpener, another plug-in, for that.
At this point the image is ready to print, but there are a couple of steps left to do. Since I manage color through Photoshop (one part of color management, which is a complicated process), I have to tell the printer software (the printer driver) to let Photoshop manage the color. Otherwise the printer will try to, and create quality problems. And of course, if I don’t select the proper paper in that same printer driver, my results will be off too.
The final print is relatively close what I’m seeing on screen, and that’s the goal. Even using an X-Rite spectrophotometer to calibrate and profile my monitor (another part of color management), I know it’s impossible to get a print that perfectly matches the monitor. The monitor projects RGB light through a screen, the printer uses ink on paper. They’ll never match perfectly, but you should be able to get close.
I use two printers, an Epson 4800 and an HP Z3200, both printing on that manufacturer’s paper stocks (usually a semi-matte or lustre). Both give excellent results. And sometimes I even include a print or two from one of the big stores in town that have large-format printers. After all, that’s how most people will get their prints done, and it’s cheaper than buying a printer.
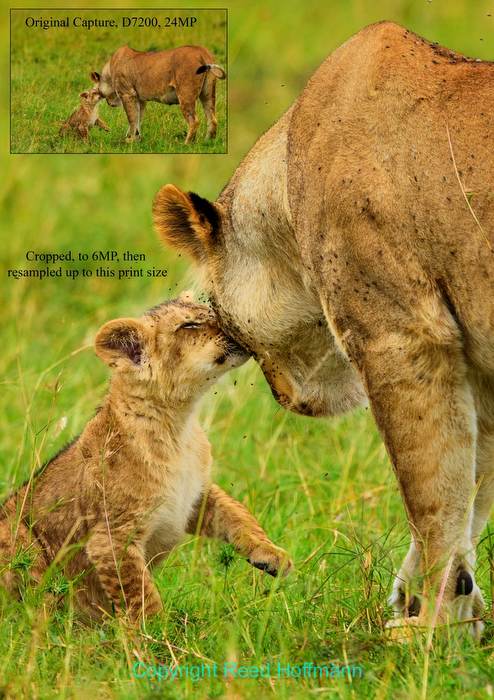
To demonstrate how well some images can be cropped, I’ve created a couple of prints that show the original framing (upper left in this print) as well as the final cropped image.
One new thing I’m doing this year is making some prints that show how well certain images can be enlarged. In general, digital capture can be resampled (enlarged) to good quality beyond what was possible with film. In this case, I’m taking a 24-megapixel capture (from Nikon D7200 and D750 cameras) and cropping it down to about 6MP. Then resampling up for a 16 X 24-inch print (at 300PPI), and the results are impressive. Of course, the images need to be sharp and high-quality to begin with.
When I started making prints for the schools back in 2002, I was using cameras that, at the most, captured 6-megapixels of information and showed noise at fairly low ISOs. I was able to make large prints, but it took a lot more work, and I’d spend about a week doing it. Today, with faster and better computers, software and printers, and cameras ranging from 16 to 36-megapixels, making prints is much easier. I can now do it in less than a day. Of course, when I’m making these prints for the schools, I’m also printing some for myself. Because after all, it’s only really a picture when you can hold it.
(if you’re interested in attending a Nikon School, and seeing some of these prints firsthand, check out the schedule here)