When I started in photography, “lighting” meant putting a flash on the camera and turning it on. If I were going to be creative, I’d bounce it off a ceiling or wall. In time, I discovered that learning how to use flash off-camera let me make pictures that otherwise wouldn’t exist. Now I look for any opportunity to use flash, in any way except on-camera.
I photographed Hannah a few years ago as part of a commercial shoot. She later helped me with some model releases from that for another client, and in turn, I offered to do a shoot for her. She took me up on that a few weeks ago. She needed photos of some jewelry and a few new shots to update her modeling portfolio. I wanted had some new lighting gear and a couple of ideas I wanted to try.
I don’t have a studio, but I do have a living room with a high ceiling. With the furniture shoved aside, that becomes my studio. My small lighting kit consists of four Nikon SB-5000 speedlights. Paired up with my Nikon D850 and wireless adapter, I have radio control of those flashes. I’ve been a big fan of Nikon’s Commander control (which communicates via infrared) in many of their cameras since its introduction in 2004. Today, with some of the newer cameras (like the D850) and SB-5000’s, I have all that control but with radio instead of IR, which makes it even more reliable.

My living room studio, complete with dog in the way. On my backdrop stand I hung two fabric backgrounds, one black and one a mottled orange. I could also put my pop-up white backdrop there for the high-contrast photos.
When it comes to using flash, size does matter. Not the size of the flash unit itself, but the size of the light source you create with it. For photos with Hannah, I’d control that using three different sized softboxes as well as a beauty dish and occasionally a bare flash. When I did use a bare flash, though, it usually had a snoot on it, to give me more control over where the light went. “Control” is the most important word lighting
Controlling where the light goes, and more importantly, where it doesn’t go, is the key to good lighting. It’s rare that I’ll light a scene with the goal of even light over the whole area. I’d rather create pools of light, to have differences in contrast in the image. Remember, the viewer’s eye will go to where the light is. So areas that are in shadow naturally draw less attention.
We had a lot of fun over the five-hour shoot. Here are a few of the photos we made, with explanations of how they were created:
(If you like this, please share it with your friends, and let them know about the links about photography I post on my business Facebook page. I’m also on Instagram and Twitter, @reedhoffmann)
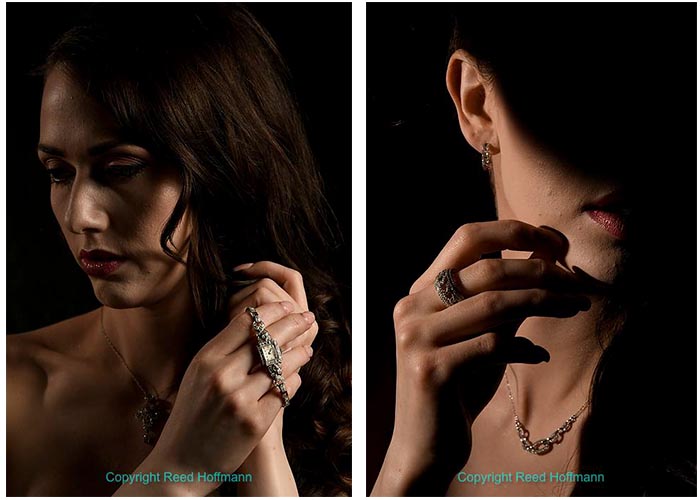
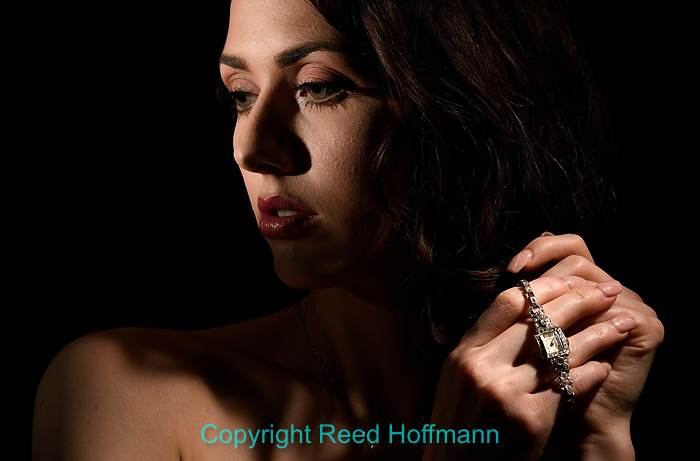
We started with the jewelry photos, and of course, the goal there was to emphasize the jewelry. For the image at left, I used one small softbox to the right, close to her hands, and a second to the left at lower power to leave her face mostly in shadow. In the photo at right, I wanted the viewer’s attention on the three pieces, not Hannah. To do that I used one softbox to the left, but then hung a reflector between it and Hannah to block the light from her face. Photos copyright Reed Hoffmann.
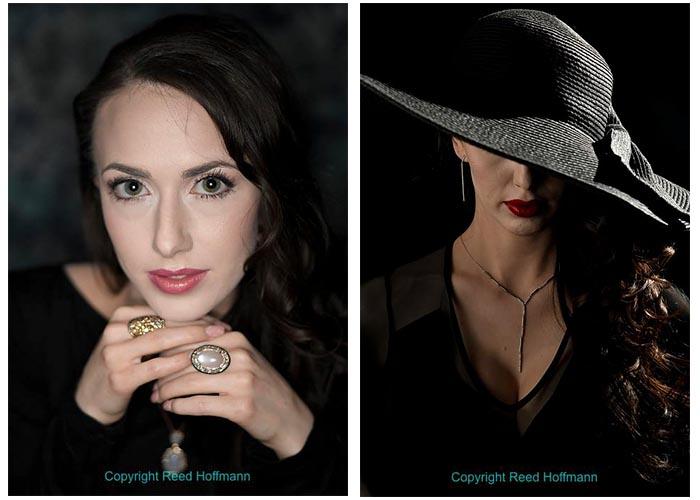
On the left, I used a ringflash, which creates a unique, direct-light look (and unusual catchlights in the eyes). Keeping Hannah’s and the rings on her fingers in the same vertical plane let me also use a wide aperture (f/2.8) for shallow depth of field yet keep the key elements in focus. In the photo at right, note that once again, keeping Hannah’s eyes out of the picture makes the photo more about the jewelry than her. A large softbox to the left gives a soft-edged glow to the light on her skin, and a direct flash at the upper right brings out texture and creates hard shadows on her hat, as well as bringing out some highlights in her hair. Photos copyright Reed Hoffmann.
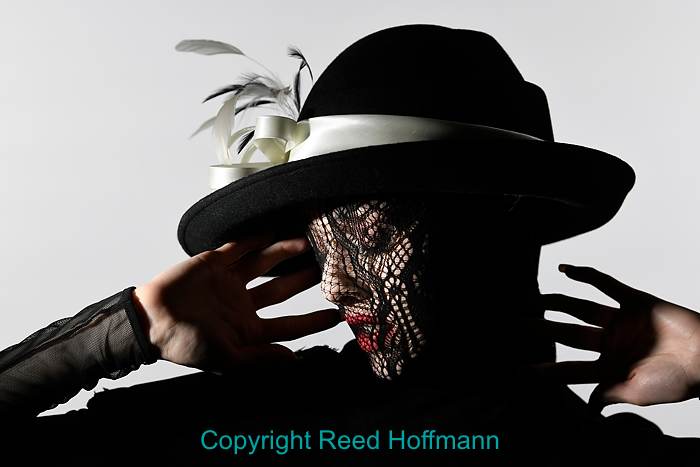
This is when we started having some fun. I wanted to make some high-contrast images, and suggested shooting her through some type of fabric. She had the bright idea of using a patterned pair of hose pulled over her head. Not particularly comfortable for her (she couldn’t open her eyes), but it did make for some striking photos. The lighting was two lights on the background to keep it bright white, and one, unmodified, from the left to create hard-edged shadows. Photo copyright Reed Hoffmann.
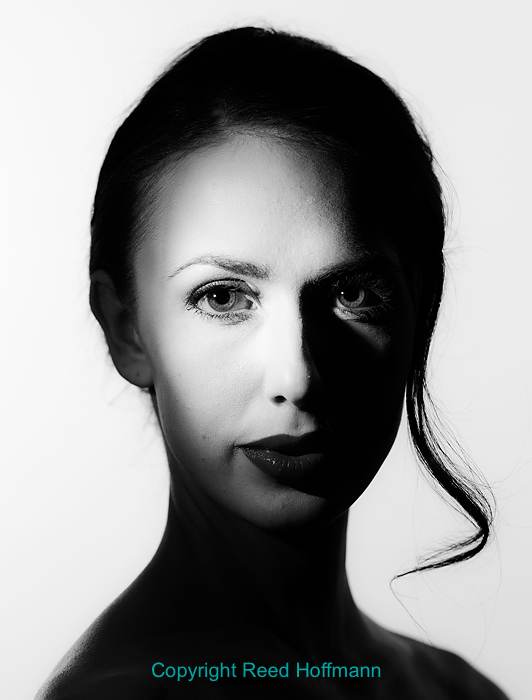
The last shoot was another high-contrast one, but this time in black and white, with Hannah’s face only partially lit. Two lights on the background again to keep it bright white, then one light with a very tight snoot on her face. Photo copyright Reed Hoffmann.