Looking for a fun way to while away a few hours this winter? Why not use your photography skills to make some cool water droplet photos? You’ll need a little patience, but the pay-off is well worth it. Below is a short tutorial on the process. Here’s all you need to get started:
- Camera
- Close-up lens (or extension tube for a regular lens).
- Flash (better if you’re able to get it off-camera, but on-camera works too).
- Tripod.
- A way to create drops (a baggie with a hole in it will do), suspended above a table.
- A container with water for the drops to land in (unless you want to mop up the floor!).
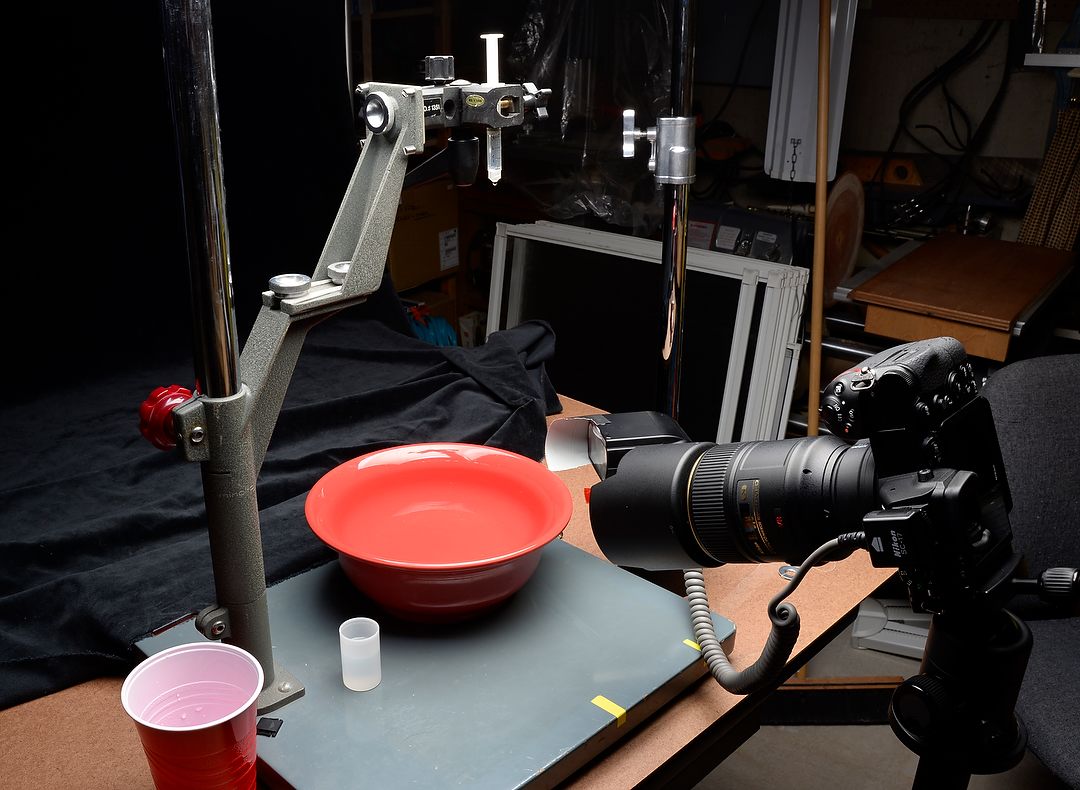
This was my basic setup. I re-purposed an old copy stand with a clamp to hold the syringe, which made it easy for me to change the height of the drops. Note also that I used a TTL cord with my Nikon Z 6 II so I could light the drops from the side.
There are two parts to this that are a little tricky:
First, since you’re focused very close, there’s almost no depth of field. This means it’s really important to get the focus right. Best is to find something you can put where the drops will fall, move it until the drops are hitting that, then focus there.
And second, timing. Expect to make a lot of pictures with no drops in the air, as you’ll shoot a bunch of photos either before or after one hits the surface. There are rigs you can buy that automate both the drips and firing the camera, but unless you get real serious about this, you can do a nice job timing it yourself. You may be surprised that after just a couple dozen shots, you start catching more drops than you miss.
You’ll need to find something you can use to focus on in the water container where the drops will land. I used a socket on an extension as a focus aid that reached just above the surface of the water. By moving the container of water slightly back and forth, I could see where the drops were falling and then set focus there.
For exposure settings, the fact that you can have the flash very close is a real advantage. For one, you’ll be able to use small apertures (like f/22 or smaller), which will give you a slight (although very slight) depth of field advantage with focus. More importantly, though, having the flash that close means you can use it at low power, which is what will freeze those drops in midair so there isn’t blur. Electronic flash is a very, very brief pulse of light, and the less power it uses, the shorter the resulting pulse. For instance, most speedlights (a flash that mounts on the camera’s hot shoe), at full power, put out a pulse that’s generally between 1/800 and 1/1000 of a second. Less than full power means a shorter pulse. The Nikon SB-5000 that I used, set at 1/64 power, has a flash duration of only 1/18,860 of a second. And that’s another thing you probably want to do. Set your flash to Manual mode (instead of the normal TTL) and adjust the power yourself. It will take a few test shots to get it right, but then you’ll have consistent output for every frame.
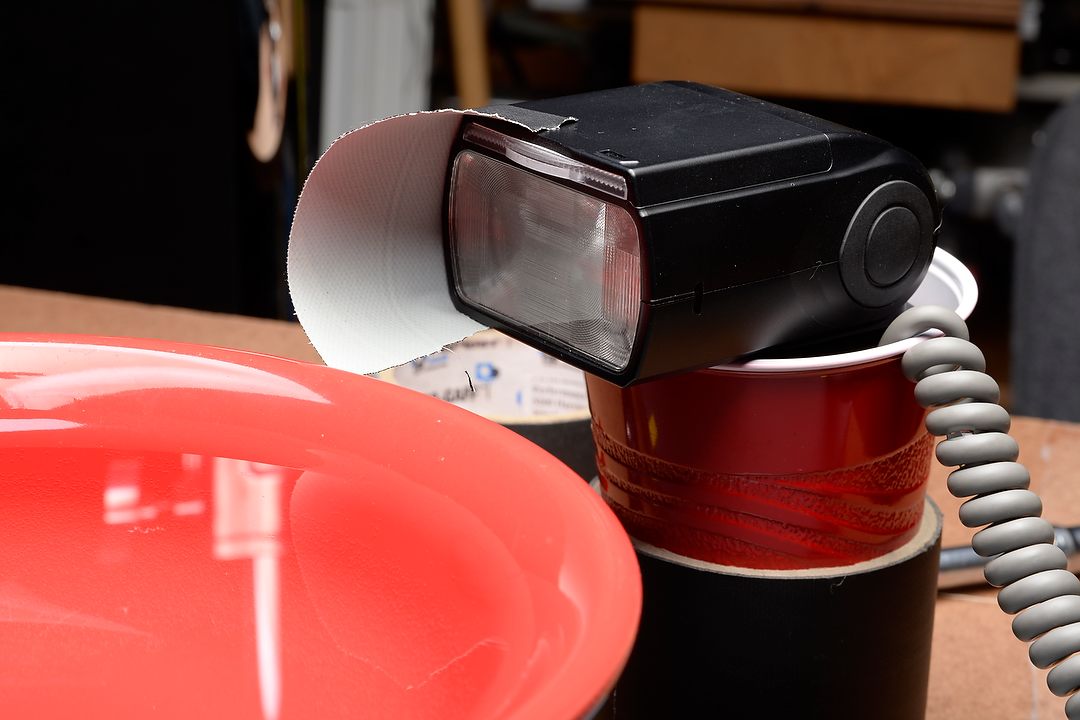
I wanted the light coming from near water level, so came up with this ingenious system to do that. The tape on the side of the flash head was to minimize the amount of light striking the far side of the bowl. The flash seen here is a Nikon SB-5000. You’ll see a droplet photo from this setup below.
For shutter and ISO, set your shutter speed for your camera’s maximum flash sync. That’s usually between 1/160 and 1/250. If you don’t know what that is, set the camera for 1/160 or 1/125. The key here is to make sure your settings are such that the ambient light doesn’t play a role, which might result in blur. In other words, if you shoot a test frame without flash, you should get a black frame. If not, you need to reduce the light in the room. I did my shoots in my basement workshop, with the lights on. At my exposure settings, which were often in the range of ISO 400, f/22 and 1/200, without flash, the image was nothing but black. And that’s good, because when I then turn on the flash, it will light the drop, and freeze it in mid-air.
Now that you’ve got focus and exposure set, you’re ready to make some cool photos. As you do that, there are a few other things you’ll want to play with. One is the distance the drop falls. That distance affects the size and character of the splash, so experiment with it. The size of the drop matters too. If using a plastic bag, try different size pinholes. I had some old syringes we used for giving medicine to one of our dogs, so the size was fixed, but that did let me control when the drop fell.
Two other factors are color and viscosity. Food coloring is an easy way to play with the color of the drops. And thicker liquid splashes differently than water. Milk is a simple way to see that, using whole milk. Heavy whipping cream is thicker still. If you get serious about this stuff, there are things you can mix with water to make your own concoctions (using powders such as Guar Gum or Xanthumum gum).
Milk is thicker, so creates a different kind of splash than water. However, the water you’re dripping it into will become – surprise! – milky. Nikon Z 6 II, Manual exposure, Flash white balance, ISO 640, 1/160 at f/32, Micro Nikkor 105mm f/2.8G lens.
Another consideration is what you use for the background. Black is easy (just use some black cloth), but you should also try different colors and patterns. I used some matte board of various colors that was left over from framing prints. Moving the background closer or further away will affect how much light from the flash strikes it. Or, if you have a second flash, use it, again at very low power, to light the background.
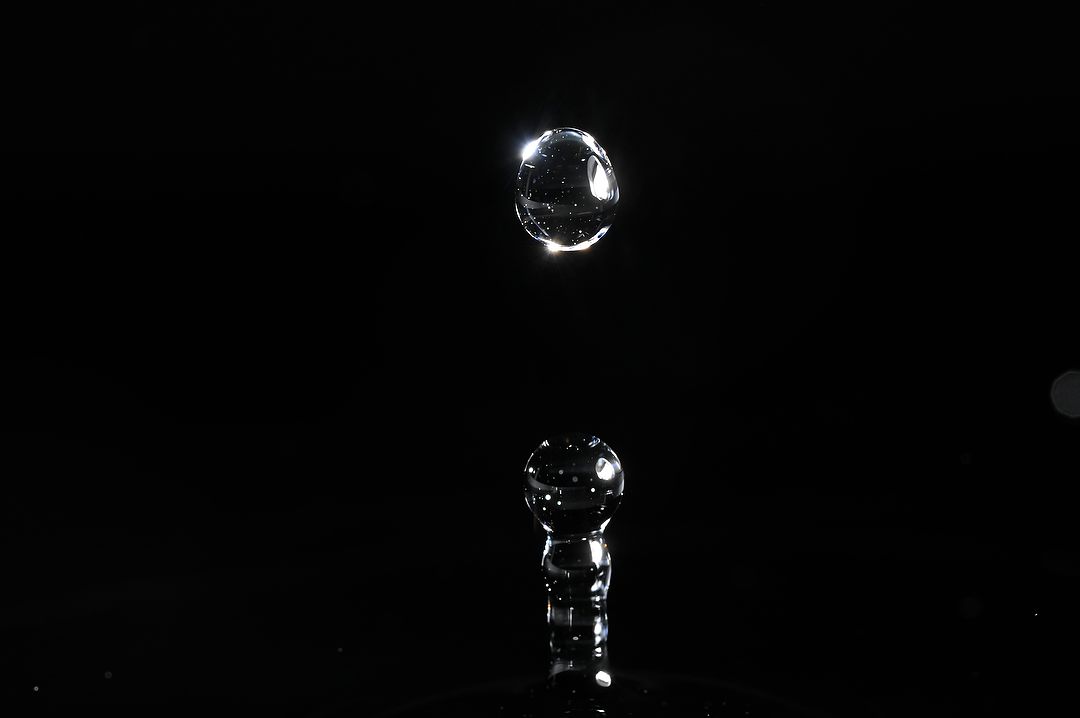
Combining a black container and black background results in essentially a black and white photo. This would be a good time to add food coloring to the water, or use milk. Nikon D780, Manual exposure, Flash white balance, ISO 1000, 1/200 at f/20, Micro Nikkor 105mm f/2.8G lens.
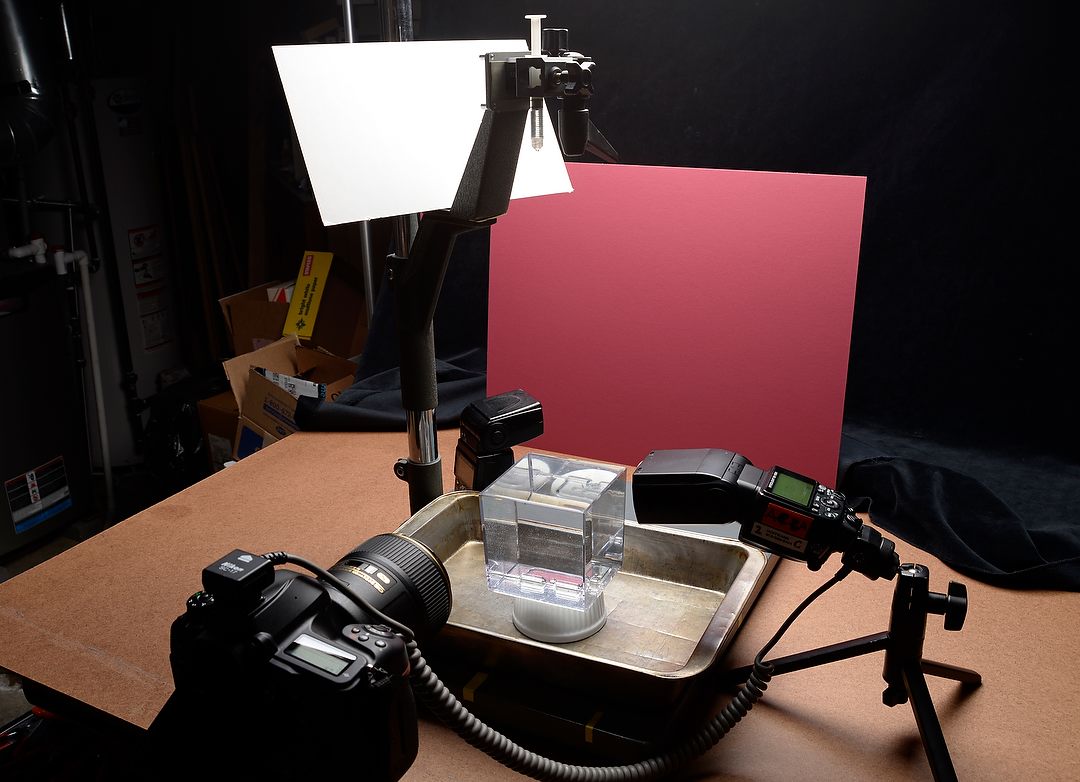
A slightly more advanced setup, this time using a matte board with color for a background plus a second flash to light it. The second flash was triggered by the main flash, and I adjusted the power of it manually as well to get the proper look. Note that I’m also using a clear container for the body of water, filled to the brim, for that infinity pool look. The white board is just there for the photo to make it easier to see the syringe.
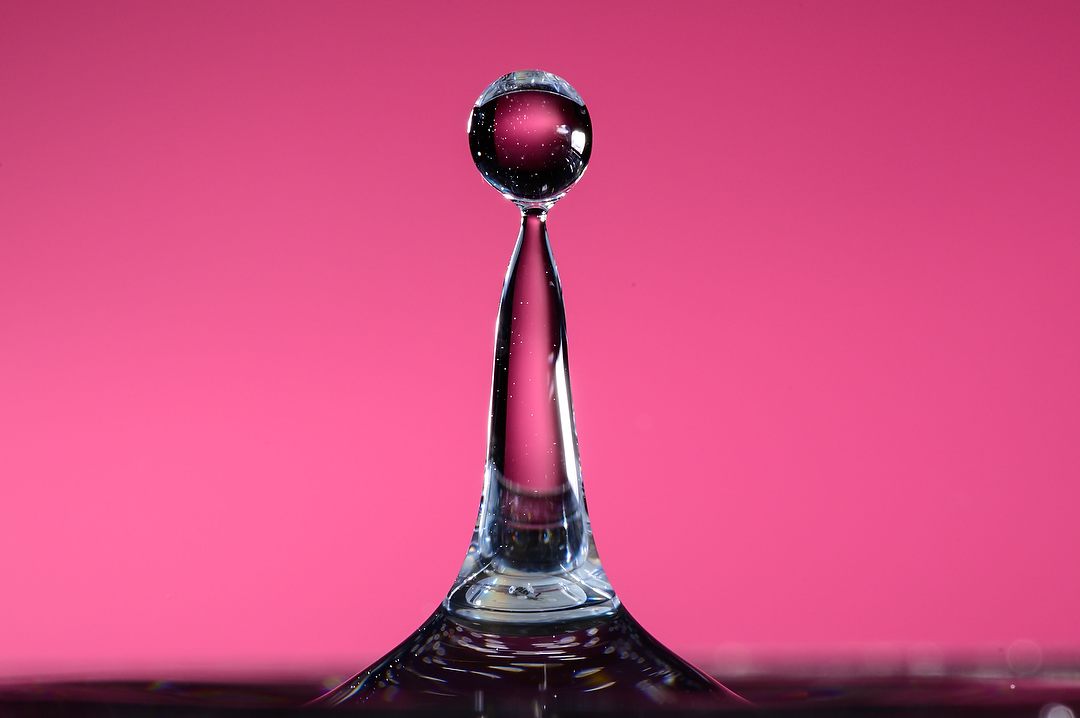
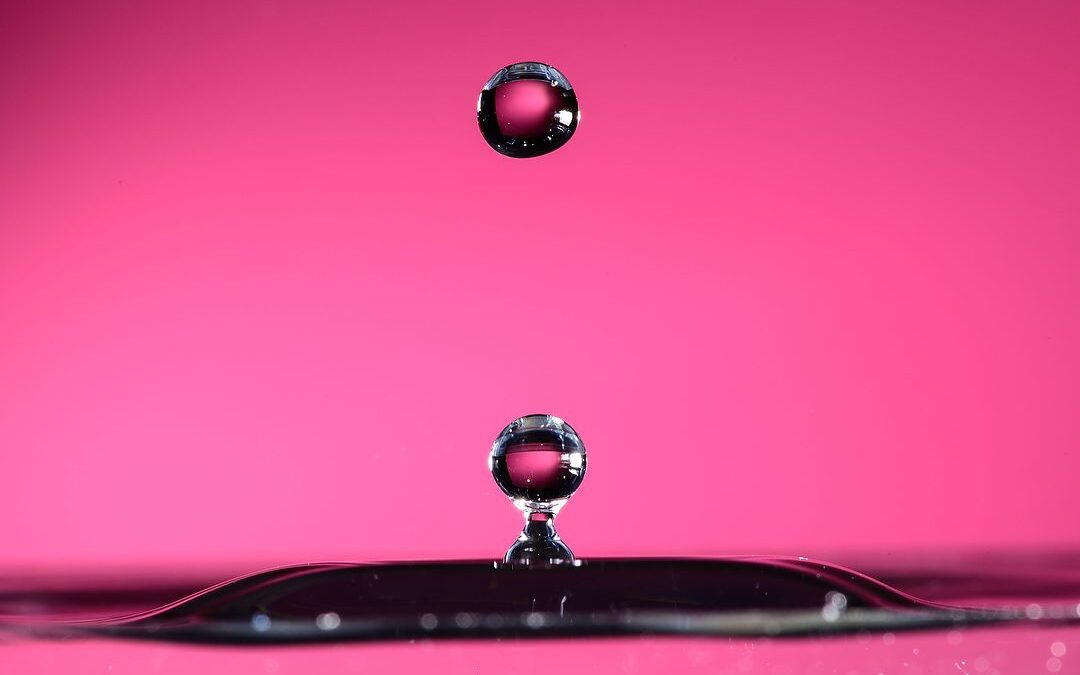
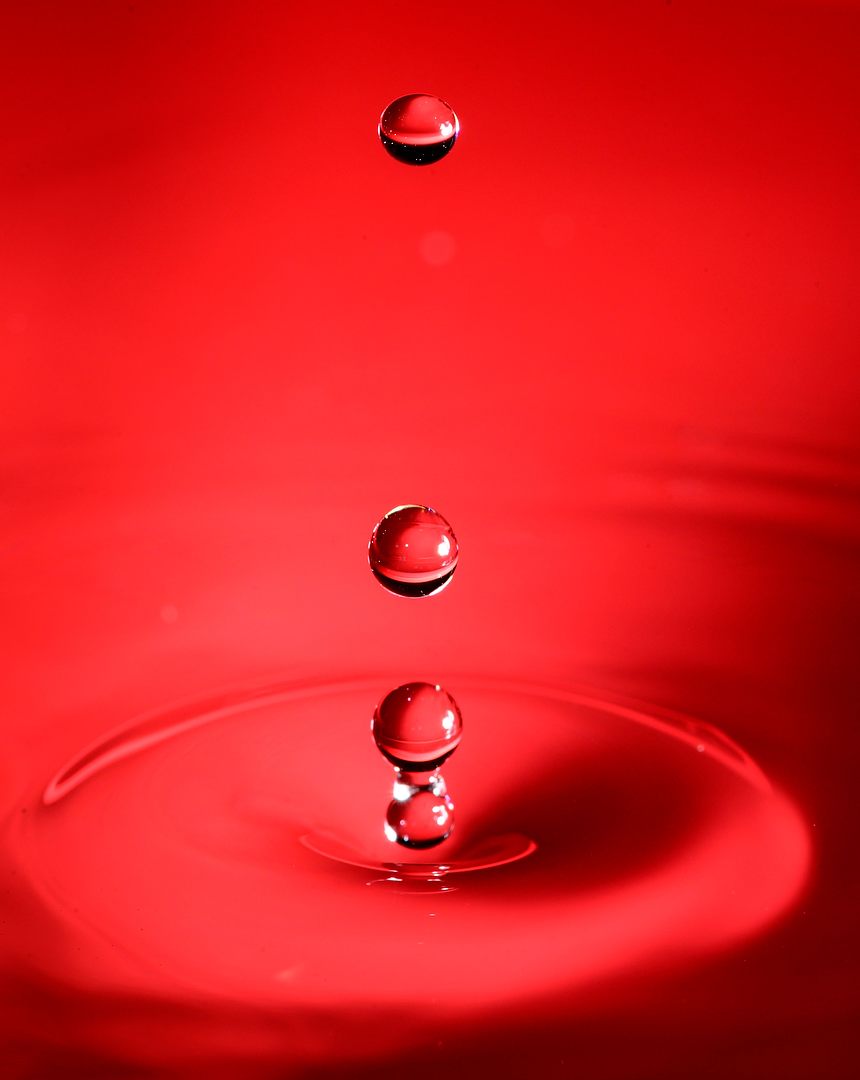
Here’s one of the photos from that two-flash setup (as is the photo at the beginning of this story). The colorful background makes a nice addition. Nikon D780, Manual exposure, Flash white balance, ISO 400, 1/200 at f/22, Nikkor Micro 105mm f/2.8G lens.
And speaking of background, try changing the angle you use to photograph the drops. Straight across is nice, but you’ll probably want a container that’s clear, and set inside another, larger shallower container. That way you can fill the first to the brim for an “infinity pool” look (and the spillover is contained by the container it sits in). Raising your camera’s angle will let you start capturing some reflections of the splash. Keep in mind you’ll need to re-adjust focus if you do that. And, since you’re now shooting at a downward angle, the color of the container will play a role since it becomes the background.
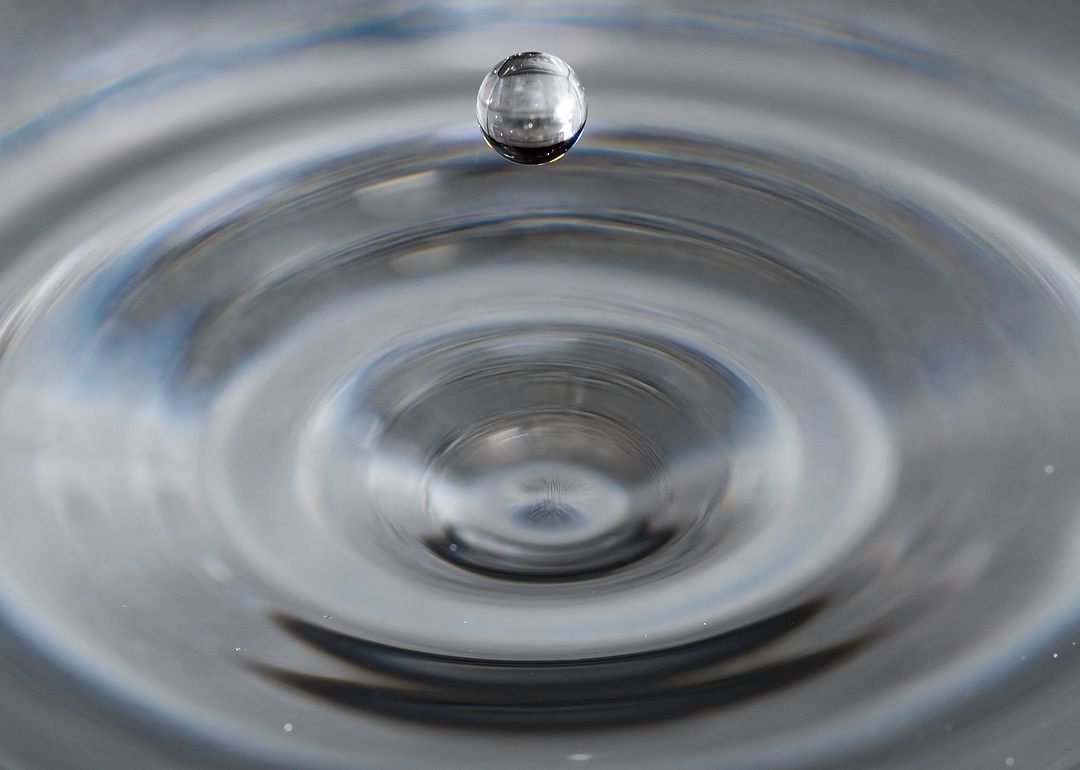
Using the camera from a higher angle gives a different look, but can be challenging to get the focus right – the droplets will vary in the height you catch them at in the air. Nikon Z 6 II, Manual exposure, Flash white balance, ISO 400, 1/160 at f/16, Micro Nikkor 105mm f/2.8G lens.
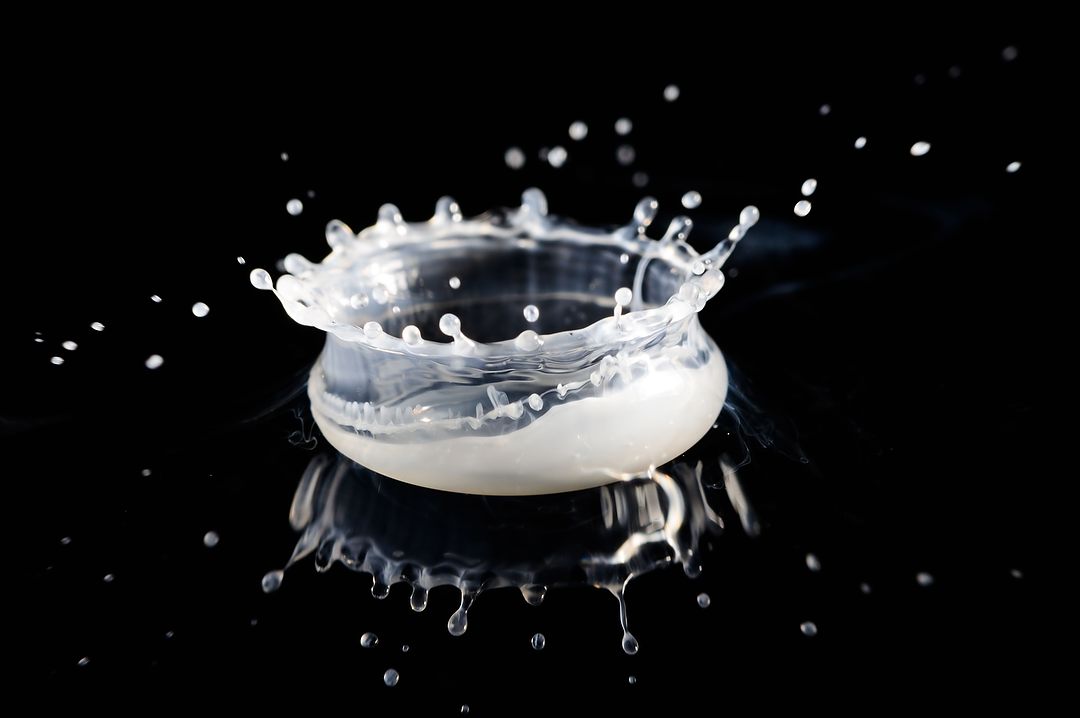
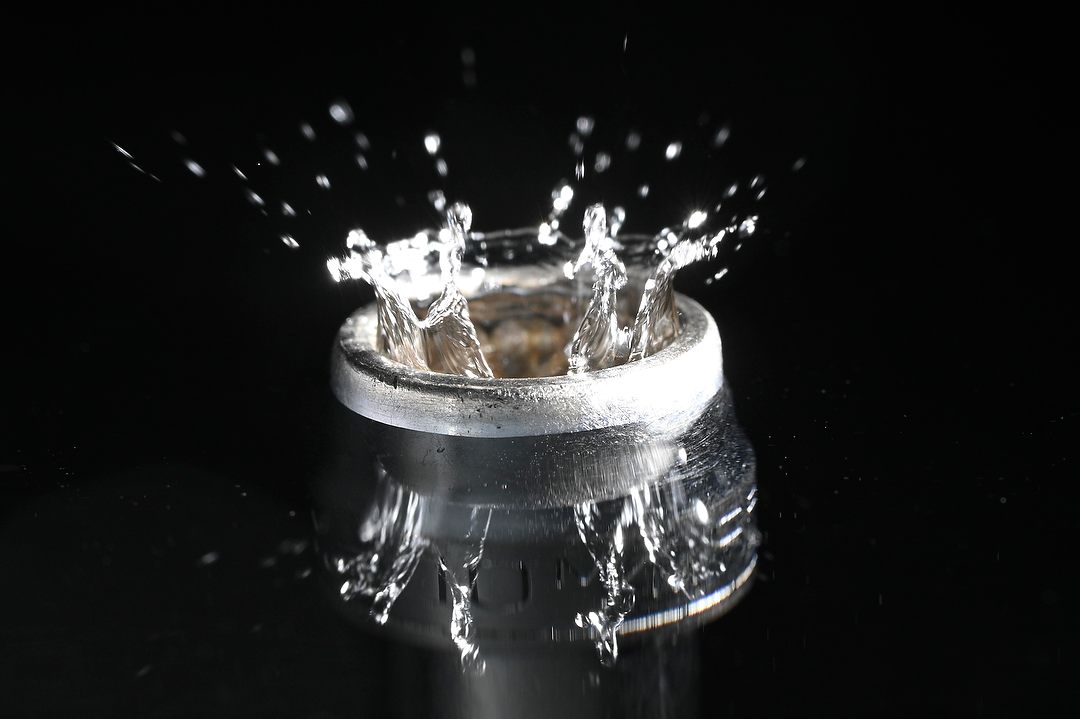
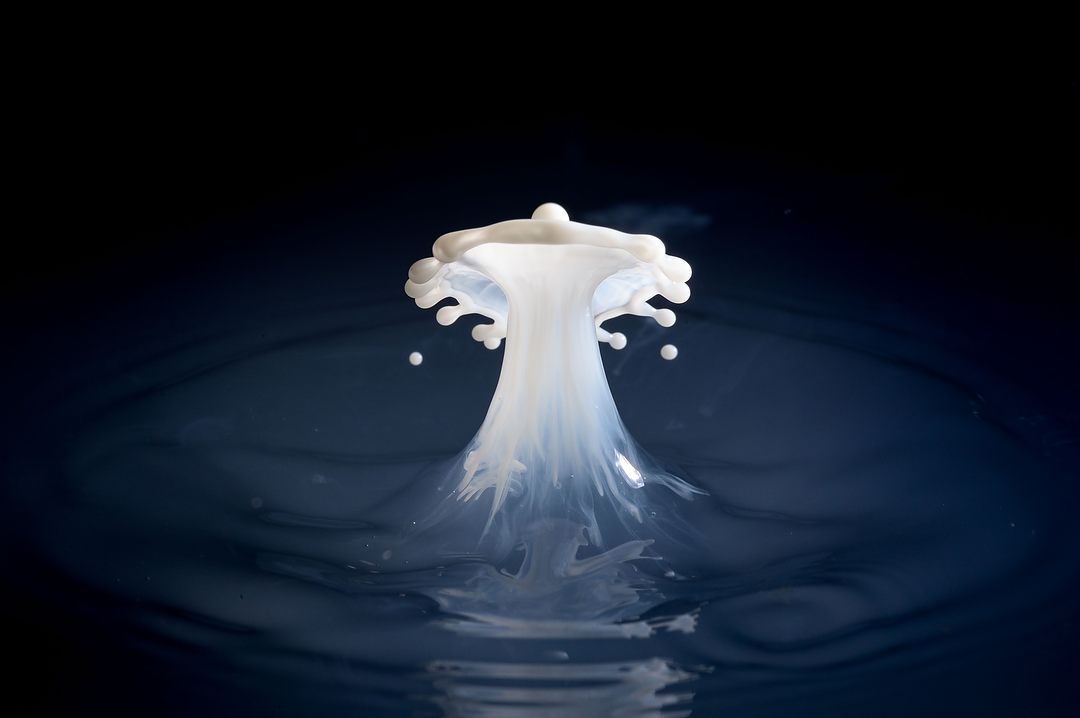
The “crown” look is something else you’ll want to try for. This is with milk, so it stands out better against a black background. To get a nice reflection, I had to pause between drops for the water to become still. Nikon D780, Manual exposure, Flash white balance, ISO 320, 1/200 at f/25, Micro Nikkor 105mm f/2.8G lens.
Another photo from a higher angle, in this case I used a red bowl as the container, and framed to use its interior as the background. Key to this look was using that single flash carefully, with the head both taped and zoomed (as seen in the earlier photo) to constrain the spread of light for a proper exposure of the background. Nikon Z 6, Manual exposure, Flash white balance, ISO 800, 1/160 at f/22, Micro Nikkor 105mm f/2.8G lens.
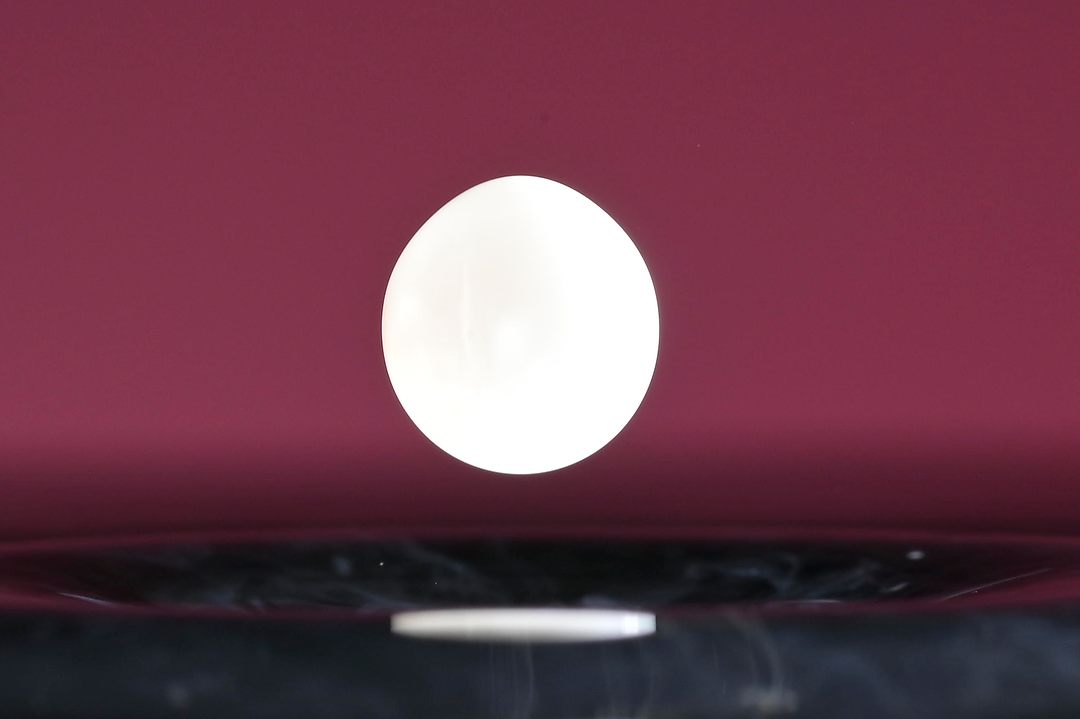
I could title this “Moonrise over Crater,” except it’s just a drop of milk coming back down after splashing up. Nikon D780, Manual exposure, Flash white balance, ISO 250, 1/200 at f/22, Micro Nikkor 105mm f/2.8G lens.
You’ll find there are lots of ways to play with variations on this, from height to background to liquids used, but if you get serious about it, be prepared to spend a little money. To get the classic “umbrella” shapes seen online, you’ll need to buy one of those rigs that can adjust size and timing of drops and fire the camera and flash at the right time. Me, I’ve enjoyed the challenge of doing it manually, and probably won’t invest in more gear. But it sure has been a fun way to spend a few long evenings in the heart of winter.
– Want to see more examples? Paul Van Allen is a Nikon Professional Services rep who teaches lighting classes, and has photos like these, and others, in this Flickr album. If you click a single photo, you’ll get more details about how it was made –
(If you like this story, please share it with your friends and let them know about the links on photography that I post on my business Facebook page. I’m also on Instagram and Twitter, @reedhoffmann. If you’re curious about the workshops I teach, you can find them here. And, you can subscribe to receive automated emails when there are new blog posts, on my home page.)
Thanks Reed. Great tips on technique! Great images!
Interesting, Reed. Question for you. If I use Lume Cubes instead of flash, then I would have less light. Could I then increase the ISO and play with the shutter speed, to capture different splash patterns more than with flash?
Sure, Rene, you could do that. COuld be interesting, let me know how it works out.