As a photographer, I always took pity on those who wanted to do bird photography. Their subjects are usually small, fast and don’t want anyone near them. Which means you need a camera with excellent autofocus and fast frame rate ($$), plus a long telephoto lens ($$). And if that’s not bad enough, you also need to be okay with lots of failure and frustration. Not something I was interested in doing a lot of. Then COVID hit, and with travel restricted, I’ve joined them. Yes, lots of failure and frustration, but I’ve learned a few things as well. And over the last couple of weeks I’ve had some success catching small birds in flight. Here’s how.
A friend reminded me that our local arboretum has a bird-watching building with a bunch of feeders around it. For my first visit, I brought a camera, long lens and monopod, and mostly shot hand-held. Being inside the building, with the windows open, gave me a good vantage point to work from that didn’t disturb the birds. But I didn’t care for photos of them at the feeder, and catching those little birds in flight was almost impossible. I needed a better plan.
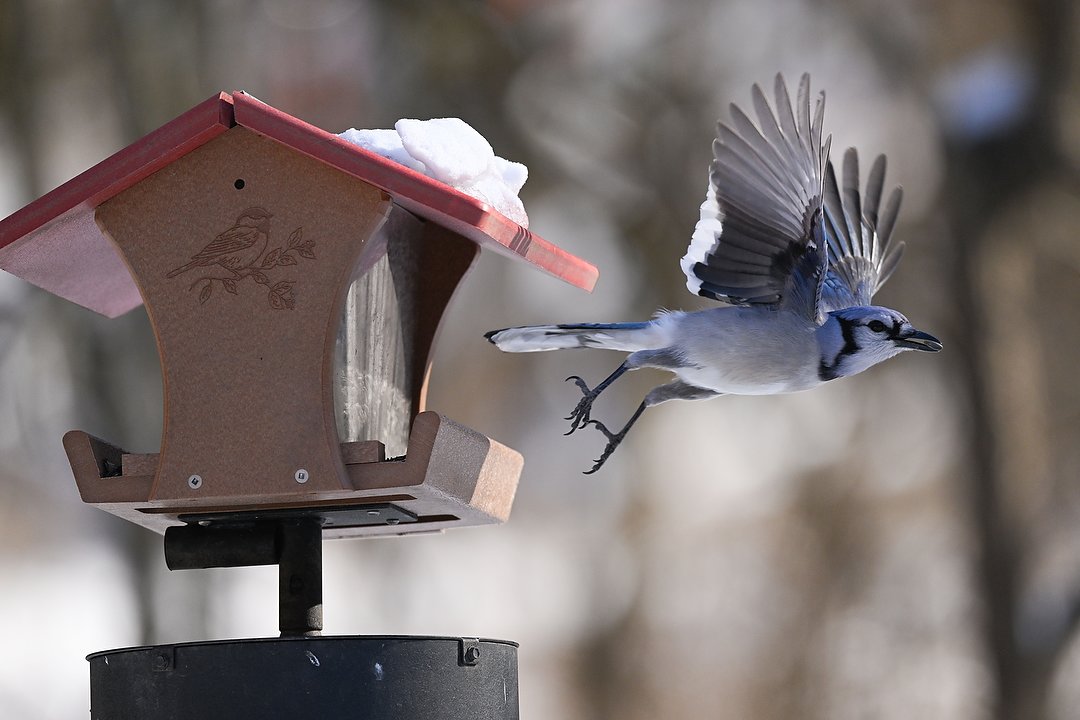
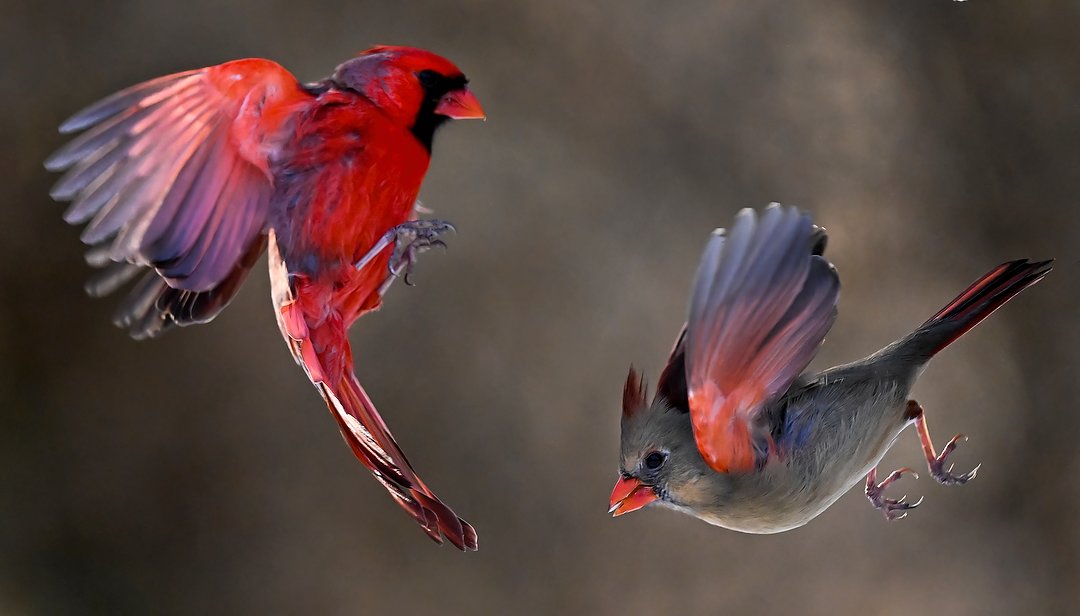
At the feeder, or flying away from it, was not the kind of photo I was looking to make. Nikon Z 9, Aperture Priority, Sunny white balance, ISO 1250, 1/3200 at f/5.6 in Matrix metering, -0.7 EV, Nikkor AF-S 500mm f/5.6E PF ED VR lens.
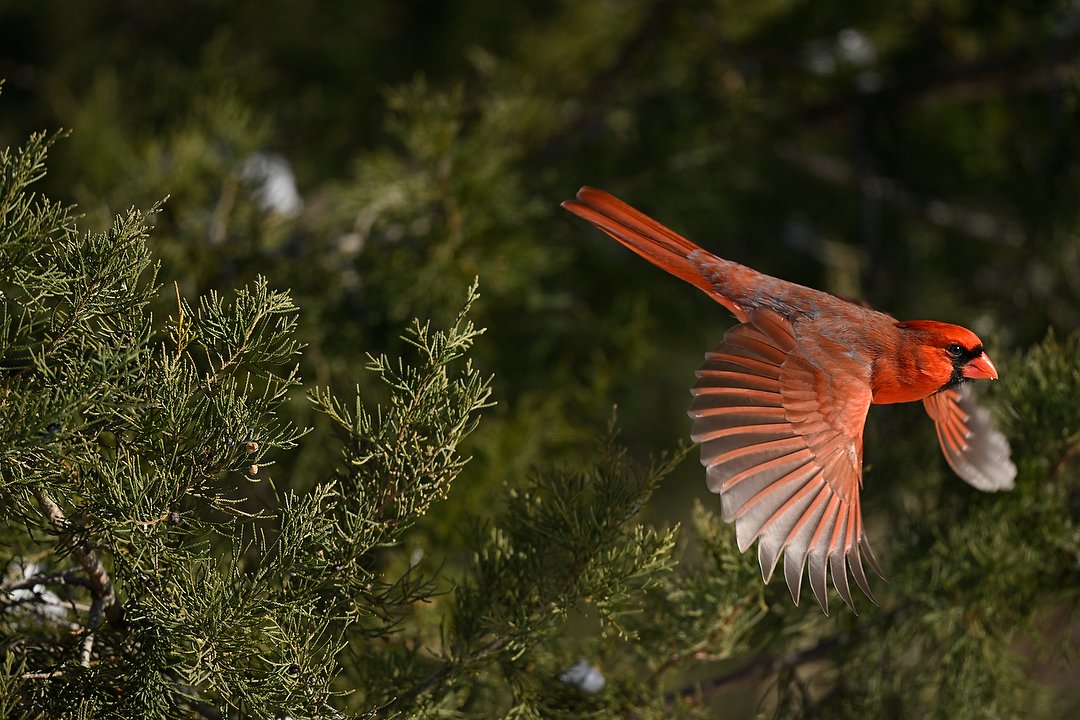
This was better, the full-frame image as I managed to catch a Cardinal leaving a tree for the feeder. Thanks to the camera’s 45-megapixel resolution, I could crop in to just the bird and still have a lot of pixels to work with. Nikon Z 9, Aperture Priority, Sunny white balance, ISO 900, 1/3200 at f/5.6 in Matrix metering, -1.0 EV, Nikkor AF-S NIKKOR 500mm f/5.6E PF ED VR lens.
A few days later I returned with a tripod. I’d realized that the best way to get in-flight photos was to lock my camera and lens down, framing the area just before they’d land on the feeder. That presented two challenges, the first of which was focus. I could focus on the perch at the feeder, but being that close, with a 500mm lens, there was a difference between the edge nearest me, the center or the far edge. With that focal length, and only 15-20 feet away, a couple of inches meant the difference between sharp and out of focus pictures. I could use a shorter lens and gain more depth of field, but that would also mean more detail in the background. And, after cropping, fewer pixels that make up the bird. I decided to stay tight and hope for the best.
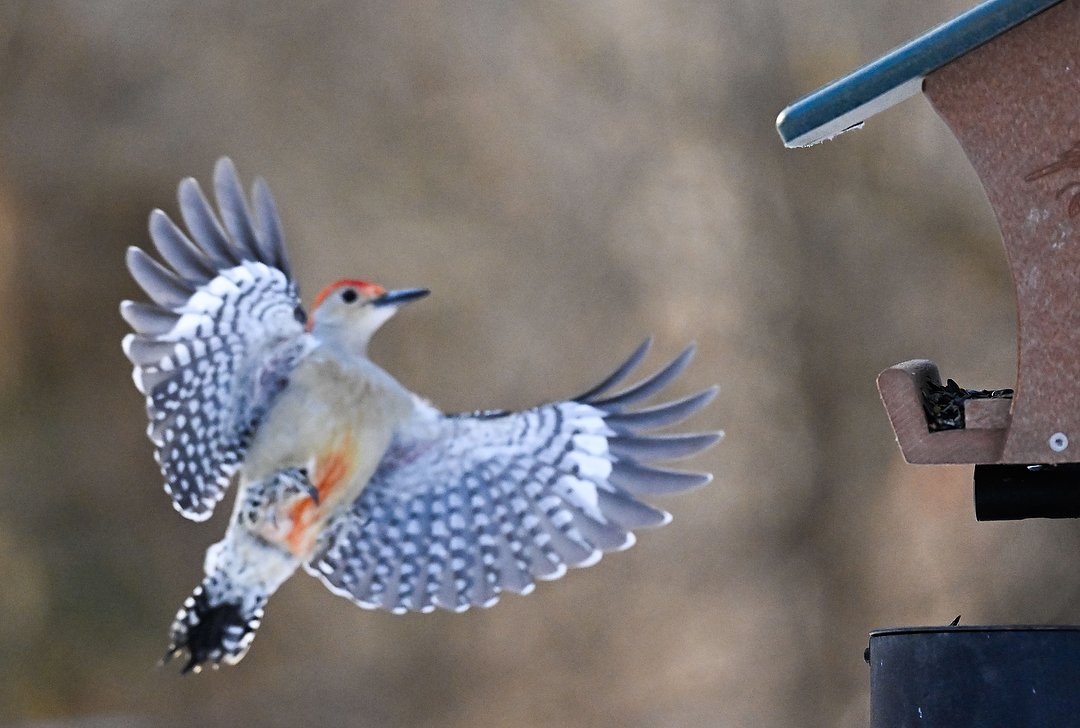
Here’s a good example of the focus issue. This Red-bellied Woodpecker is flying up to the feeder from behind it, so won’t be in focus until it gets to the feeder (and I don’t want the feeder in the photo).
The second problem was capturing them in the frame. If I had my eye to the viewfinder, by the time I saw the bird it was too late. So I stopped looking through the camera and started watching the wider scene for any bird flying towards the feeder. Doing that, with my finger ready on the shutter button, I had more success catching some birds in flight. (UPDATE: today I took that a step further. I remembered that I have two WR-R10/WR-A10 dongles that I use with my SB-5000 Speedlights for radio control from the camera. Those also come with a WR-T10, which is a small trigger. Using those two WR-R10/WR-A10’s, plus the trigger, I now have two cameras firing at the same time when I push the trigger. That means I have a frame of each moment from two different cameras, which lets me have two different positions and framing.) Now to refine the process.
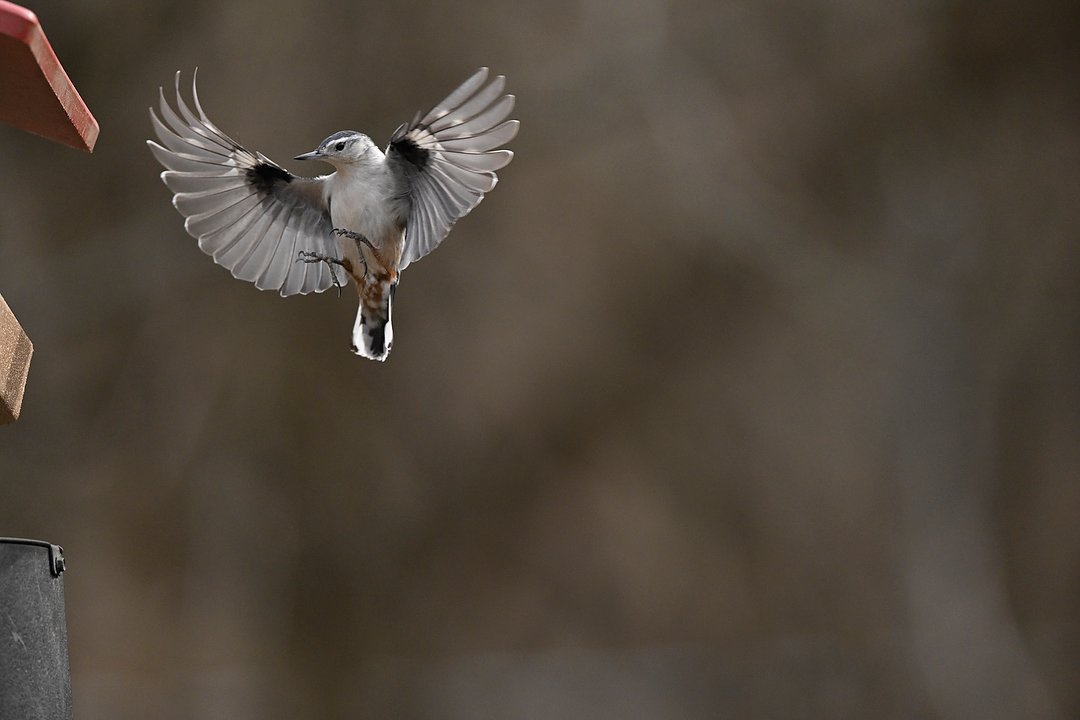
With my eye away from the viewfinder, I had a better chance of seeing the birds flying in and getting a photo, like this of a White-breasted Nuthatch coming in to feed. Nikon Z 9, Manual exposure, Sunny white balance, ISO 3200, 1/4000 at f/5.6, Nikkor AF-S NIKKOR 500mm f/5.6E PF ED VR lens.
And with the Z 9’s 45-megapixel resolution, even cropped tightly like this I still have a 9-megapixel image, enough to make a fairly large print.
The next time I went, I brought along a wired release. Connecting that to my camera allowed me to get more comfortable while watching, and avoid arm cramps. I also started increasing my shutter speed (by raising the ISO). These little birds are FAST! And then I began taking advantage of my Nikon Z 9’s higher frame rates. For most action, I’m content to shoot at 10 or 12 frames per second. However, with the tight framing of the 500mm lens, that only let me get a couple of images as they flew in to the feeder. So I bumped that rate up to 20, then 30 fps (the Z 9 allows that, even at full 45-megapixel resolution). Now I was getting more images, and thus more possible “keeper” images. I also played with the 120 fps the Z 9 allows, which drops the resolution to 11-megapixels.
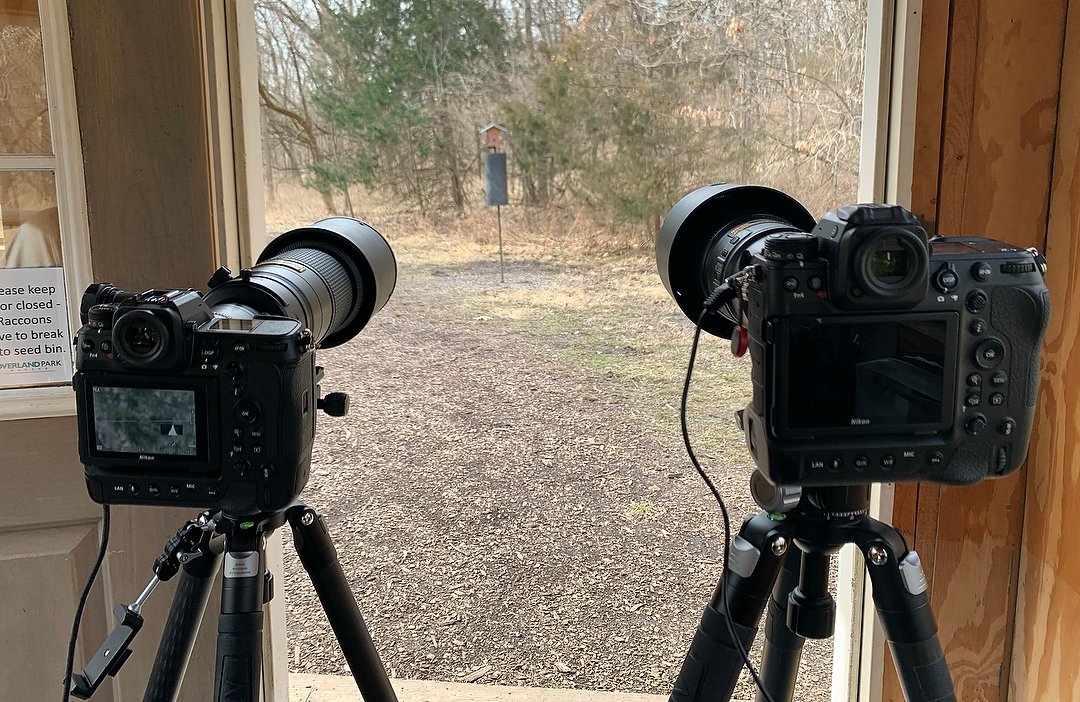
Joined by a friend, both of us used wired remotes to trigger our cameras, so we could more easily watch, and capture, the action.
Shooting at 30 frames-per-second gave me more photos to choose from of each bird approaching the feeder. Here’s a short video clip I made of seven frames from one of those bursts. For the video, each image is only shown for .2 seconds. Keep in mind I can then edit any one of those frames, shot at high shutter speed and 45-megapixel resolution, into a final image.
And here’s a video of 68 frames shot at 120 frames-per-second with the Z 9, the video again having a .2-second time for each image. That means this burst covers only about 1/2 second of action. The camera does drop to 11-megapixel JPEGs to take advantage of this feature.
As I spent more time there, I realized that the real secret to getting more in-focus pictures was up to the birds, where they launched from on their way to the feeder, and how they flew in. The closer they were to flying in at a 90-degree angle to the feeder, the better my odds of sharp photos as they arrived. If they were coming in at an angle, the only time they entered my area of focus was just as they landed, which meant the feeder was in the photo. There was one tree where the birds would rest, which was directly to the left of a feeder. Perfect! And because I was framed pretty tightly, I also noticed how some would fly straight in, while others came from below or above. That meant I started adjusting my framing based on the bird I hoped to capture.
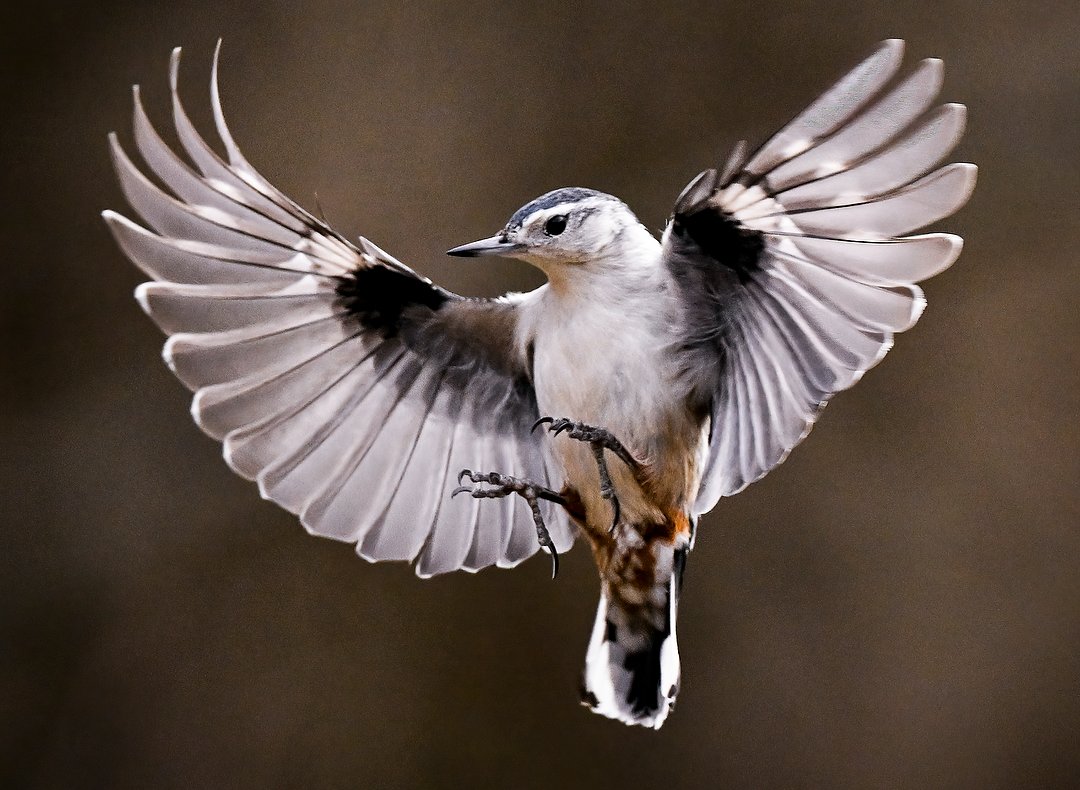
Another good example of how little depth of field you have when you’re close with a long telephoto lens. Note that the near wing feathers are sharp, but the head is slightly out of focus. Nikon Z 9, Manual exposure, Sunny white balance, ISO 4000, 1/3200 at f/5.6, Nikkor AF-S 500mm f/5.6E PF ED VR lens.
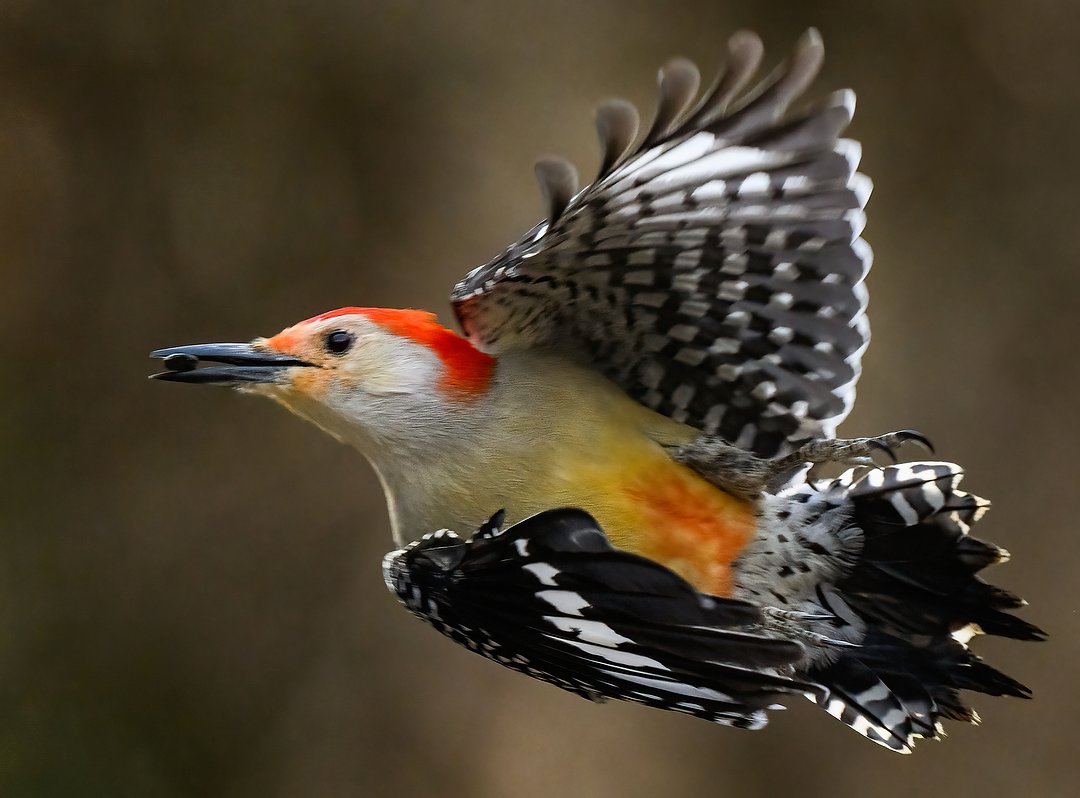
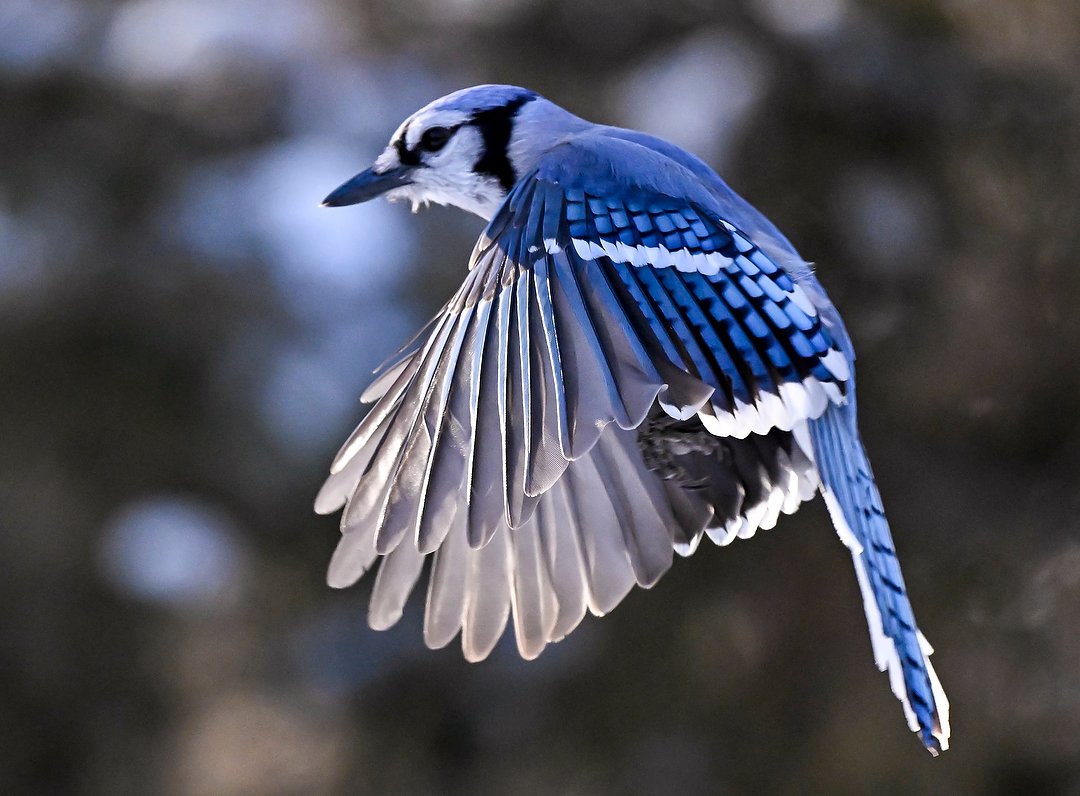
And this is why I want to experiment with even higher shutter speeds (the Z 9 will go up to 1/32,000/sec). Note the touch of blur in the wingtips? I’d like to see if I can stop that. Nikon Z 9, Manual exposure, Sunny white balance, ISO 6400, 1/2500 at f/8, Nikkor AF-S 500mm f/5.6E PF ED VR lens with Nikkor TC-14e III teleconverter for 700mm.
Am I done? No. I want to try even higher ISOs with still higher shutter speeds, and have yet to be there for strong sunlight. I also want to try putting up a remote camera right under the feeder, with a wide-angle lens. So I’ll keep at it, and meanwhile look forward to the snow geese and sandhill cranes migrating through our area in the coming weeks, then the herons returning. Big birds are easier to photograph in almost every way. So yes, I’ve turned into the thing I always felt sorry for, a bird photographer. But, aside from the frustration and failure, it is fun, and sure beats sitting at home!
(If you like this story, please share it with your friends and let them know about the links on photography that I post on my business Facebook page. I’m also on Instagram and Twitter, @reedhoffmann. And if you’re curious about the workshops I teach, you can find them here. And, you can subscribe to this blog on my home page.)
Thanks Reed. Great tips!