The first time I saw light painting demonstrated, I had the same reaction as when I first saw a print come up in developer in the darkroom – it was magical. That was back in 2000, at an early digital workshop. Dave Black, who may well be known as the Godfather of light painting, was showing how it’s done. While it did exist in the days of film, it was much, much more difficult. Now anyone with a digital camera, tripod, and a flashlight can do light painting. Here are the basics on how to do it…
The key to light painting is that you’re doing a time exposure (keeping the shutter open for several seconds, at the least), and “painting” parts of the scene with a flashlight. So the first
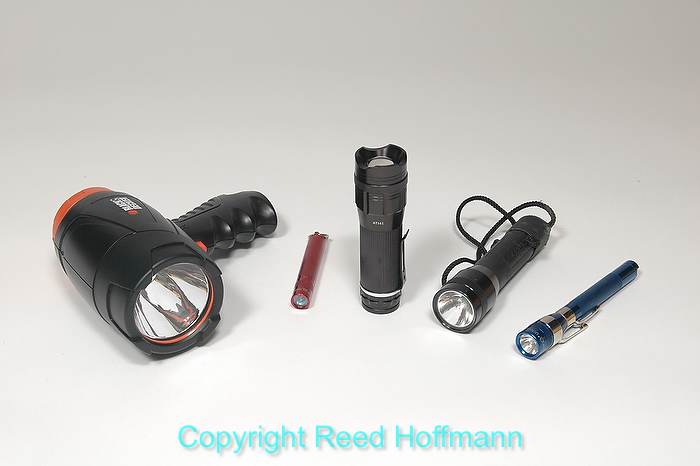
Some of my collection of flashlights for light painting. My favorite, standing up in the center, is the iProtec 220.
thing you’ve got to do is make sure the camera doesn’t move. The easiest way to do that is with a tripod. However, you can get creative about that by putting the camera on a chair, rock, window ledge, etc. Anything that won’t move. Remember, though, that if you push the shutter button to start the exposure, you’ll likely move the camera. Some people use remote releases, but I prefer the self-timer. Not only is it built into my camera, but by setting the delay to ten or twenty seconds, I have time to move into position to start painting.
Also, since you’re doing a time exposure, and want some parts of the scene stay be dark, you’ll need to put your camera into Manual exposure. There’s no easy formula I can give you for a starting point for all situations, but by using the camera’s LCD it’s pretty easy to find a starting exposure that works.
Not surprisingly, the most effective light painting photos use a little light, not a lot. If you wanted the whole scene illuminated, it would be easier to use flash, wait for daylight or simply do a long time exposure. The best of these photos have a touch of light here and there – a little goes a long way.
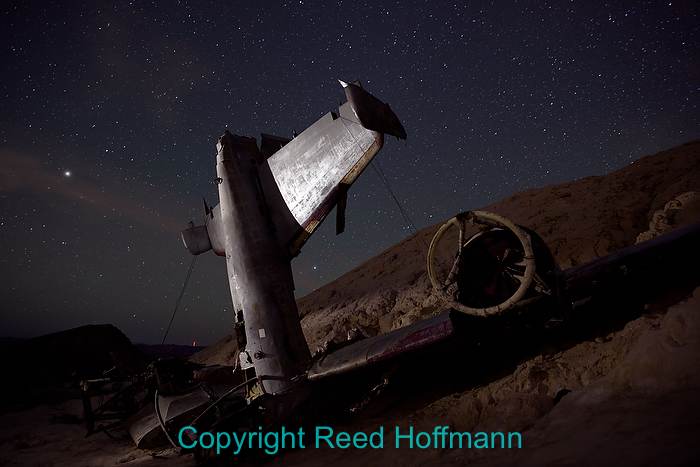
For this shot, I first found an exposure that would make the sky look the way I wanted (that’s the lights of Las Vegas in the sky). Then I spent most of the exposure running around, painting the three main objects in the scene with my small spotlight. You’ll also notice a small spot of blue light under the truck. That’s a strobe I put there with a gel on it, triggered with a radio remote. Nikon D750, Manual exposure, ISO 640, 30-seconds at f/5, Nikon 20mm f/1.8 lens at 20mm. Photo copyright Reed Hoffmann.
Almost any flashlight will do for a start, but if you get hooked on this, you’ll end up with a bag of them. The two most important qualities for a light painting flashlight are power and control. You need enough power so you can light things without having to get right on top of them. And a narrow beam makes it easier to control where the light does, and more importantly, doesn’t go. Of course, you can also use high-tech devices, like the core of a toilet paper roll, to make the beam narrower.
The simplest way to get started is at home, in a room at night. With the lights on, arrange a few interesting things on a table and frame and focus your shot. Remember to turn off autofocus after the camera’s focused, otherwise it will start hunting for focus (in the dark) every time you’re trying to start the exposure. After you’ve done that, grab your flashlight and start playing with how and what you’re going to light. Remember – a little goes a long way. If turning out the lights makes the room truly dark, you can start with a trial exposure of ten seconds, f/8 and ISO 200. Once you’re ready, turn out the lights, start the exposure, and flash a few touches of light onto your props. Check your results on the LCD, adjust exposure and play until you’ve got a shot you like.
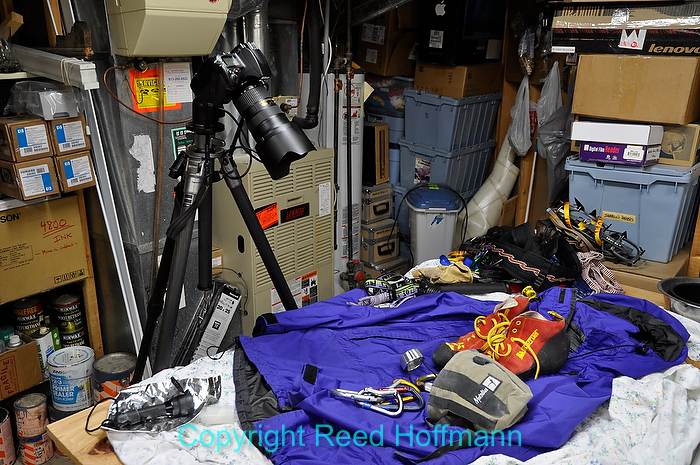
Here’s my fancy basement studio (uh, workshop), where I’m preparing to do a light painting shot of climbing gear. Nikon D90, ISO of 800, shutter speed of 1/20 at f/6.3, Nikon 16-85mm lens at 20mm. Photo copyright Reed Hoffmann.
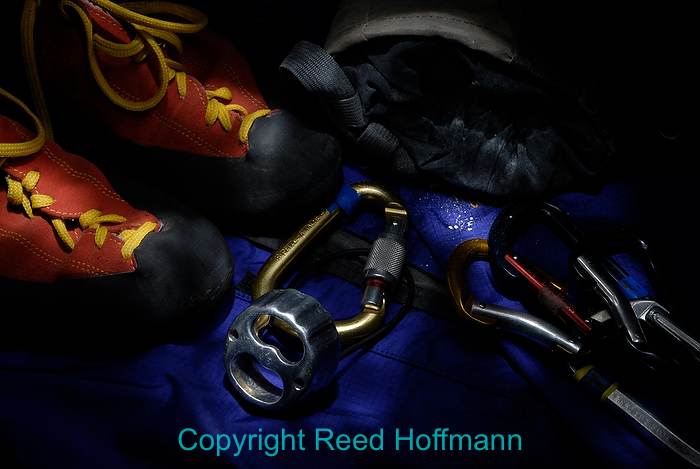
And here’s the result. Notice how I used just a little light in several spots, to highlight parts and let the rest go dark. Nikon D60, set to white balance of incandescent and ISO of 200, shutter speed of 10 at f/14, Nikon 17-55mm f/2.8 lens at 48mm. Photo copyright Reed Hoffmann.
Once you’ve had some success indoors, you’re going to want to get outside and work with bigger subjects. That’s when you’ll probably need to go to longer exposures and more powerful lights. As you do that, you’ll find it’s fun to play with the balance between available light and your flashlights, raising the ISO to bring out details like stars, while reducing the power of your lights to blend in. And sometimes you have to raise the ISO because your subjects are so far away that even your strongest flashlight needs ten or fifteen seconds to expose them.
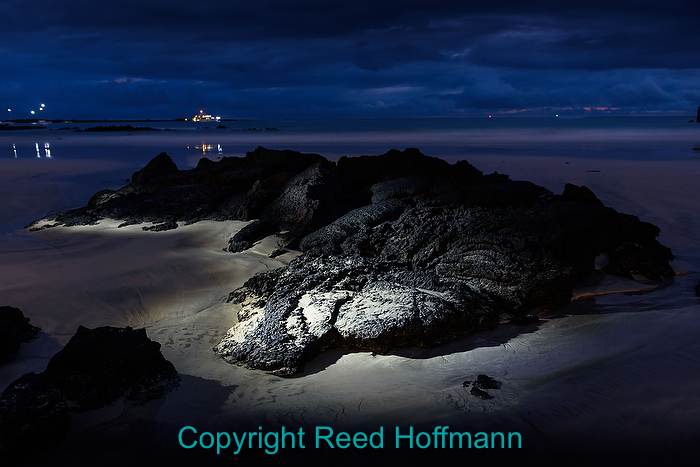
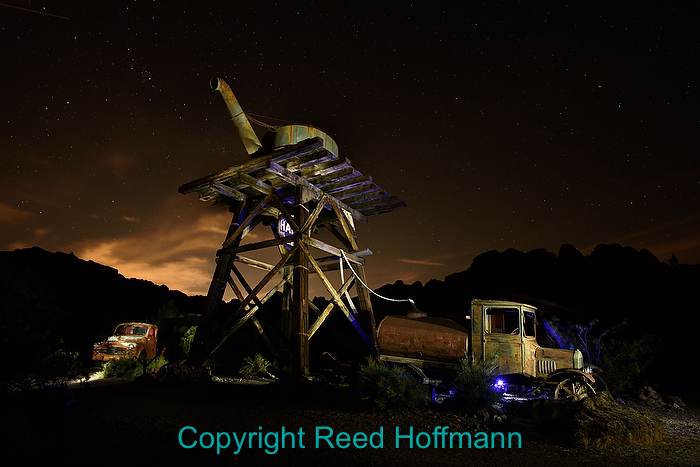
I did this shot in the Galapagos Islands in April, just after dusk. I set my exposure for the light in the sky, then used my little flashlight to highlight the edge of the rocks from the left side. Nikon D750, Manual exposure, ISO 400, 30-seconds at f/6.3, EV -1.0, Nikon 24-70mm f/2.8 lens at 27mm. Photo copyright Reed Hoffmann.
Speaking of balance, you’ll probably want to choose a white balance setting other than “Auto.” I usually start with either Daylight (if it’s just stars and moon), or perhaps Incandescent or Fluorescent if artificial light’s involved. Of course, this is one of those times where shooting in RAW format really pays off, as you can then set the white balance afterwards, on the computer.
Once you start light painting, my guess is you’ll be hooked. Which is why I almost always have my a flashlight (and a tiny headlamp to see with) in my bag on trips. There’s a real thrill that comes from creating something unique. In a world with millions and millions of nearly identical photos, I can almost guarantee that no one else has painted whatever subject you’re working with, the same way you will. Which means this is a great way to do something different. And different is the key to interesting photography. Have fun!
To create the final light painted image, I start with a base exposure that shows nothing. D750, Manual exposure}, ISO 100, 30-seconds at f/16, Nikon 24-70mm f/2.8 lens at 48mm. Photo copyright Reed Hoffmann.
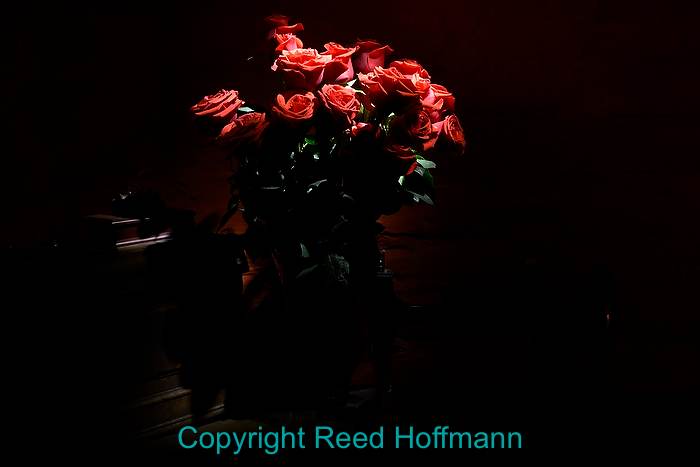
The next step is to figure out how much light I need for the different parts. Nikon D750, Manual exposure, ISO 400, 30-seconds at f/6.3, Nikon 24-70mm f/2.8 lens at 27mm. Photo copyright Reed Hoffmann.
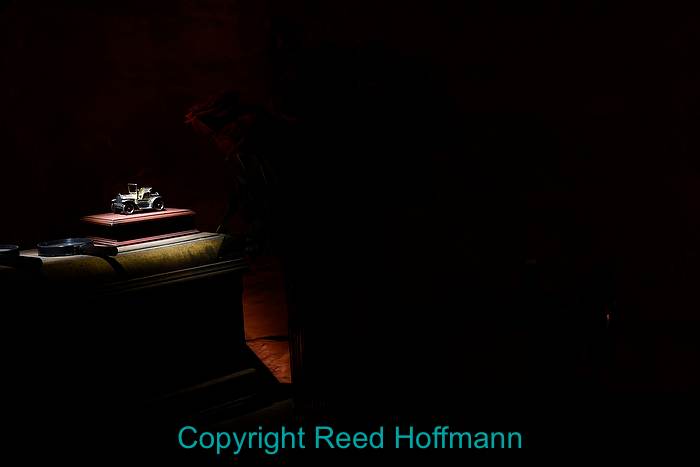
After the roses, a touch of light on the toy car. Nikon D750, Manual exposure, ISO 400, 30-seconds at f/6.3, Nikon 24-70mm f/2.8 lens at 27mm. Photo copyright Reed Hoffmann.
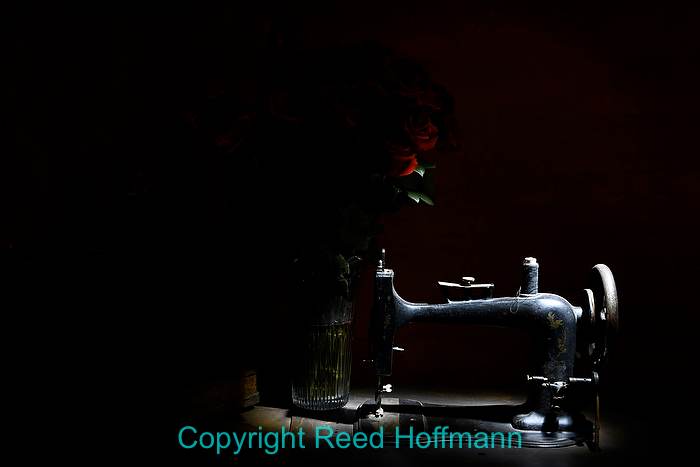
Then some light on the sewing machine. Nikon D750, Manual exposure, ISO 400, 30-seconds at f/6.3, Nikon 24-70mm f/2.8 lens at 27mm. Photo copyright Reed Hoffmann.
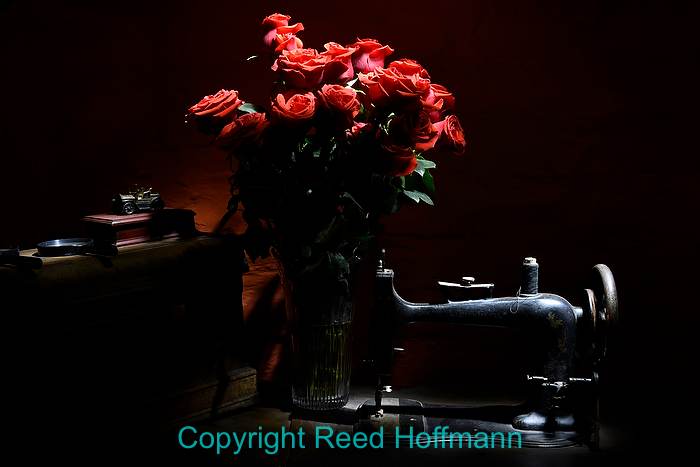
All three done together during the 30-second exposure resulted in this final image. Nikon D750, Manual exposure, ISO 400, 30-seconds at f/6.3, Nikon 24-70mm f/2.8 lens at 27mm. Photo copyright Reed Hoffmann.
Trackbacks/Pingbacks