
Most people consider two options when retiring an old camera – sell it or give it away. I’m here to suggest a third – convert it to infrared. Why infrared? Because it’s a new and different way to approach your photography, and “new” and “different” are important words in photography.
I started playing with infrared about ten years ago the cheap way, with an infrared filter mounted on my lens. That let me create infrared images, but only while using a tripod since the filter blocks visible light. Even with full sunlight, exposure times can run in the seconds. But that did show me the potential for IR, and that I wanted to pursue it. So the next step was to find out how to shoot infrared more easily, which led me to Life Pixel. (Note: there are other companies that do this too, like Kolari Vision, but Life Pixel is who I prefer and have used.)
Life Pixel’s a small company in the northwest that specializes in converting digital cameras to infrared (and some other options, such as for astrophotography). From this point on, I’ll give you the basics of having a camera converted to infrared and what’s involved in processing those images, but for much, much more detailed information, visit Life Pixel’s introduction page on their website.

My first infrared camera, a Nikon D70, and the low-pass filter that Life Pixel returned with it after the conversion.
Having decided to do IR right, in early 2007 I sent a Nikon D70 in to have its low-pass filter (which also blocks infrared light) removed and replaced with an infrared sensitive filter. Many of today’s cameras no longer have a low-pass filter, but they still have a filter over the sensor that blocks IR light (among other things). That is what’s replaced. And, most companies offer you several choices in the type of IR filter used. I chose “Super Color” from Life Pixel because I felt that the description of its capabilities best fit what I wanted. (NOTE: once you’ve had a camera converted, all it will shoot is infrared, you can’t make “normal” pictures with it any more. Life Pixel does return the original filter with the camera, and you can have it converted back in the future if you like.) Once this process is finished, you have an infrared camera that shoots like a normal camera as far as exposure, but records only infrared light. (Note: after a few years I wanted more resolution and a larger LCD, so then had a Nikon D80 converted.
This is how an original RAW capture looked out of the D70. Nikon D70, ISO 200, 1/250 at f/10.

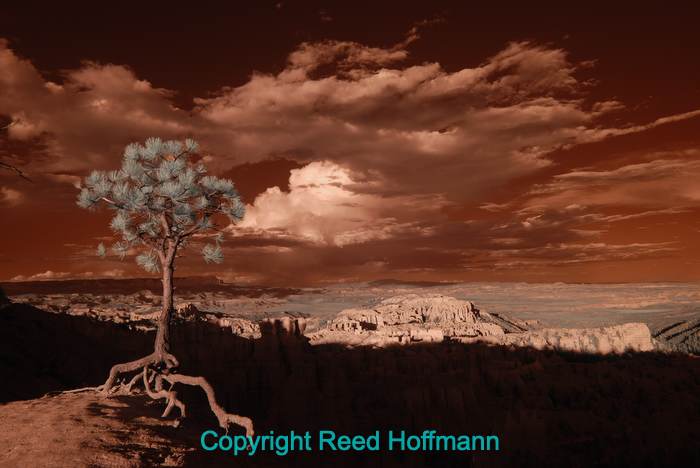
And this is how that same capture looked after doing a “Color Swap” as detailed below. Nikon D70, ISO 200, 1/250 at f/10.
Before I get into the fun part of that, let me mention one more thing about the conversion. Since infrared is a different wavelength than visible light, focus is affected. There are a few ways to work with that. Often, the company doing the conversion can calibrate a lens you send with the camera to focus the image capture properly after the conversion. But, the calibration is good only for that one lens. Or, if your camera offers live view (either as an EVF or on the back LCD), you can focus using that. Finally, and the option I usually take, is to shoot wide-angle lenses at small apertures, and shift my focus while shooting several frames. Now on to the details of shooting and processing:
Exposure – because the display on the back of the camera is showing you the infrared capture, you may find it difficult to judge exposure based on that. In time you’ll learn, but you’ll also find that the meter is fairly accurate to what you want, and you can still rely on the histogram readout. While the key in most photography is to avoid clipping highlights, with infrared you may find that clipped highlights on the original capture aren’t a problem. You’ll understand this better if you get a camera converted and start using it.
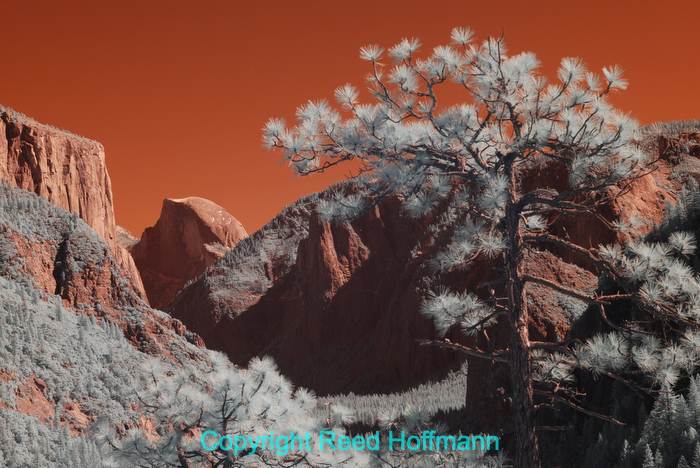
Light – you’ll quickly realize that to get neat infrared photos, you need sunlight. Cloudy days and artificial light will leave you disappointed. And I find that landscapes, with foliage and blue skies are great, as are the classic Southwest scenes.
Color – here’s where things get really interesting. With the “Super Color” filter in my Nikon D80, before shooting I create a custom white balance (“Preset” in Nikon speak) off a grey card in sunlight. The key things here are to make sure you shoot in RAW and to have your manufacturer’s free RAW converter software. With most cameras, if you open a RAW infrared capture into Adobe Photoshop or Lightroom, you’ll find your ability to adjust color temperature very limited. However, if you first open into software like Nikon’s Capture NX-D (or now NX Studio) or Canon’s Digital Photo Professional, you’ll have much more leeway to make adjustments. Since I’m a Nikon shooter, I first open my infrared NEF files into Capture NX-D, then decide whether I want to change that custom (“Preset”) white balance using the eyedropper tool. After that I can shift exposure with the slider if needed, and then open the image from Capture NX-D to Photoshop. At that point, I have some options. For one, I can go for that classic black-and-white IR look, high contrast with black skies. Or, I can choose a couple of different ways to work with color. If going for color, the first thing I’d do is a “Color Swap,” which my Super Color filter excels at. You can find the step-by-step video on Life Pixel’s site, but it’s simply a matter of opening the Color Channel adjustment and flipping (swapping) the red and blue channels. If that looks good, fine. But you can go further still by opening the Hue/Saturation adjustment and working the individual colors. Yellow, Cyan and Blue are the main ones, though you might also want to work with Red. After that, I save as a TIFF (without Layers), then re-open into Adobe Camera Raw for a few final tweaks. Once finished I save the image as a DNG.

This is from last month’s Southwest workshop, from sunset at Bryce National Park. If I took this overexposed RAW file straight into Photoshop, I’d never be able to get the look I wanted. Nikon D80, ISO 100, 1/200 at f/7.1.
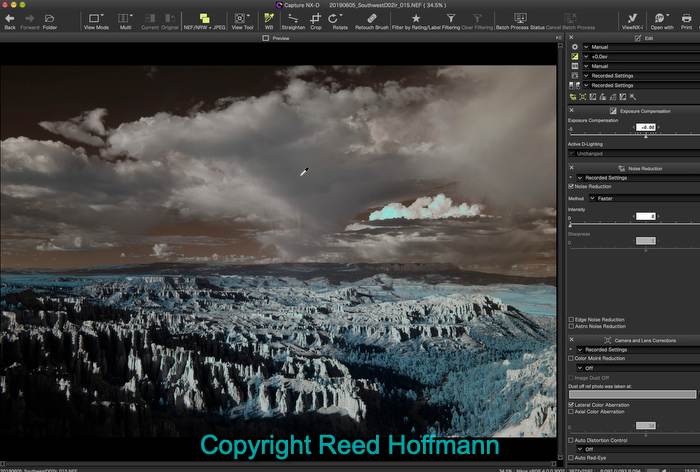
By taking it into Nikon’s Capture NX-D, I could to set the white point off the gray clouds and have the data rendered differently, something I couldn’t do in Photoshop. Now I have a good infrared exposure to work with. Nikon D80, ISO 100, 1/200 at f/7.1.
So here are the steps I take:
1 – Shoot in Raw.
Another capture from Bryce. This is the original NEF from the camera. Nikon D80, ISO 100, 1/250 at f/8.
2 – Open into my manufacturer’s RAW conversion software and use the white balance eyedropper to set a custom white balance and adjust exposure if needed.
In Nikon’s Capture NX-D software I can choose to set the white balance differenty, in this case off a cloud, and open the exposure a bit with the exposure slider. Nikon D80, ISO 100, 1/250 at f/8.
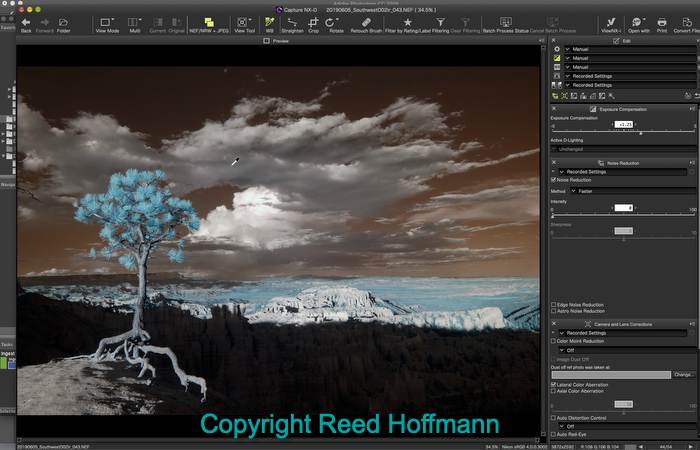
3 – Open the file from there into Photoshop and do a “Color Swap.”
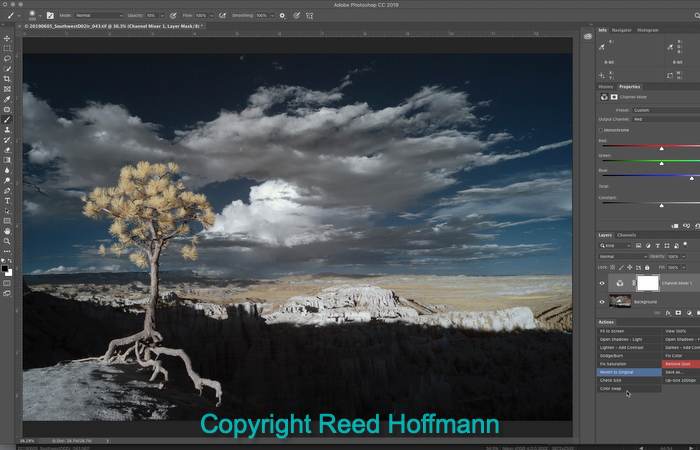
In Photoshop, I run a “Color Swap” conversion, which I’ve created as an action. Nikon D80, ISO 100, 1/250 at f/8.
4 –If that’s not enough, I use the Hue-Saturation adjustment to work individual colors.
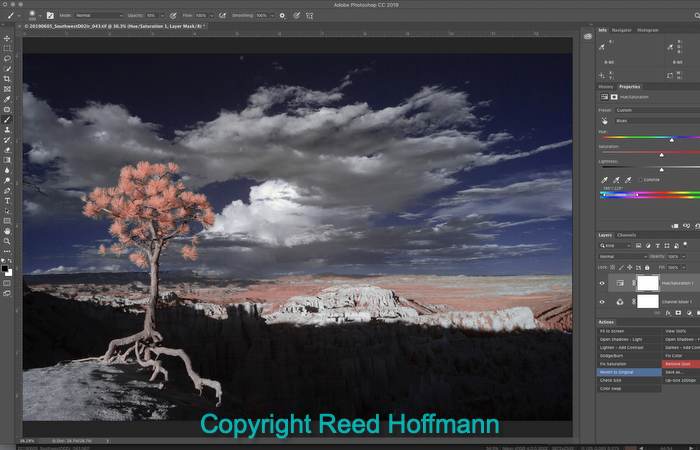
Wanting to go further with the color, I added a Hue/Saturation Adjustment Layer and shifted the Yellows, Red, Cyans and Blues. I then save it out as a TIFF without Layers. Nikon D80, ISO 100, 1/250 at f/8.
5 – Then save as a TIFF (or PSD), without Layers. At that point I open into Adobe Camera RAW for final adjustments before saving the finished image as a DNG.

My final step is to open that TIFF into Adobe Camera Raw, where I do most of my editing, make some final adjustments and save it as a DNG. Nikon D80, ISO 100, 1/250 at f/8.
That’s it. Nothing to it, right? For me, infrared is like a fisheye lens – the less you use it, the better the effect. I took the D80 along on my recent Southwest workshop, and will take an IR camera along with me on the Acadia one this fall. In fact, it’s time to upgrade my camera once more. Anyone have a good used D7100 or D7200 they’re looking to sell cheap? 🙂
If you like this story, please share it with your friends and let them know about the links on photography that I post on my business Facebook page. I’m also on Instagram and Twitter, @reedhoffmann. And if you’re curious about the workshops I teach, you can find them here.
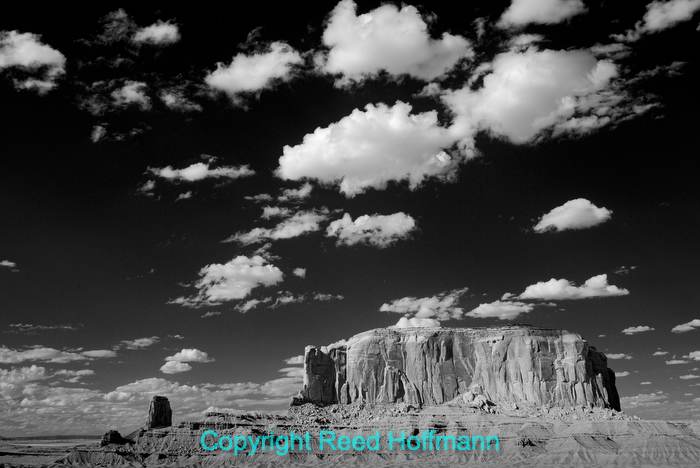
Here’s an infrared capture from Monument Valley with a simple black and white conversion applied to it. Nikon D80, ISO 160, 1/400 at f/7.1.

A different photo from Monument Valley, doing a Color Swap and adjust Hue/Saturation to get the look I wanted. Nikon D80, ISO 250, 1/125 at f/9.
This is exactly why I had a D200 converted that I was no longer using. I got the Super Color from Life Puxel as well. I’ve never had any focus issues with other lenses, but I do tend to use a 15mm f/3.5 ais at f/8 on it a lot. I used Adobe’s DNG editor to make a custom profile that gets the white balance within ACR’s range.
Yes, I’ve read about the DNG editor fix. I’ll have to give it a try.