I used film for 25 years before converting to digital in the late 90s. Which means more than half of my life in photography is on film. Now I’m bringing new life back to those old images, I’m digitizing old photos.
I’ve always been a proponent of using digital cameras to digitize old prints. It’s easy, fast, and high-resolution. That was also easy to do with slides. Since slides are positives (as opposed to negatives), all you had to do was backlight them and use a close-up lens (often referred to as a “macro” or “micro”). I’ll explain how to do that in a moment. But copying negative film was more complicated. With black and white, you had to reverse it. That wasn’t too difficult, as long as you had software that could “Invert’ the image, then make some tonal adjustments. But Color negative film was a bigger challenge because, well, it’s color in negative form. You can’t simply invert it. There are a number of tutorials on how to that, but none are easy and the results can be inconsistent. Which is why one of the new features introduced with the Nikon D850 intrigued me. It has the ability to do black-and-white and color negative conversions in-camera. No software or added work needed afterwards. So guess what I’ve been doing the past week?
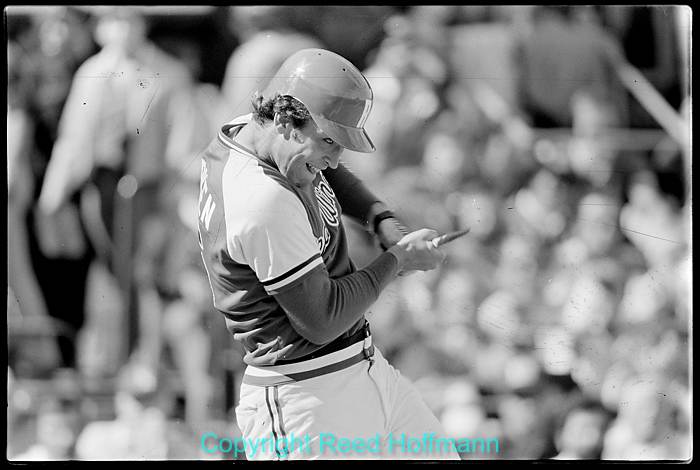
This is a black-and-white negative from the early 80s of Cal Ripken, Jr., breaking a bat while playing for the AAA Rochester Red Wings. The conversion from negative to positive happened in-camera with the Nikon D850.
Before I get into those new features on the D850, let me explain the setup you’ll need to copy film, regardless of what camera you use. As with many things in life, there’s an easy way and a slower, but better way. The key, as I mentioned above, is backlighting – having a light source behind the film to illuminate it. That can be as simple as a white wall or a piece of cardboard.
If you only need to make a few copies, you can put a rig together pretty simply. You just need a way to hold the film in front of the camera and have light on something white behind it.
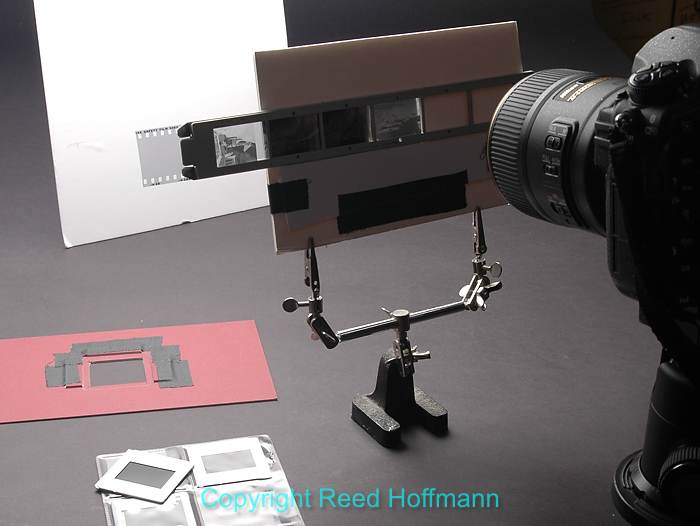
Regardless of what method you use to make your copies, you’ll need something to hold the film and/or slides. A few minutes of work with a razor, some cardboard and tape should solve that. If you have film that’s heavily bowed, then using two pieces of glass (or an old film holder from a scanner or enlarger) will help flatten it out.
You don’t need anything fancy to hold the slides. But the tighter the fit, the easier it is to quickly copy a large number of slides.
At this point, you could simply prop that film holder up and place something white behind it. With your camera on a tripod, adjust the distance to fill the frame. The hardest part of doing it this way is getting the film and camera as parallel and in line with each other as possible. Take your time doing this, as the more precise you are, the better the copies will be.
Now you need light on that white surface behind the film. You can use available light, and that will work fine. However, be sure to create a custom white balance (called “Preset white balance” by Nikon) in that light to ensure the proper color for your copies. And, since you’ll want to be at a low ISO (for quality) and a fairly small aperture (like f/11) to help compensate for any curvature in the film, you’ll also be shooting at a slow shutter speed. That means you should use the self-timer (lower the interval to the shortest, like two-seconds) or a remote release. Either of those should help prevent you adding blur to the copy by pushing the shutter button.
If, instead, you use a flash to light that white surface, make sure it’s off-camera (using a cable or some other method). That allows you to shoot at higher shutter speeds, meaning less chance of camera-movement blur. That burst of bright light also means you can use smaller apertures (f/16 or 22), and simplify white balance by setting it to the “Flash” setting on the camera.

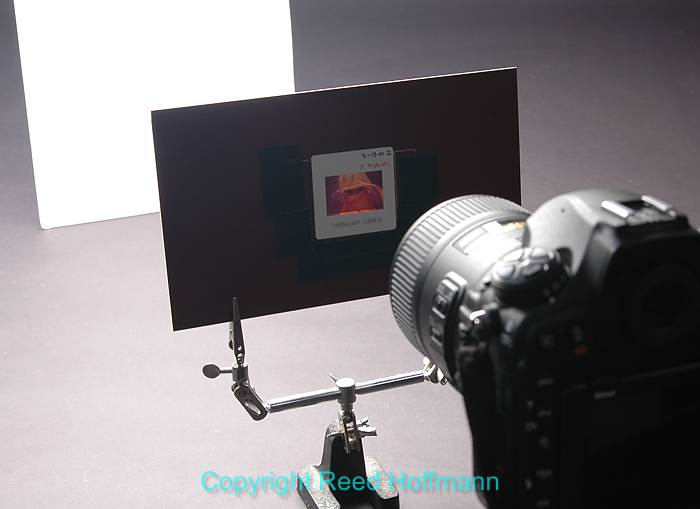
A better setup for copying is to use a box, which you can then light from the inside with a flash (I used an old Nikon SB-800, connected to the camera with a TTL cord). To the left of the flash, hidden behind the stand’s post, is a light bulb. That provides illumination for both focusing as well as shooting the color as well as black-and-white negatives.
If your workflow normally incorporates RAW capture, go ahead and do that. It will help you afterwards if you need to make any tonal or color adjustments.
If you’ve got a lot of film or slides to copy, it’s worth spending a little more time on the setup. In my case that meant digging an old copy stand out of storage. I picked this up at a camera store, used, for about $30. With it I can mount the camera directly over the film and carefully adjust the distance. Using my smartphone and a free level app (iHandy Level), I can also ensure that it’s perfectly parallel to the film. I used the same film/slide holder I’d made for the simple setup, but put that over a small hole I’d cut in the top of a cardboard box.
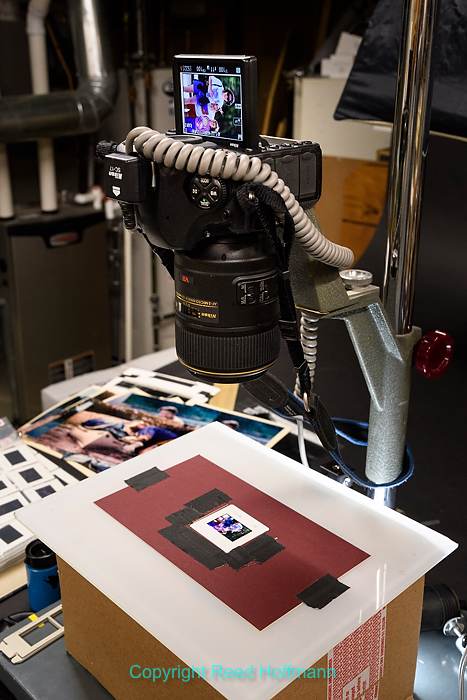
A more precise way to copy film would be to use a copy stand to mount the camera both directly above and exactly parallel to the film. The box, below, which has a sheet of translucent glass on top of it, is lit inside with both a bulb and a flash. I used the flash when copying slides.
Cutting another hole in the side of the box let me use a small light bulb to fill the interior of the box with light. I’d need that light to focus, and as you’ll see in a moment, to copy the negatives. I also used a flash (Nikon SB-800) for copying color slides. Adding some white paper to the inside of the box gave me clean, even light projecting up through that top hole and the film.
Up to this point, everything I’ve done can be done with any camera and close-up lens (or even a point-and-shoot in Macro mode). But the big reason I’m doing this now is to take advantage of that new feature in the D850, called the “Negative digitizer.” With the LCD flipped up to face me, I turned on Live View. After framing and focusing, pressing the “i” button on the back of the camera took me into a menu with several options. Selecting “Negative Digitizer,” I then had a choice of “MC” (monochrome) for black and white negatives or “CL” (color) for color negatives.
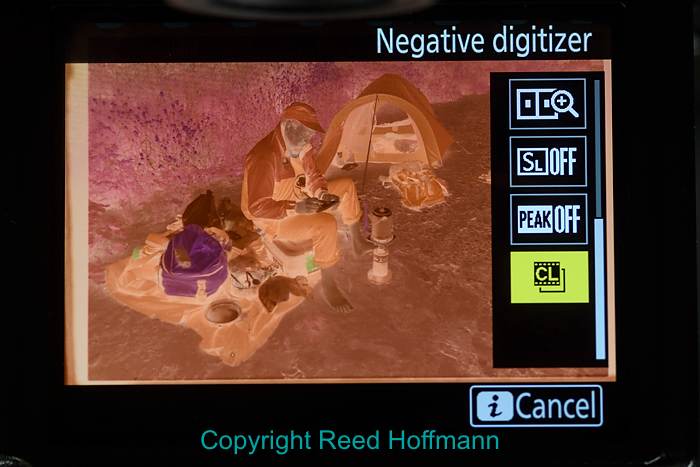
This is how a color negative looks before turning on the “Negative digitizer” on the Nikon D850. This was from a magazine story I did in 1995 with a reporter (Jack Jones, shown here), as we canoed the Genesee River from its beginning in Pennsylvania to its end in Lake Ontario.
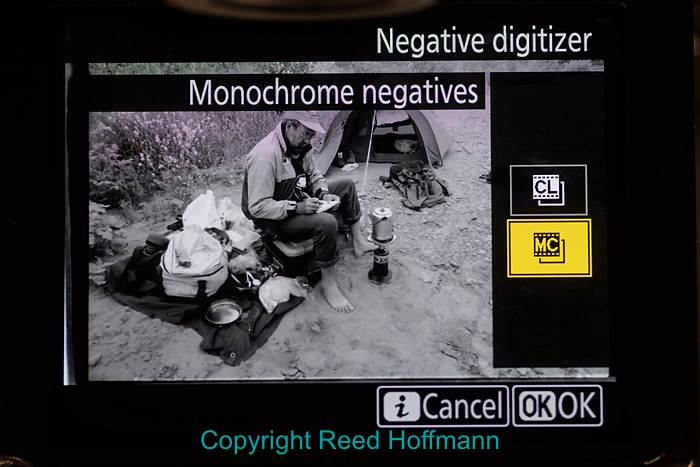
And this is how it would look with the conversion to monochrome (back-and-white).
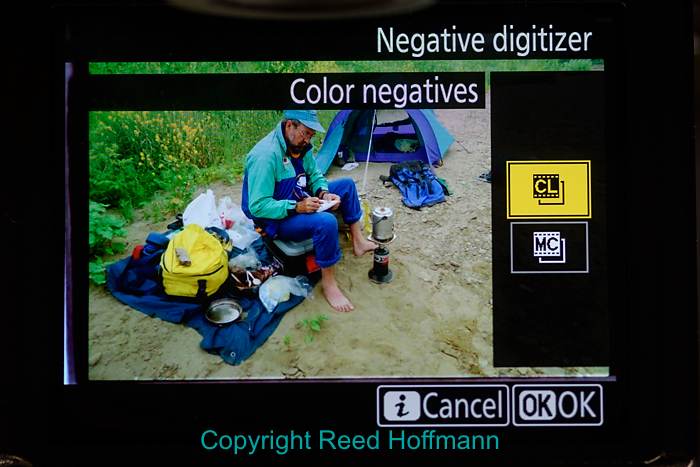
This is how the camera converts it, in-camera, to a color positive.
The advantage of having these conversions done in-camera is that you save the time and trouble of doing it later. The downside is that you have to use available light (no flash), the file is a JPEG and you have minimal control over exposure. Exposure is controlled automatically via Aperture Priority (and you can’t change that), although you are able to adjust it to darker or lighter. To do that, push the “OK” button, where you’ll then be able to shift a slider up or down and see the effect. On the plus side, these are full-resolution JPEGs, meaning 45-megapixels of data. One thing you’re sure to notice, though, is that film’s quality doesn’t compare well with today’s digital cameras.
It’s worth noting here that if you don’t want to bother building your own setup for copying, you can buy one from Nikon. The Nikon ES-2 is made just for that, and should be released soon.
I knew film was dead when I got my first 12-megapixel digital SLR. Those images outperformed my best 35mm film captures in resolution, sharpness and dynamic range. So don’t be surprised if you’re disappointed with the digital copies of your old film. But don’t let that stop you from digitizing them. After all, a big part of photography is moment. I first visited India in 2001. At that time I had a choice of shooting a state-of-the-art 2.7-megapixel camera (Nikon D1) or a Nikon D5 and Kodachrome. I knew film was on its way out, but the digital resolution then was so low that I chose the D5 and Kodachrome. As it turned out, that was the last time I shot film. I’ve returned to India since then, but some of the photos from that first trip are still some of my favorites. For instance, on that first visit to the Taj Mahal we had beautiful morning light with a perfect sky. So while those shots don’t hold up well technically against my more recent photos of the Taj, they’re still the best ones.
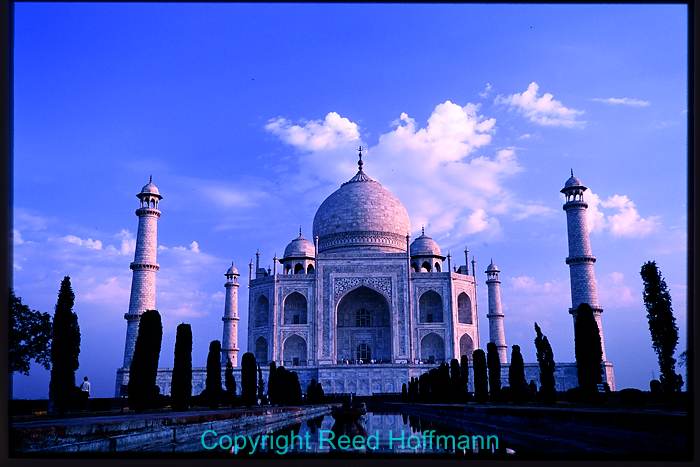
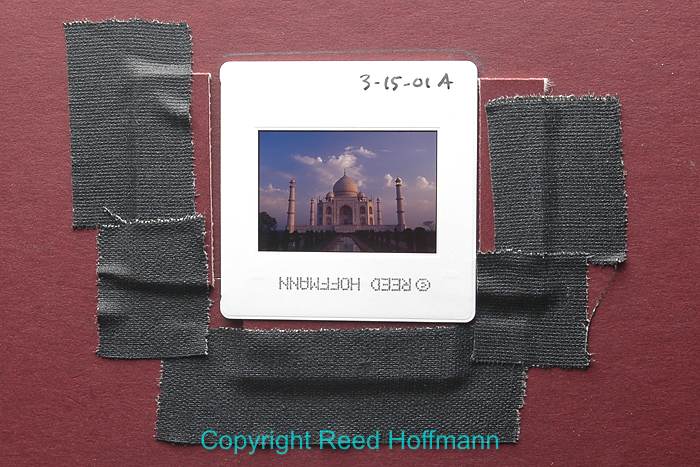
This view of the Taj Mahal in India, is from 2001 and was shot on Kodachrome. Using my Nikon D850, I’ve now copied it to create a 45-megapixel digital image.
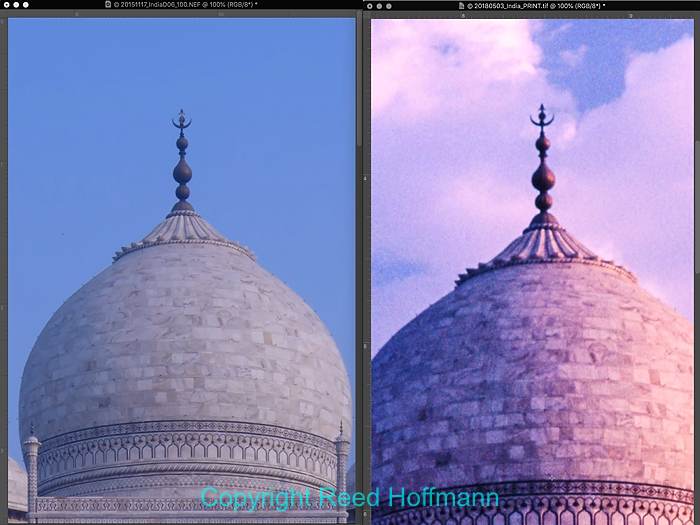
The photo of the top of the dome of the Taj Mahal at left was taken with a 24-megapixel D750 in 2015. At right is the copy from the Kodachrome slide, re-sampled from 45-megapixel (from the D850) to 24-megapixel for direct comparison. You can see how there’s more detail and sharpness in the digital capture from the D750.
And of course there’s the sentimental value of old photos. Going through my film, I re-lived the bicycle trip I took from Indiana to Wyoming in 1974. Same with my family’s European vacation in 1974. All the photos from my kids’ childhoods are on film. And I even found some slides from my parents’ wedding, in 1946. Honestly, photos like that will be more important to my family when I’m gone than anything I’ve created professionally.
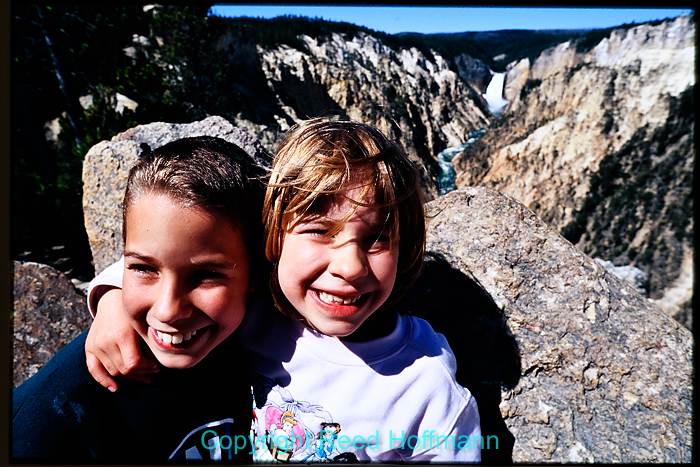
Our children were born in 1990 and 1993, well before I started shooting digital. Now it’s easy for me to go back to that old film, copy it into digital format and archive it for the future. This is Nathan and Rachel from a trip to Yellowstone National Park.
When all’s said and done, that’s the legacy in photos that I leave my family. Not the events I’ve photographed or the places I’ve traveled, but the history of my family. And prior to 2000, that’s all on film. But not anymore. Now it’s digital, so I can share it and ensure it lives on for future generations.
(If you like this, please share it with your friends, and let them know about the links about photography I post on my business Facebook page. I’m also on Instagram and Twitter, @reedhoffmann)
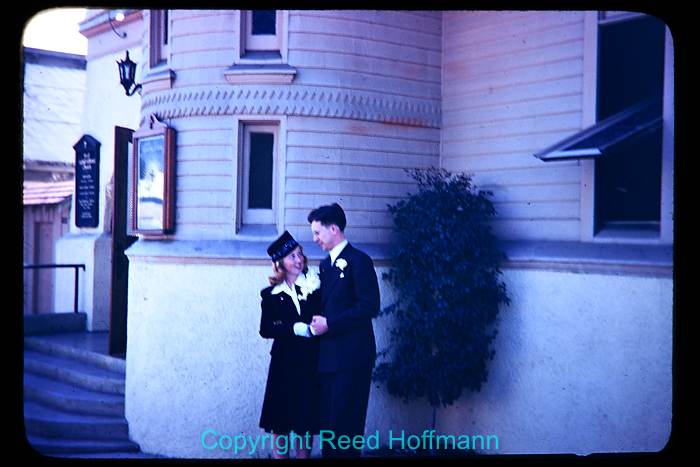
Going through old family film, I found a few slides from my parents’ wedding in 1946. They were married in San Diego after both served in WWII, then came back to Indiana to raise their family. This is one of the few pictures we have from then.