One thing I remember clearly from my early years in photography was a fear of flash. Direct flash (from the camera) was flat and boring. But figuring out how to get the flash off-camera, at the proper angle and power was a black art. It was either too much, too little, or too harsh – it never looked good. So you can imagine my relief, when, at my first newspaper, the other photographers told me to avoid flash at all costs. “Concentrate on the available light,” they told me,“ and use it in the best way possible.” That was great advice, and I learned so, so much from them. But years later, that changed. I discovered that even one flash, off-camera, could make a world of difference. I could create my own “available” light, with the help of a flash.
That realization came in a roundabout way. After working at newspapers for a few years, I felt the need for a new challenge. So I chose to face my fear of flash. I volunteered for the food and fashion shoots and started using the studio. I also began incorporating flash into more of my assignments. The key to that was getting the flash away from the camera, so I bought a 15-ft sync cord, then a second, so that when paired I could put the flash even further away. It was far from easy. Remember, these were the days of film, so I never knew whether the lighting worked until after I got back to the lab. In time, though, it started making sense to me, and more surprisingly, I began having fun with it. I realized that using flash properly meant I could take control of my lighting, which let me be more creative. And I’ve never looked back.
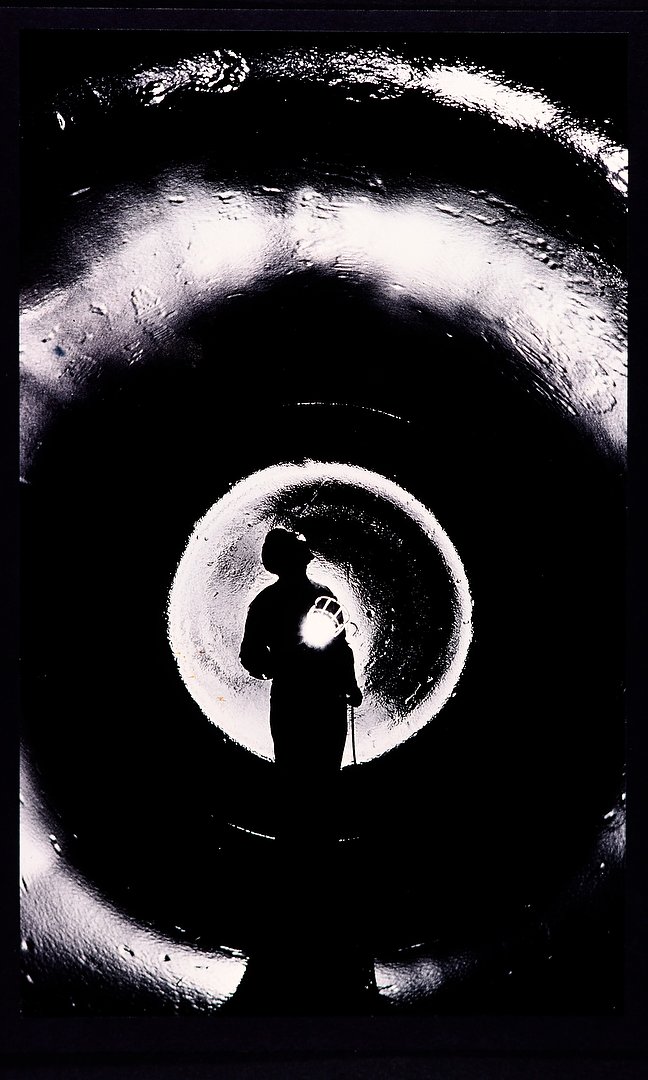
This was one of the first off-camera flash photos I did, back in the mid-80s, where I realized, “Hey, this might work!” I combined those two 15-ft sync cords to put my Vivitar 283 flash in the small opening behind this worker inspecting a glass chemical mixing tank at Kodak, in Rochester, NY. Shot with a Nikon F2 on black and white film.
From then on, on both assignment work and leading my photography workshops, I look to add flash whenever possible. However, that doesn’t mean it has to be a lot of work with a bunch of gear. Again, just one flash, off-camera, can make a huge difference. Part of the reason I can get away with only one flash is that most of these photos are done outdoors. That means I use the available light ia a second light source. Doing that, I set the exposure manually and make my flash the dominant light in the scene. While I regularly use flash for people photography, it often plays an important role in my landscape photography as well. And with the wireless capability that many of today’s flashes (and someitmes cameras) have, it’s easier than ever. Let me show you how and why with the photos below. And if you’re interested in taking my online “Mastering Flash” class, let me know.
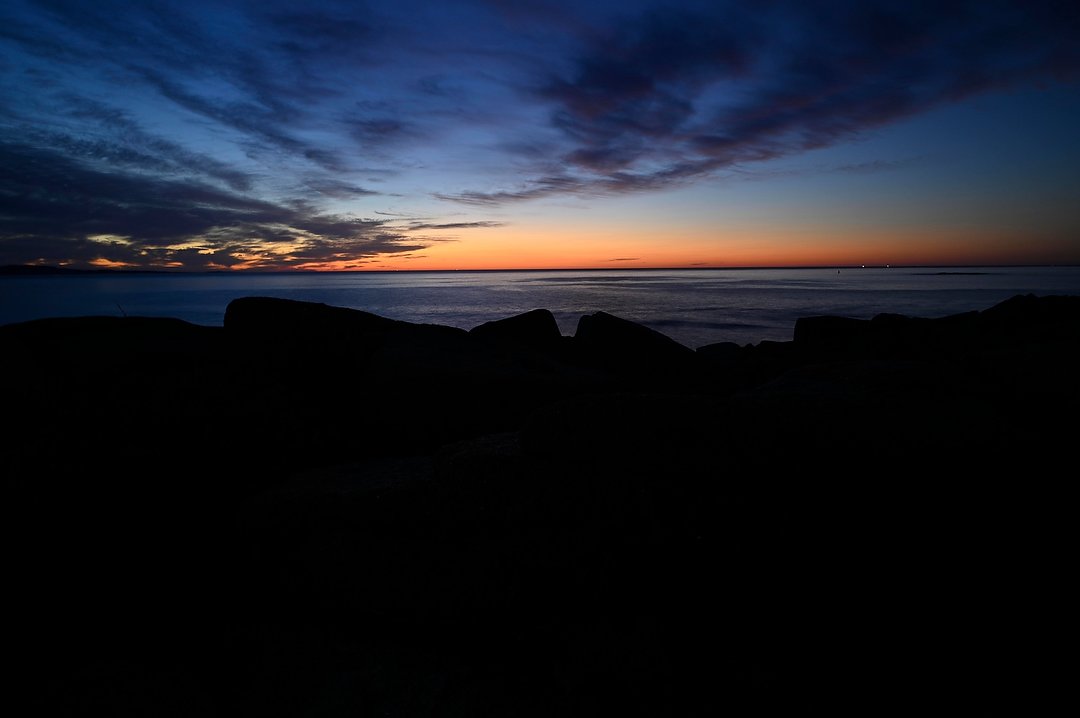
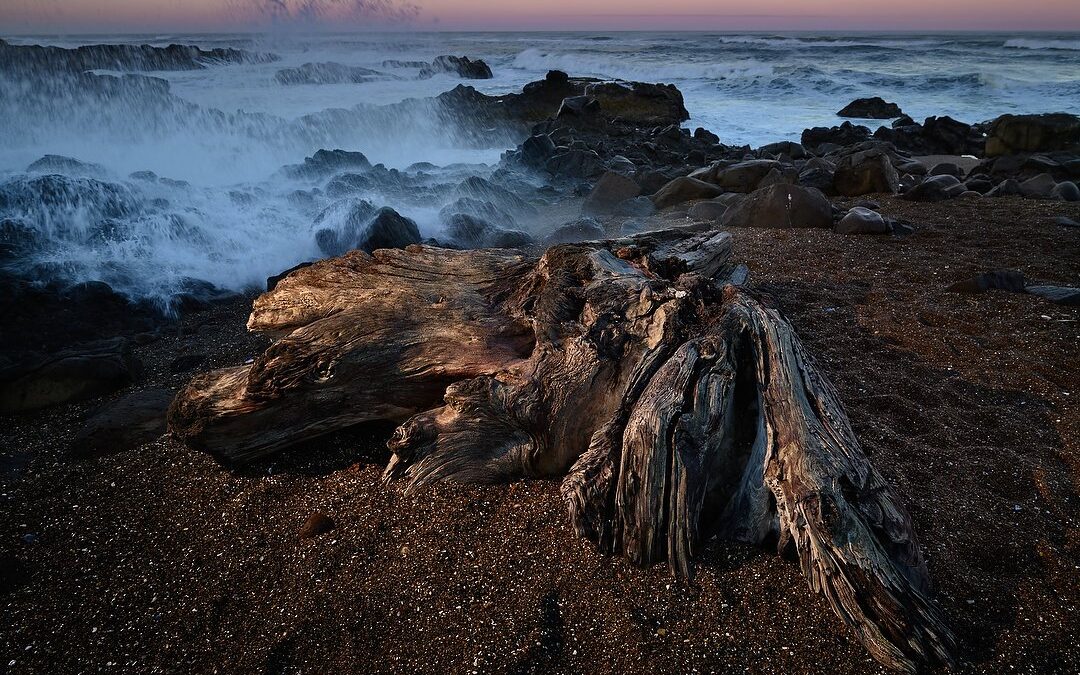
In Acadia, at Boulder Beach for sunrise, the sky had lots of light but not the foreground. I’m not patient, so instead of waiting for the sun to rise (when the sky would be less colorful), I pulled out my flash. Note that I’ve set the exposure for the sky, not the foreground, as the flash will take care of that. Nikon Z 6, Manual exposure, Sunny white balance, ISO 200, 4-seconds at f/20, Nikkor Z 14-30mm f/4 S lens at 19mm.
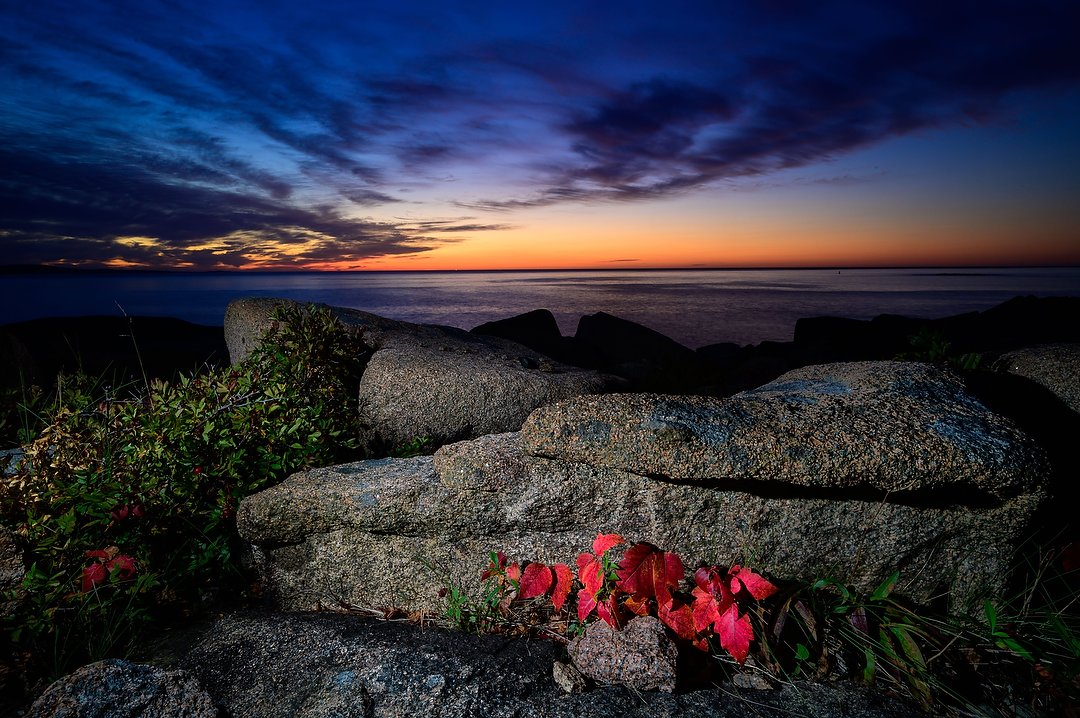
With the camera on a tripod, and using the self-timer, I had enough time to take a couple of steps to the left and manually trigger my Nikon SB-5000 flash. Without having and using that light, this picture wouldn’t exist. I used the “available” light I’d brought with me. Nikon Z 6, Manual exposure, Sunny white balance, ISO 200, 4-seconds at f/20, Nikkor Z 14-30mm f/4 S lens at 19mm.
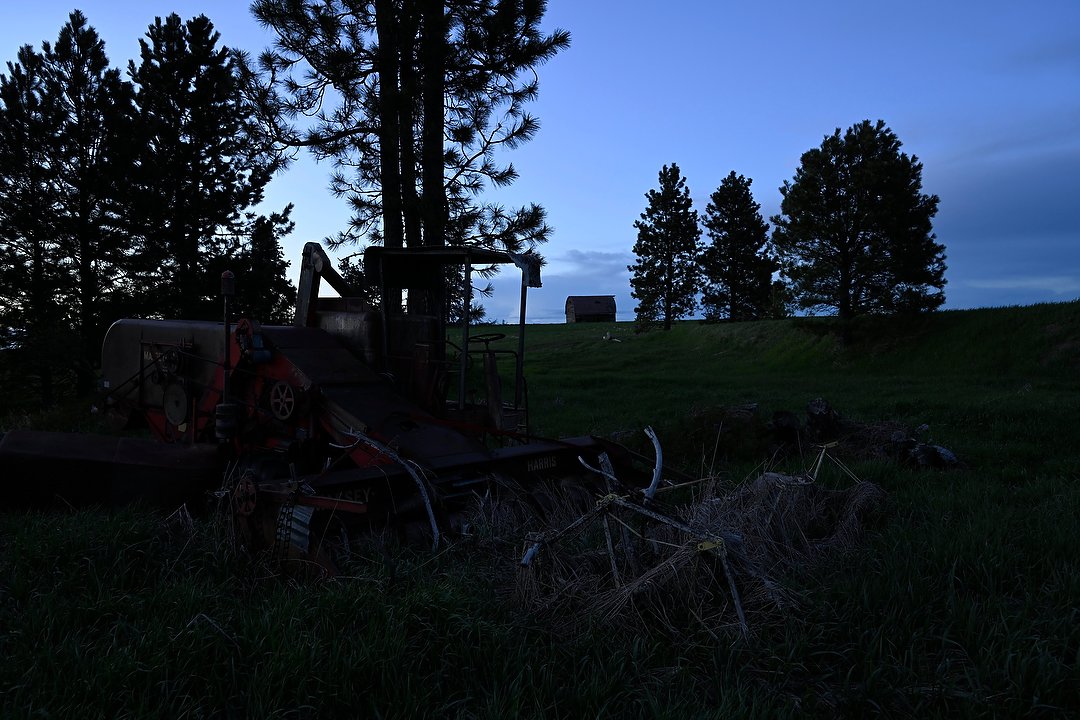
This was a spot I took my group for a night shoot during the Palouse workshop last spring. While waiting for it to get dark enough to light paint an old combine, I decided to go ahead and make a picture using flash. Again, my “base” exposure is for the sky, not the foreground subject, because the flash is going to light it. Nikon Z 9, Manual exposure, Sunny white balance, ISO 250, 1/40 at f/5.6, Nikkor Z 24-120mm f/4 S lens at 26mm.
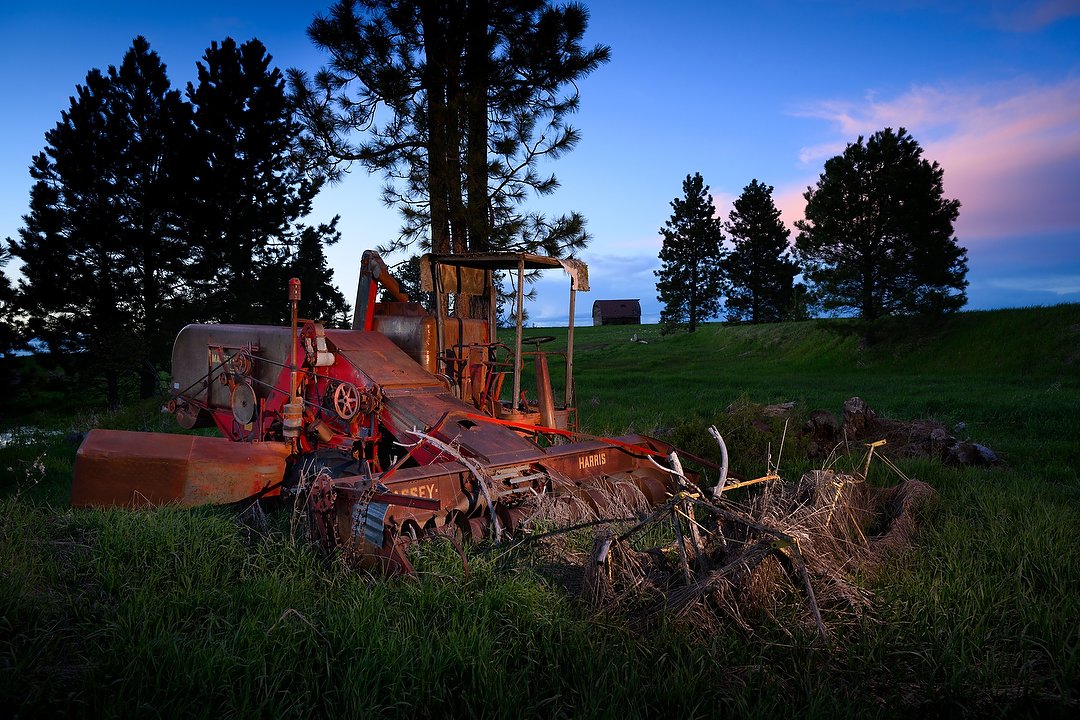
This time I used the wireless capability of my Nikon SB-5000 with the camera to trigger the flash, which was on a stand about 15-feet to the right. Getting the light to the side (off-camera), creates directional, more interesting, light and shadows. Nikon Z 9, Manual exposure, Sunny white balance, ISO 250, 1/40 at f/5.6, Nikkor Z 24-120mm f/4 S lens at 26mm.
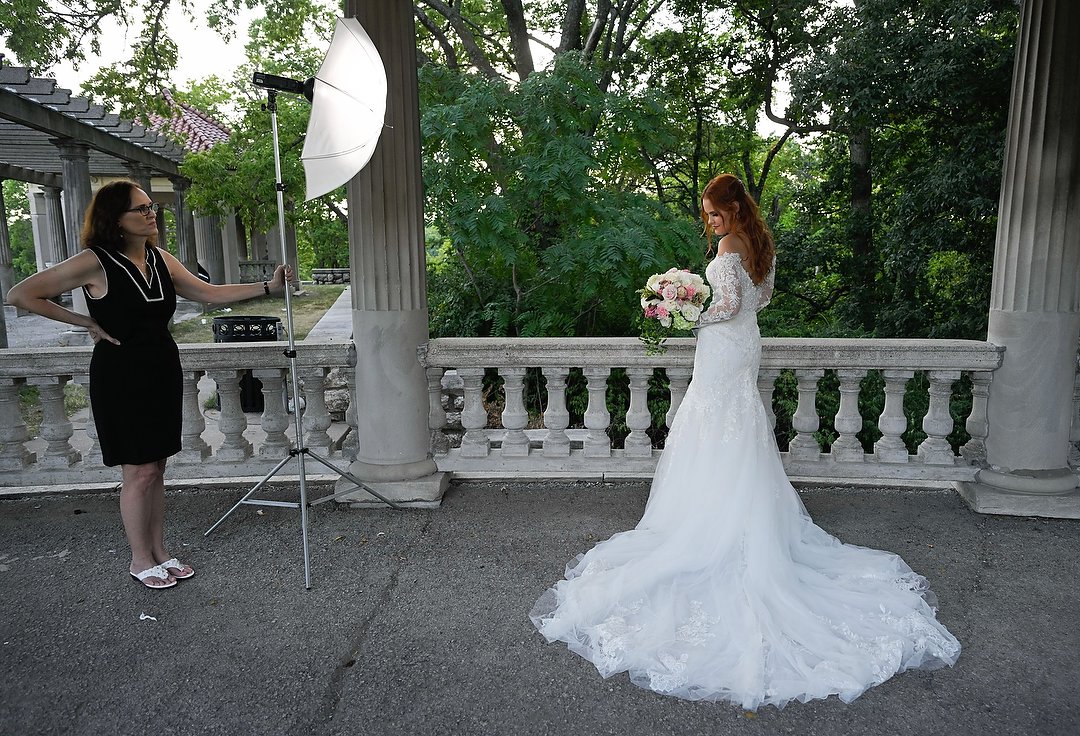
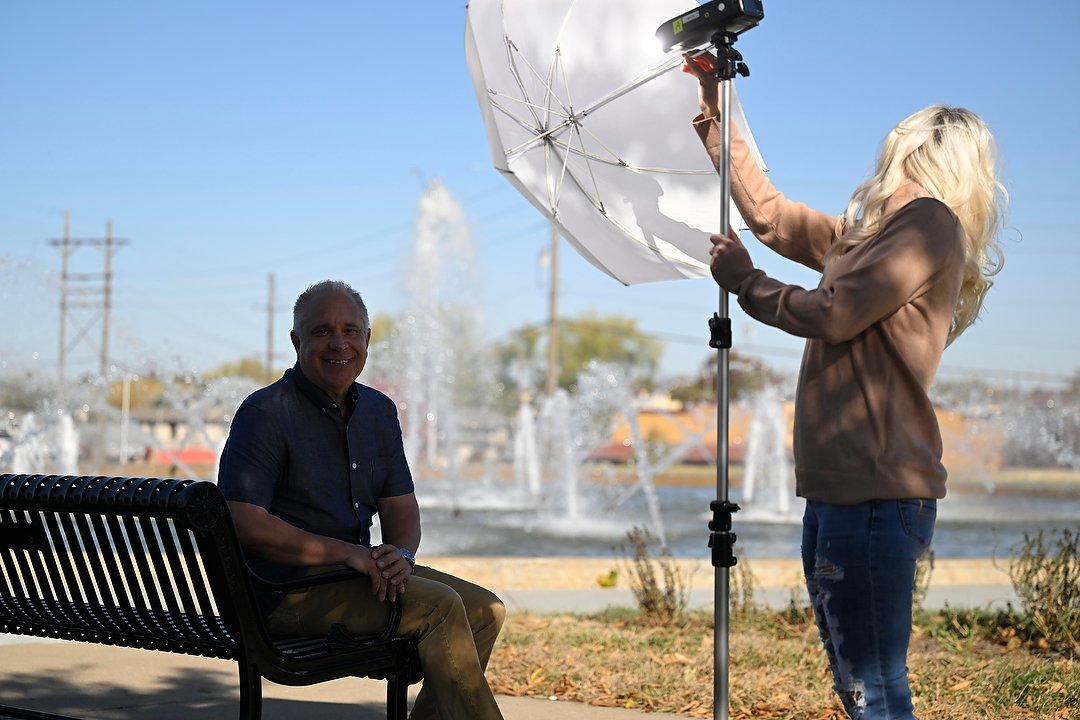
For this bridal dress shoot last fall, I needed a more powerful light, so used a battery-powered Flashpoint eVOLV 200. The more available light there is, and the further your light is from the subject, the more power you need. But it’s still just one light, and I’m firing it through an umbrella to make it “softer” (more diffuse, less harsh). Nikon Z 9, Manual exposure, Auto white balance, ISO 200, 1/250 at f/4, Nikkor Z 24-120mm f/4 S lens at 24mm.
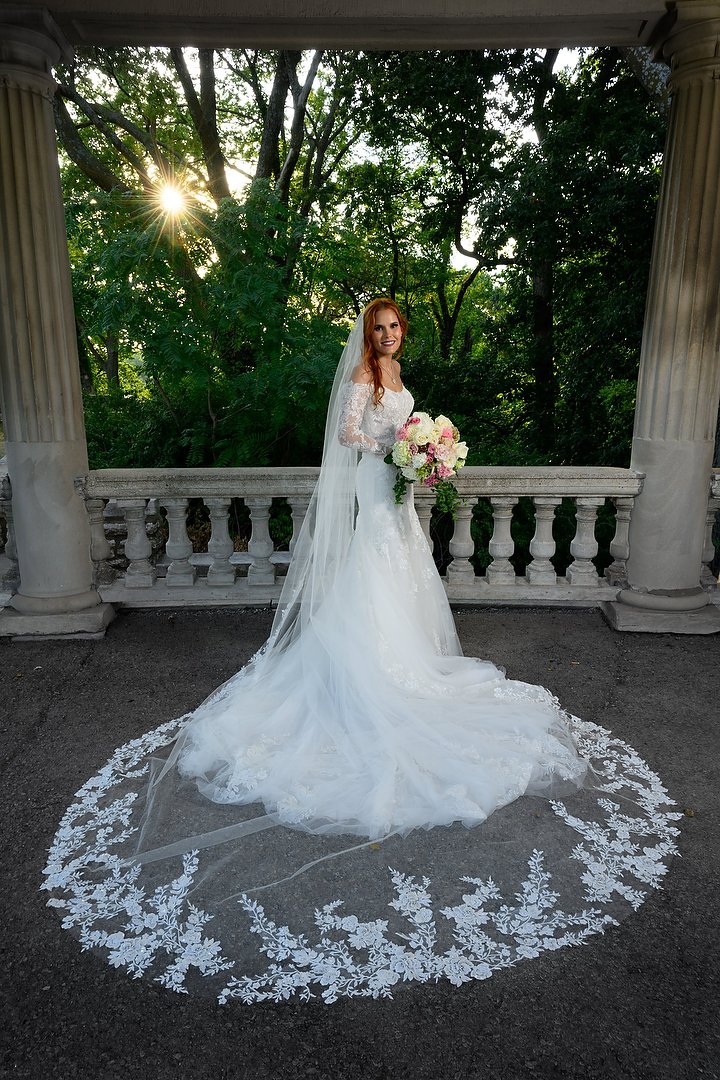
This is one of the final photos from that shoot. Note I changed the exposure to use a smaller aperture (f/16) so I could get a “sunstar” effect through the trees. And you can now see how the softer light created by firing the flash through the umbrella meant no hard shadows in Camille’s face. Nikon Z 9, Manual exposure, Auto white balance, ISO 100, 1/13 at f/16, Nikkor NIKOR Z 24-120mm f/4 S lens at 24mm.
Here’s another technique I often use. I’ve put my subject in the shade, then set my exposure for the sunlit background. Nikon Z 9, Manual exposure, Natural Auto white balance, ISO 200, 1/4000 at f/2.8, Nikkor Z 70-200mm f/2.8 VR S lens at 70mm.

Now adding the flash, it lights up my subject nicely. By adjusting the power of the flash, or moving it closer or further from him, I can control how much light illuminates him. Nikon Z 9, Manual exposure, Natural Auto white balance, ISO 200, 1/4000 at f/2.8, Nikkor Z 70-200mm f/2.8 VR S lens at 70mm.

This is the same setup as the previous photo, one flash in an umbrella, off to the left. That’s what gives me such nice light in the kids’ faces. Nikon Z 9, Manual exposure, Natural Auto white balance, ISO 320, 1/320 at f/4.5, Nikkor Z 24-70mm f/2.8 S lens at 24mm.

Weather bad outside and bored? Why not use a flash to create some fun water droplet photos? Note the one-second exposure. I was doing this in a darkened room, with the flash to the right. And since the flash duration is shorter than 1/1000 second it freezes the water in midair. Nikon D610, Manual exposure, Flash white balance, ISO 1250, one-second at at f/16, Nikkor AF-S VR Micro-Nikkor 105mm f/2.8G IF-ED lens.

This is more of a run-and-gun situation, covering election night last November for the Associated Press. Since I’m moving around a lot, I can’t use a flash on a light stand. But I can hold my Nikon SB-5000 off to the left in that hand, with a small diffuser to make it a bit less harsh. As in the other photos, I’m using Manual exposure set for the background, and relying on my flash to properly light the subject. Nikon Z 9, Manual exposure, ISO 2500, 1/125 at f/2.8, Flash white balance, Nikkor Z 24-70mm f/2.8 S lens at 25mm.
(If you like this story, please share it with your friends and let them know about the links on photography that I post on my business Facebook page. I’m also on Instagram and Twitter, @reedhoffmann. And if you’re curious about the workshops I teach, you can find them here. And, you can subscribe to this blog on my home page.)
I took Reed’s Mastering Flash class in early 2022. The class far exceeded my expectations. I’ve been able to use speedlights much more effectively in a variety of situations. I now occasionally use flash and other artificial light sources for landscape photos. This is something I never did before learning the correct techniques from Reed. He also does a great job of explaining the science and technology behind lighting and flash. I recommend this class!
Thanks Matt, I appreciated the kind words!