When I started in photography, I shot almost exclusively in black-and-white. Along with being less expensive, I could control the process – it was easy to develop the film and print the pictures myself. Gradually, though, the newspapers I worked for starting using color, until that’s all I was shooting. Lately, though, I’ve been leaning back into that monochrome look, and loving it.
When students ask me about shooting B&W, there are a few things I tell them. First, that it’s a good option if there’s not much color to begin with. That’s what happened to me on a winter trip to Yosemite. The weather forecast called for heavy overcast, and was accurate. So I went ahead and switched my camera to “Monochrome,” and honestly, even when I occasionally went back to color, the photos looked about the same.
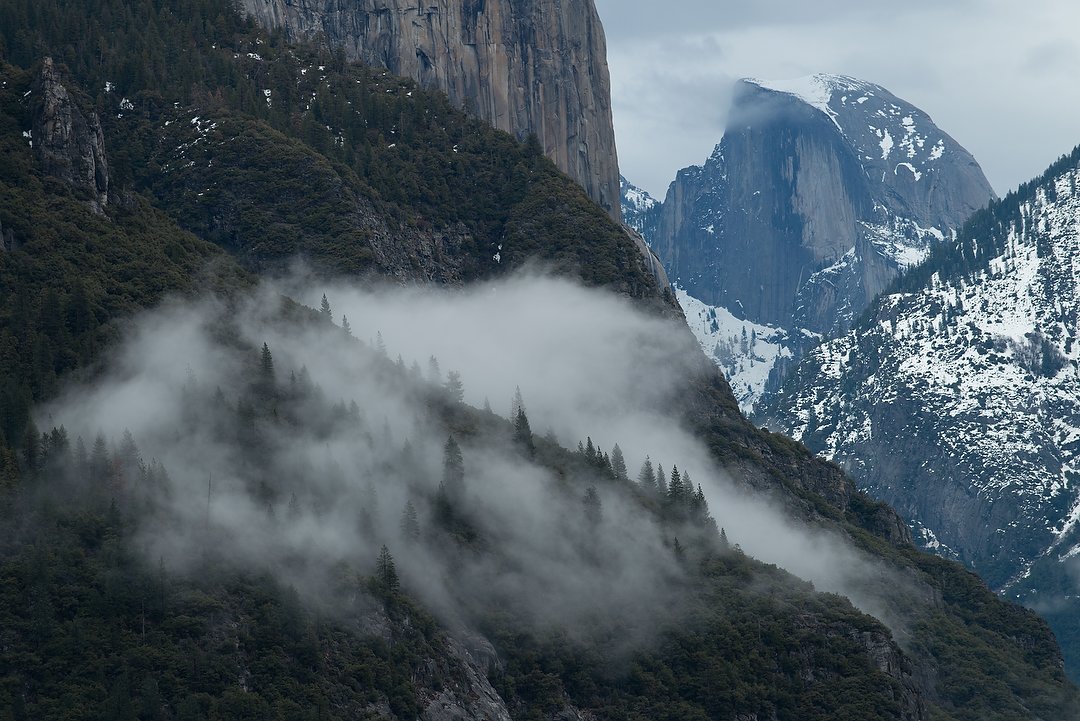
On a trip to Yosemite in 2013, we had clouds all day, every day. So the color wasn’t very impressive. Nikon D800, Aperture Priority, ISO 200, 1/500 at f/4.5, EV 0.0, Nikkor 70-200mm lens at 200mm.
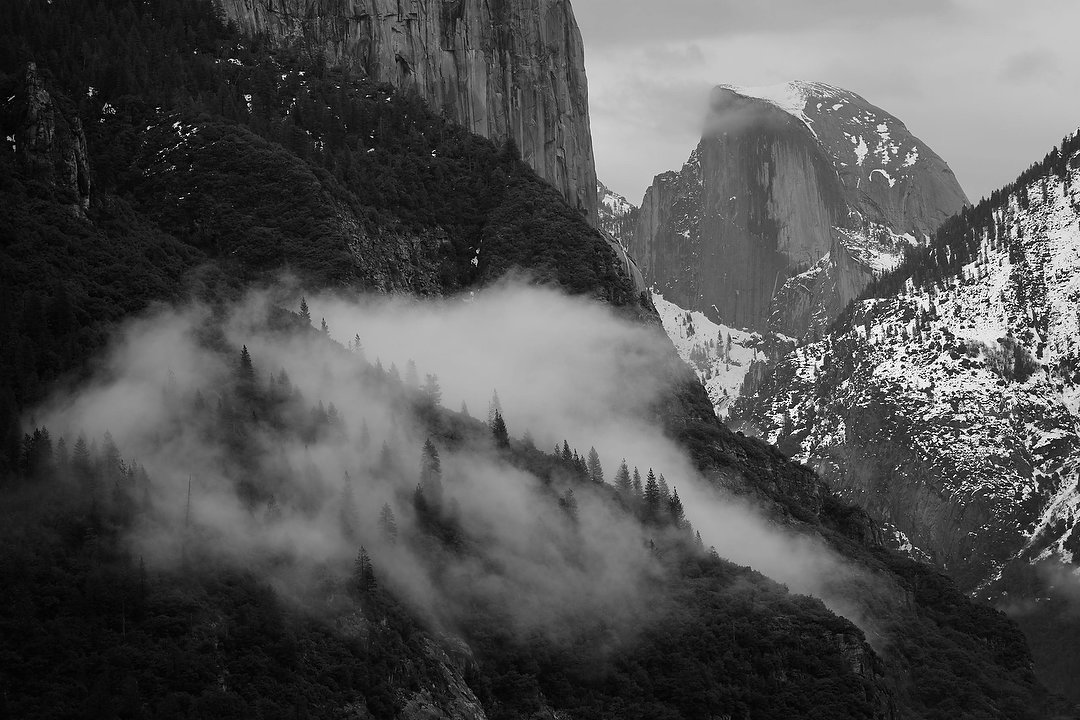
But in black-and-white, it looked great. Nikon D800, Aperture Priority, ISO 200, 1/500 at f/4.5, EV 0.0, Nikkor 70-200mm lens at 200mm.
Another good time to change to B&W is if the color in the scene is distracting or simply not pleasing. The human eye is drawn to bright colors, and there are times when that can actually take away from the power of the picture. I’ll aways remember when the newspaper I was working for at the time switched to color. The editors stopped looking for the best photo from an assignment, and instead would look for the most colorful. I guess they wanted to get their money’s worth from the more expensive production process. The photo staff would joke that we should carry a rock painted bright blue and put it in every picture.
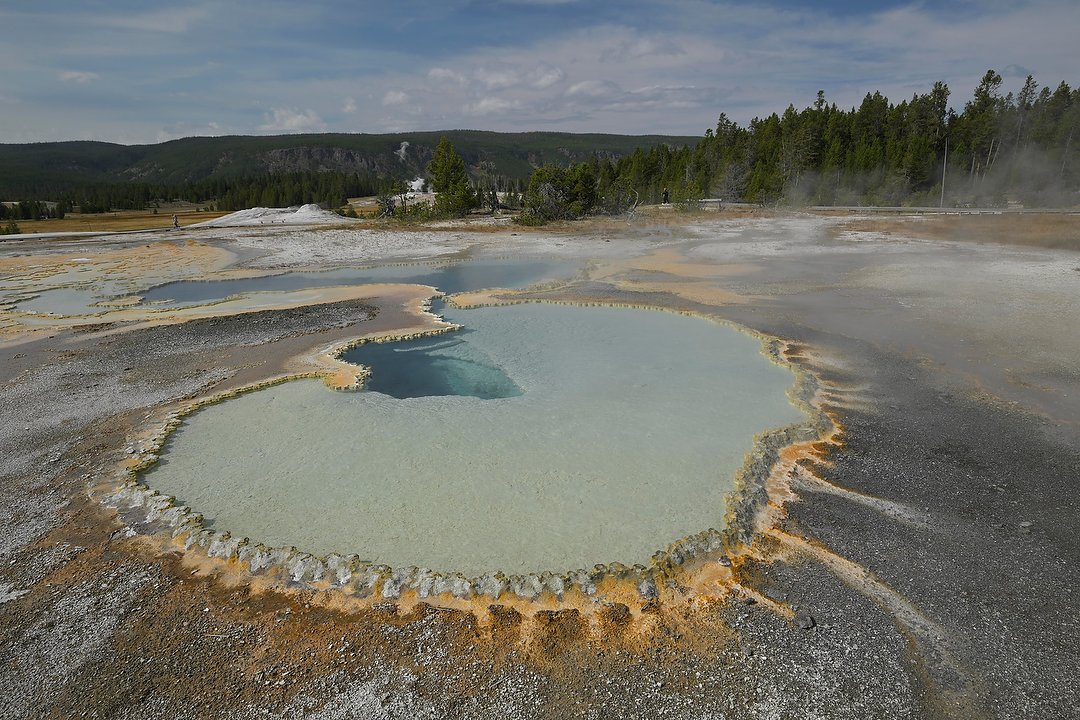
During a trip to Yellowstone this fall, the light was okay, but the color didn’t do much for me. Nikon Z 8, Aperture Priority, Sunny white balance, ISO 64, 1/100 at f/10 in Matrix metering, 0.0 EV, Nikkor Z 14-30mm f/4 S lens at 21mm.
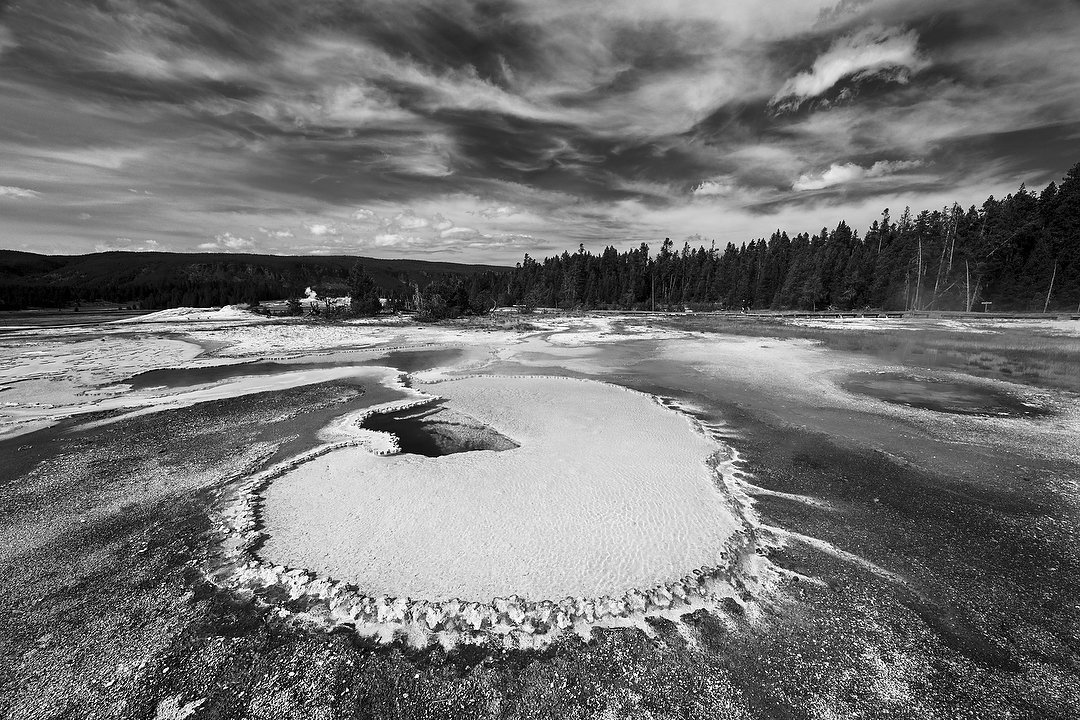
On the other hand, once I switched to my modified Monochrome setting (see below), the same scene suddenly looked awesome. Nikon Z 8, Aperture Priority, Sunny white balance, ISO 64, 1/100 at f/10 in Matrix metering, 0.0 EV, Nikkor Z 14-30mm f/4 S lens at 14mm.
Monochrome can also give an “old-time” look to pictures, since most of the black-and-white photos we see are from the mid 20th century or earlier.
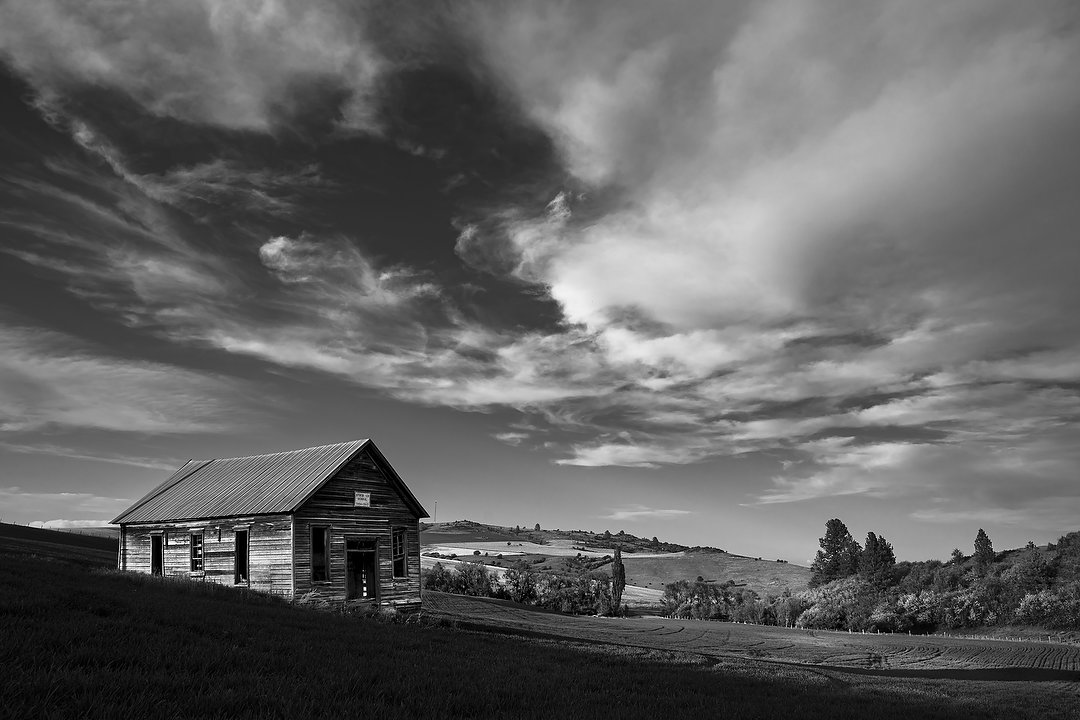
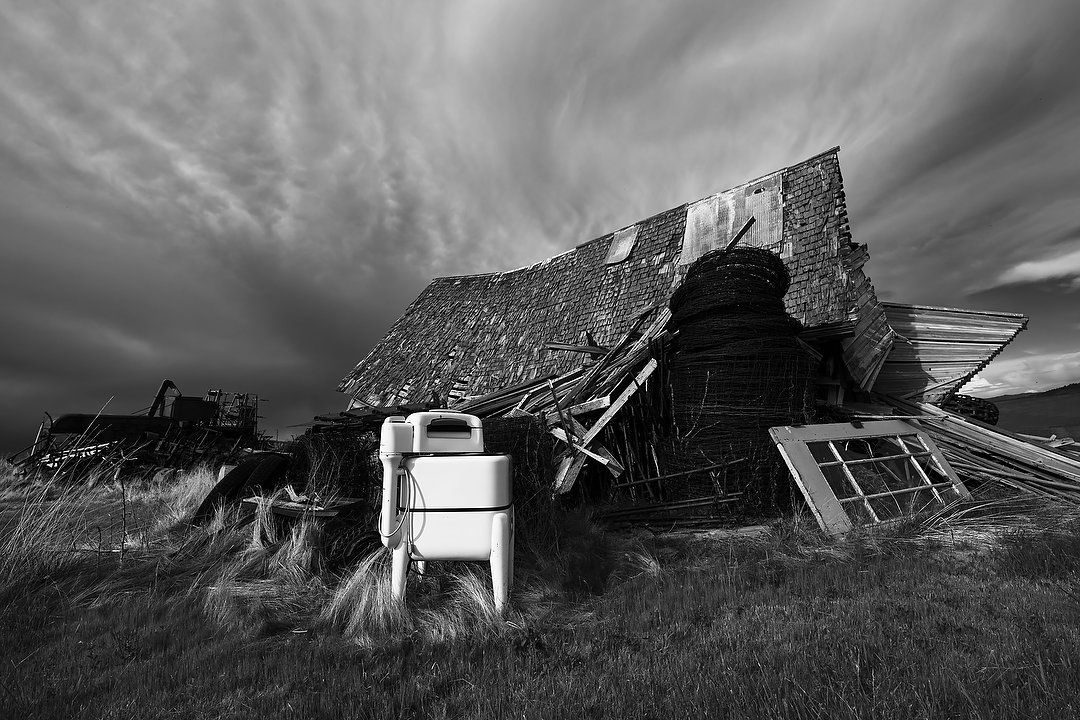
On the Palouse trip I was leading last May, one of the places I took the group was to an old schoolhouse. In this case, choosing black-and-white emphasized the old-time feel that the scene already had. Nikon Z 9, Aperture Priority, Sunny white balance, ISO 100, 1/200 at f/8 in Matrix metering, +0.7 EV, Nikkor Z 24-120mm f/4 S lens at 24mm.
Finally, since color is everywhere these days, B&W is now “cool.” Remember when suddenly everyone wanted their engagement and wedding photos in black and white? And some people still do, for the same reason.
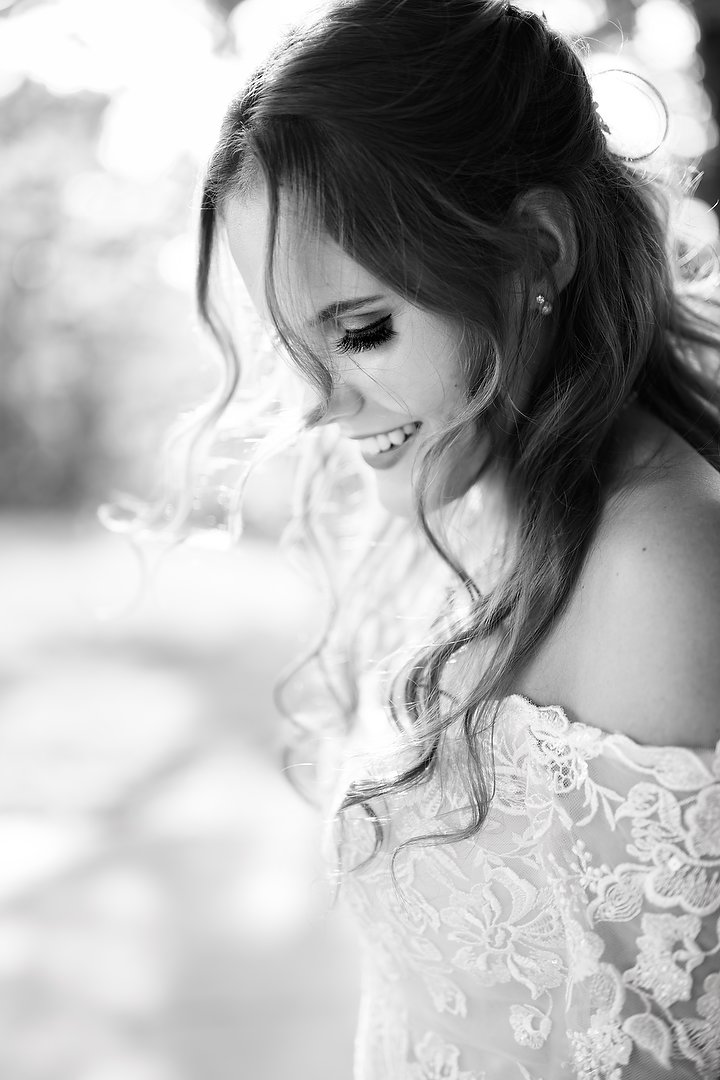
Doing this bridal shoot, I offered some of the photos black-and-white because that look is popular. Nikon Z 9, Aperture Priority, Sunny white balance, ISO 100, 1/200 at f/1.8 in Matrix metering, +1.3 EV, Nikkor Z 50mm f/1.8 S lens at 50mm.
So, if you want to shoot black-and-white, what are the things you should think about? First, you should leave yourself the option of going back to color. What’s that mean? If you shoot JPEG photos, DON’T switch your camera to monochrome. Instead, do a black-and-white conversion from the color image afterwards, in software. Why? Because in JPEG, if you choose monochrome, the camera only records one channel of information, with a maximum of 256 shades of gray (from black to white). However, if you shoot JPEG color, then you get three channels (RGB) of information, each one containing up to 256 shades of data. Which means WAY more data, which will then give you more flexibility when converting to black-and-white later, on the computer.
If, however, you shoot monochrome in RAW format, that’s not an issue because you’re still recording those three channels of data. That means if you shoot RAW, feel free to switch to black-and-white any time you like, since you’re still recording all the information you would if you were shooting color. And, of course, you then always have the ability to decide to process the image as a color photo.
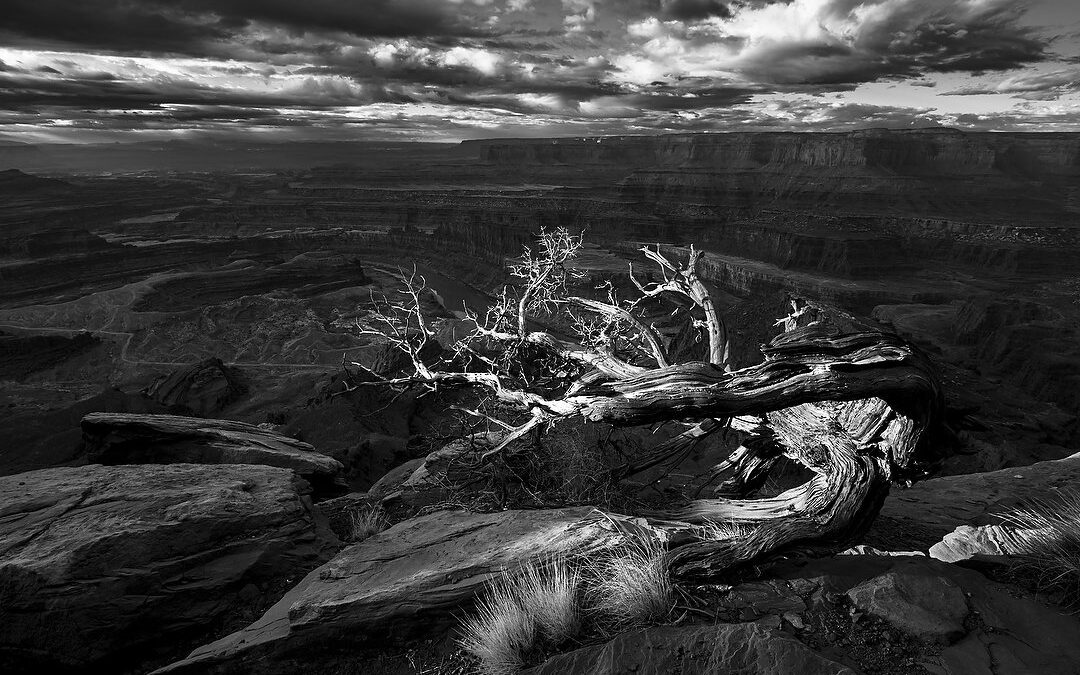
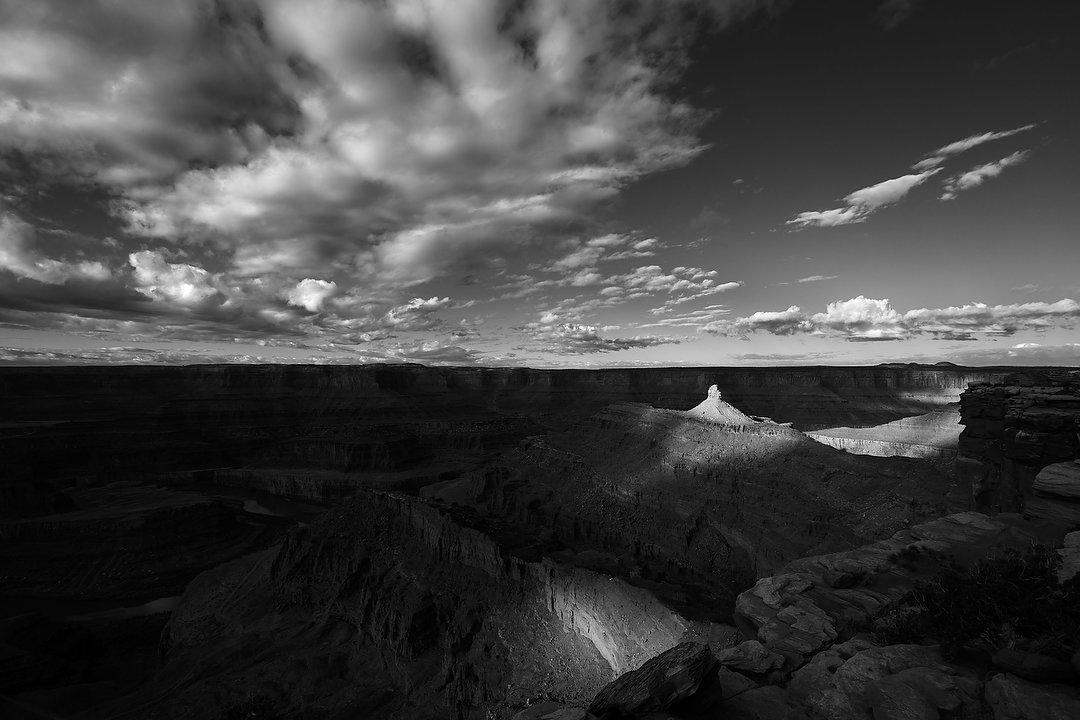
We had beautiful light at Dead Horse Point (near Moab, UT) a few weeks ago, and this is one of the photos I shot in monochrome. But I did that in RAW, not as a JPEG, so I’d have that extra data to work with. Nikon Z 8, Aperture Priority, Sunny white balance, ISO 100, 1/320 at f/8 in Matrix metering, -0.7 EV, Nikkor Z 14-30mm f/4 S lens at 14mm.
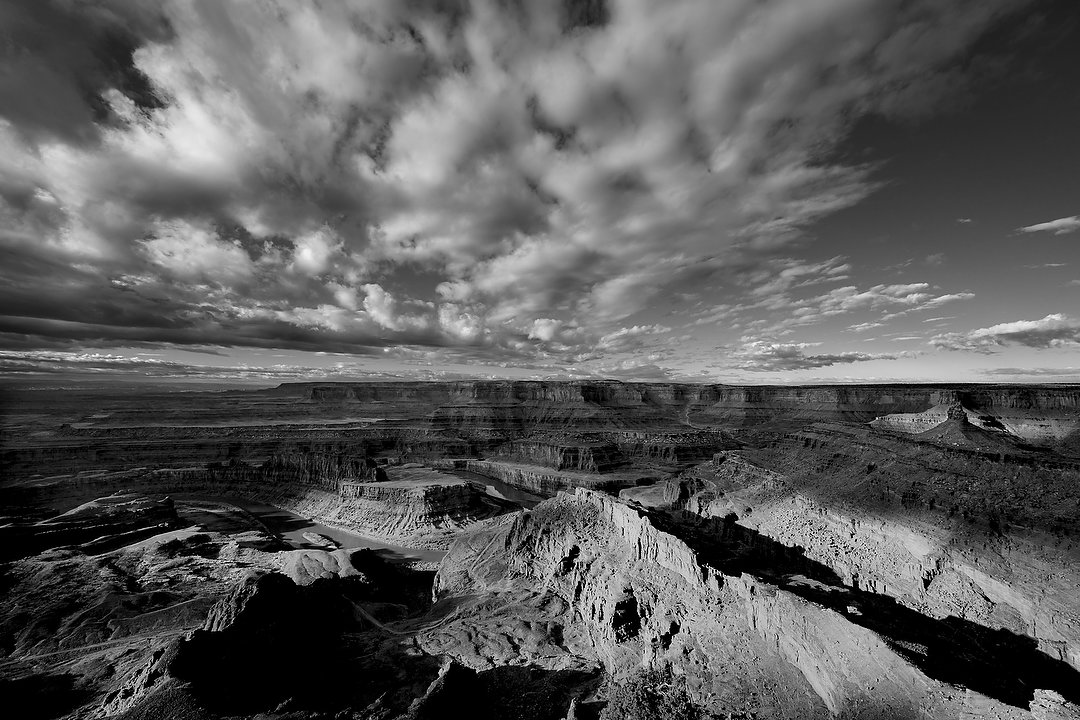
Having the extra information the RAW file contained let me process it afterwards to bring out much more detail in dark areas. If I’d shot this as a monochrome JPEG, it’s unlikely I could have done the same. Nikon Z 8, Aperture Priority, Sunny white balance, ISO 100, 1/320 at f/8 in Matrix metering, -0.7 EV, Nikkor Z 14-30mm f/4 S lens at 14mm.
Plus, with a DSLR, you have the added benefit of seeing the image in black-and-white immediately after shooting. It’s hard for most people (including me) to look at a scene in color (the way our eyes see it) and imagine that scene in black-and-white. So that feedback is important. Better yet, if you’re using a mirrorless camera, then you can see the scene in B&W, in the viewfinder, before you take the picture.
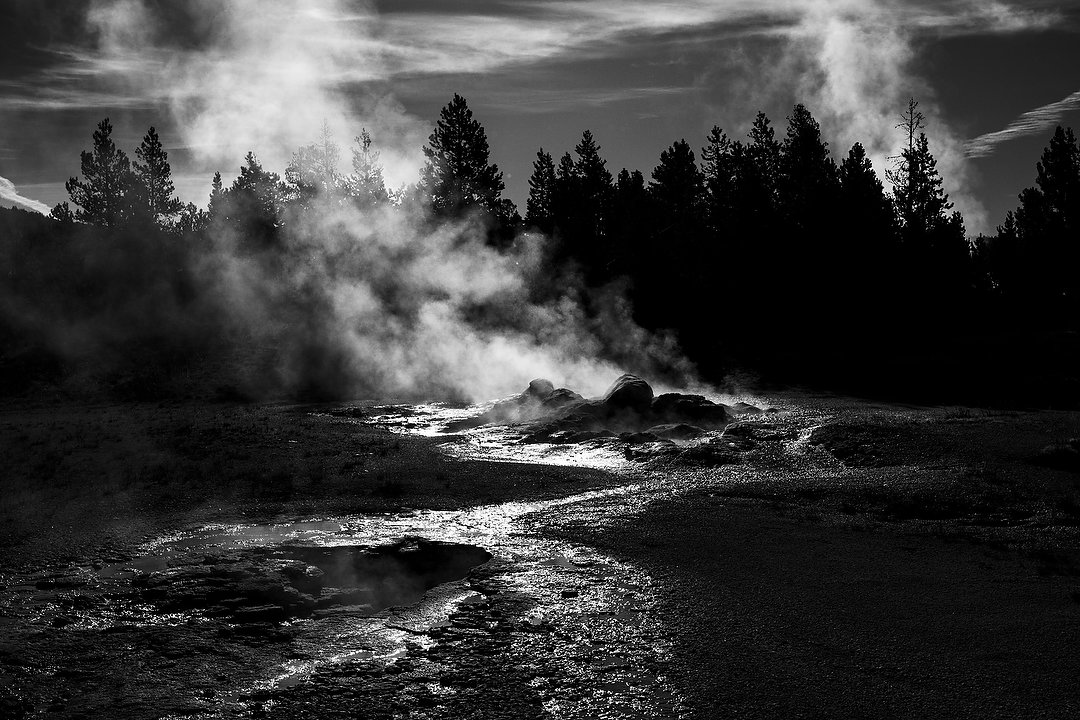
My camera was set to color when I first brought it up to my eye at this hot spring in Yellowstone, and I thought, “Nothing special here.” Then I switched the camera to monochrome. At which point I called over a few of my clients and suggested they do the same. It was MUCH better as a black-and-white, and we could see that right away with our mirrorless cameras. Nikon Z 8, Aperture Priority, Sunny white balance, ISO 64, 1/640 at f/13 in Matrix metering, -1.7 EV, Nikkor Z 24-200mm f/4-6.3 VR lens at 44mm.
At this point you’re probably asking yourself, “Okay, Reed, I’m sold. Now any tips on shooting black-and-white.” Well, yes, and here they are:
Pretty much every camera today will let you change how it initially processes the image. Some manufacturers call it something like “Picture Style,” but on my Nikons’ it’s “Picture Control.” Since one of the hallmarks of a black-and-white “look” is contrast, I go to the “Monochrome” Picture Control and bump that up a couple of notches. That way I get more “pop” with the contrast in those photos. And, since I’m shooting RAW (NEF for Nikon), I can always change that contrast choice later, in software. I’ve used that setting for a while now, but this next one is a fairly new change for me, and it’s made a big difference!
Those of you old enough to remember shooting black-and-white film might also remember that purists would then add a filter to the lens to accentuate something in the scene. Red adds the most overall contrast, yellow is good for skin tones (and foliage), orange somewhere between red and yellow, and green mainly for foliage. Ilford has more information on the effects the filters produce here. However, I’m not looking to carry more filters around with me. And as it turns out, I don’t need to. In Nikon’s Picture Control settlings (and some non-Nikon cameras my clients have used) I can select one of those four filter effects when I choose Monochrome. So as a default now, I leave my Monochrome set to +2 Contrast and Red filter, and can quickly switch between that and color.
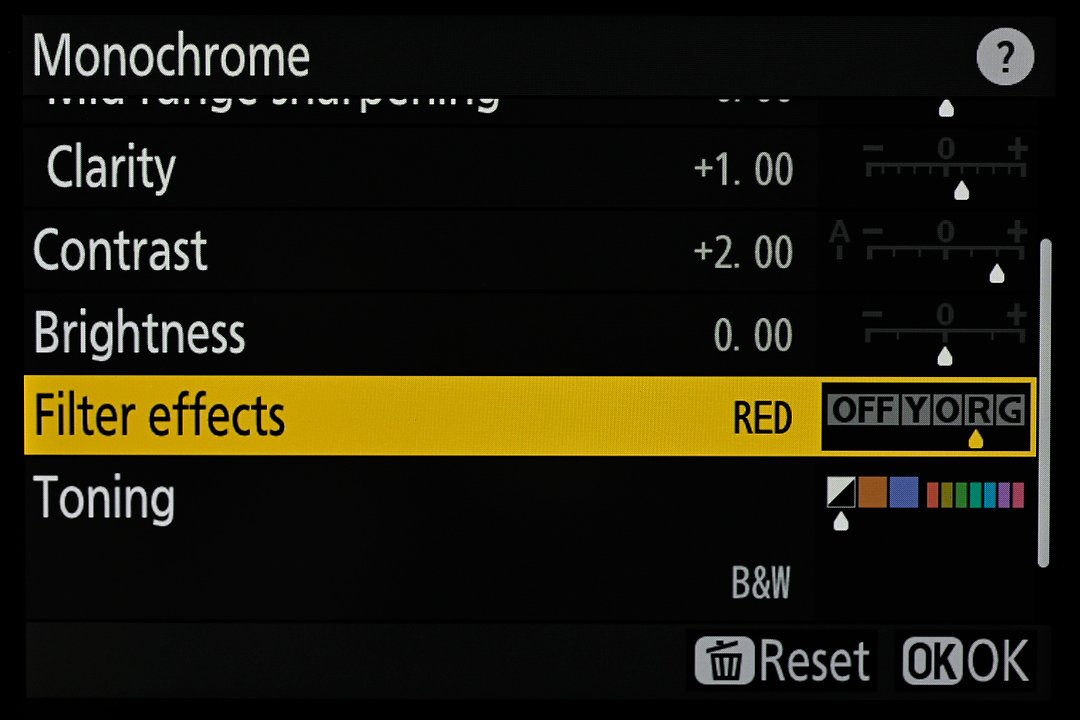
To make a custom Monochrome setting, I go into Picture Control on my Nikon cameras and adjust its settings to boost contrast and turn on “Filter Effects,” choosing “Red.”
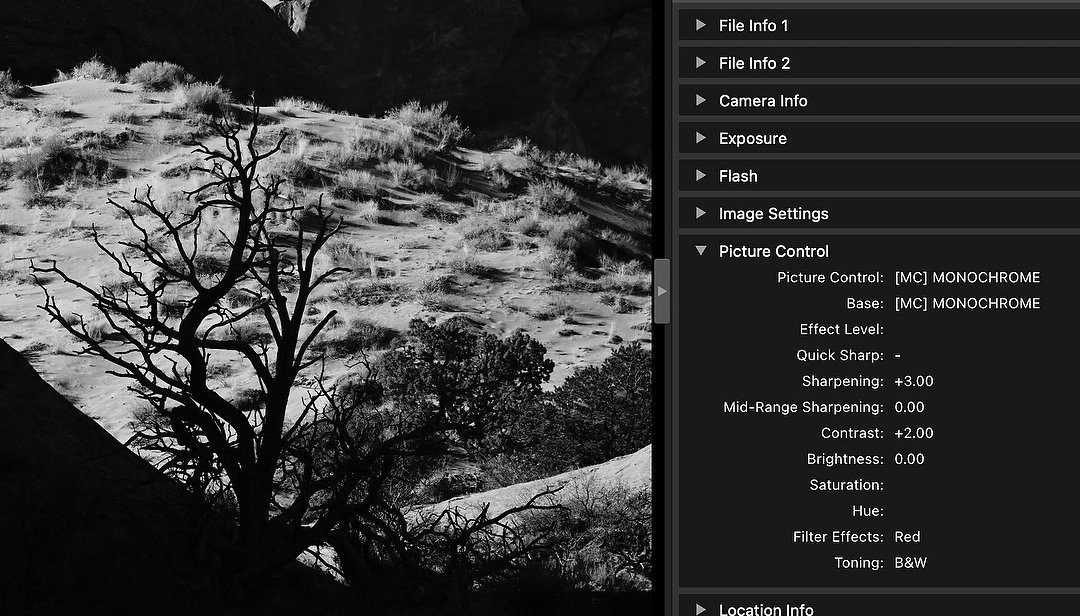
Now viewing the image in Nikon’s free NX Studio software, you can see how it shows I have the camera set to Monochrome with a +2 for Contrast and the Red filter.
There’s one more thing I should mention. Unless you’re using your camera manufacturer’s software (that’s Nikon’s NX Studio for me), you may not get the same “look” that you see in, or on the back of, your camera. For instance, using Adobe software (Lightroom, or in my case ACR), I need to make sure that “Camera Raw Preferences – Raw Defaults,” are set properly to do that. Which means I set “Global” to “Camera Settings” instead of “Adobe Default.” And by doing that, when I open my Nikon RAW file in ACR, it comes up with a Profile of “Camera Monochrome (Red Filter).” Excellent!
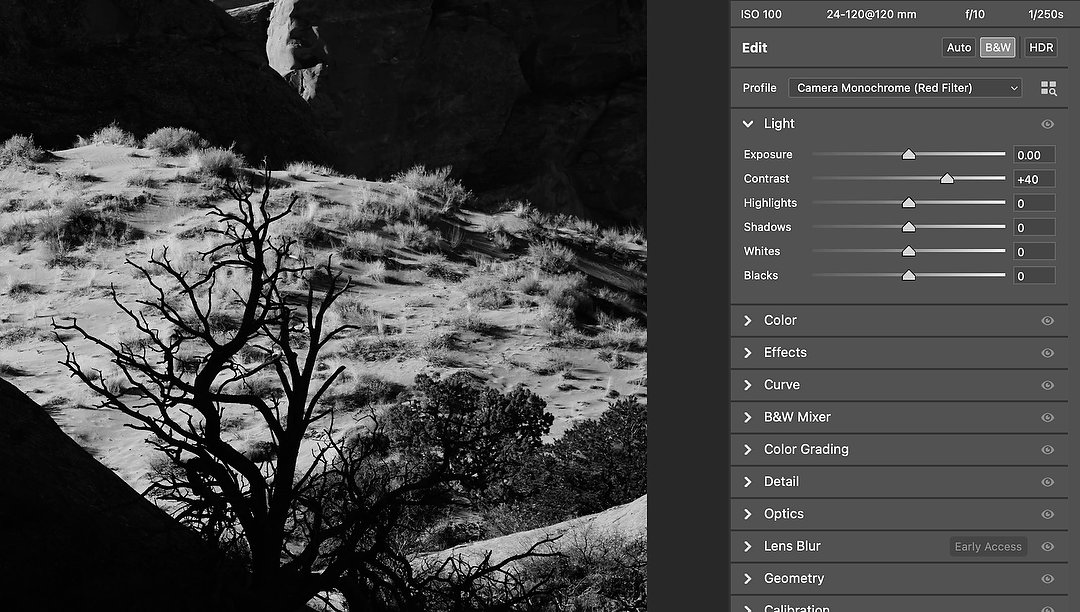
And now, opening that same NEF in Adobe Camera Raw (the editor I choose to work in), you can see that it’s honored the Nikon Picture Control set in-camera, showing boosted contrast and “Camera Monochrome (Red Filter),” as the Profile.
What about using traditional filters for other things? While I can use those four color filters in Picture Control, I can’t simulate the effects of a polarizing filter. And that filter can still make a big difference, even when shooting black-and-white. Just as in color photography, it can cut down on haze, reduce reflections and glare and with the sun to your left or right, make a blue sky darker.
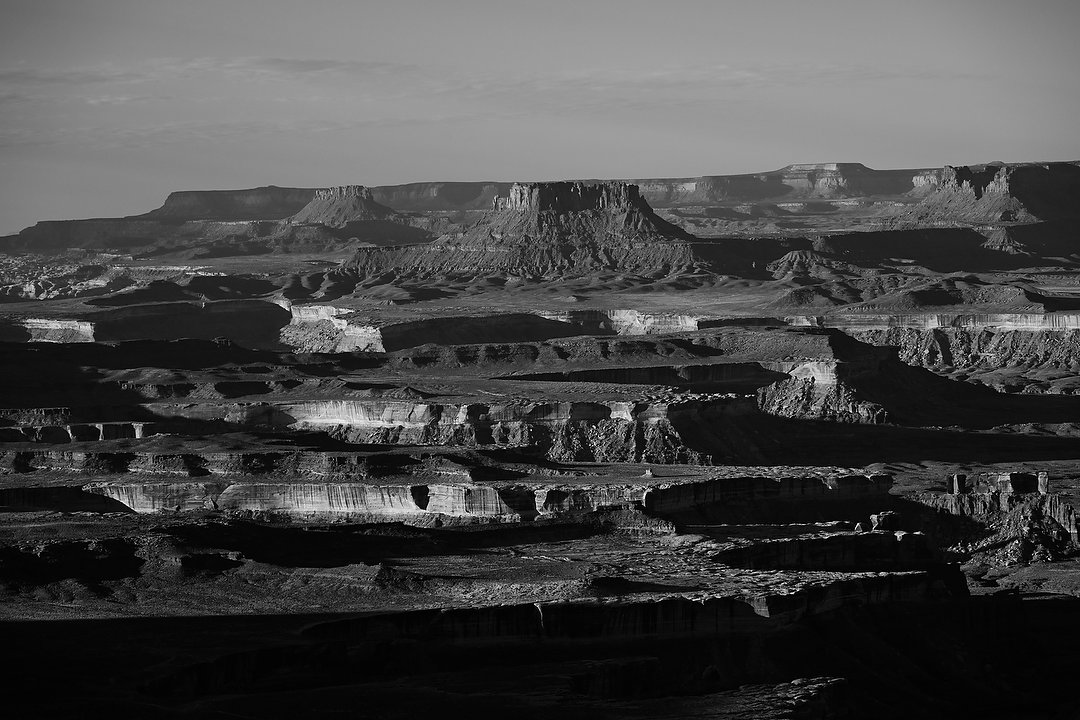
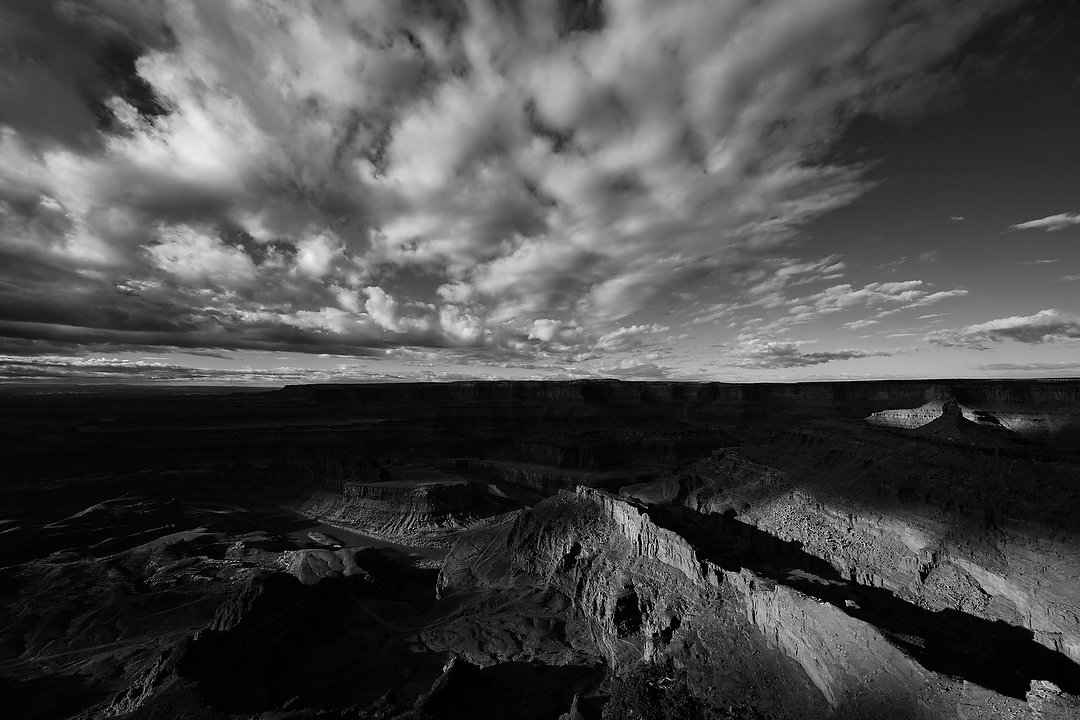
On our morning visit to the Green River Overlook in Canyonlands a few weeks ago, we had nice light from the rising sun to our left, but haze in the distance. Nikon Z 8, Aperture Priority, Sunny white balance, ISO 64, 1/160 at f/6.3 in Matrix metering, -1.0 EV, Nikkor Z 24-120mm f/4 S lens at 100mm.
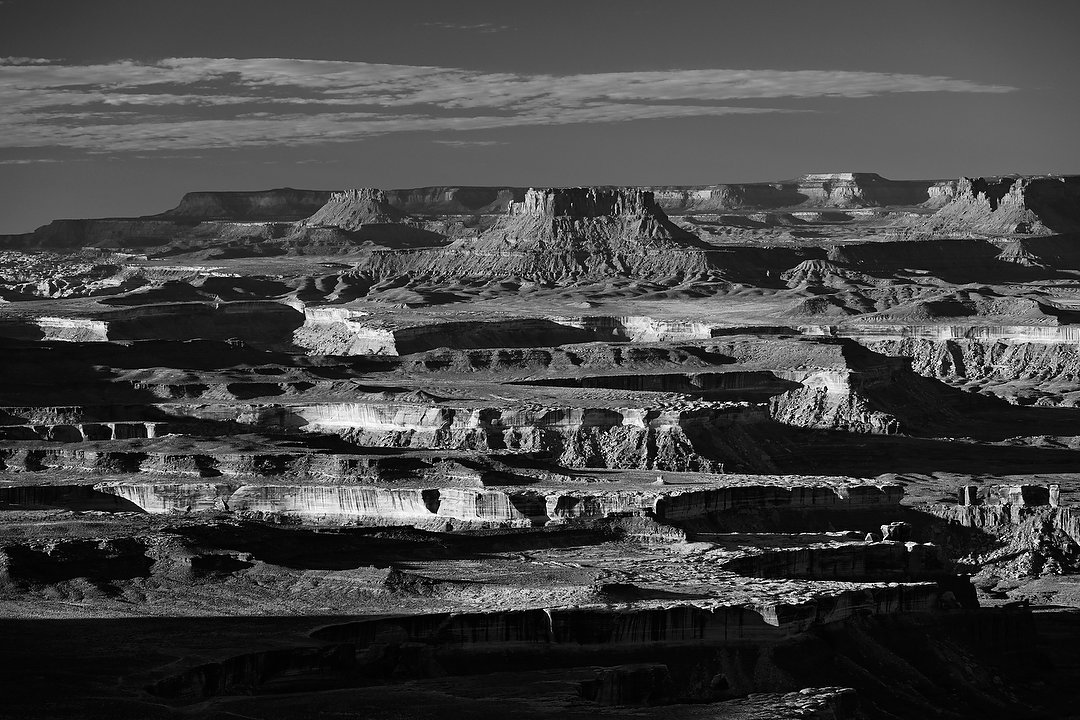
Adding a polarizing filter the front of the lens made a huge difference, as you can see, adding contrast in both the foreground and the sky. Nikon Z 8, Aperture Priority, Sunny white balance, ISO 64, 1/80 at f/6.3 in Matrix metering, -1.0 EV, Nikkor Z 24-120mm f/4 S lens at 100mm.
If you’d like to take your black-and-white to an entirely new level, there’s always infrared. Over the past 20 years I’ve had several cameras converted to infrared (you can read about that journey here). While initially I was intrigued by the “false color” images I could create doing that, lately I’ve shot almost exclusively black-and-white. This gives a different look than traditional B&W, with blue skies going even darker and green foliage recording as white. In fact, shooting black-and-white infrared is what got me interested in making better monochrome images with a “normal” camera. Wanting to shoot B&W at times, I didn’t always want to take an infrared camera on a trip with me, or carry a second body. And that’s what led me to creating the custom Picture Control setting as described above. It doesn’t give me the same look I get with infrared, but comes pretty close.
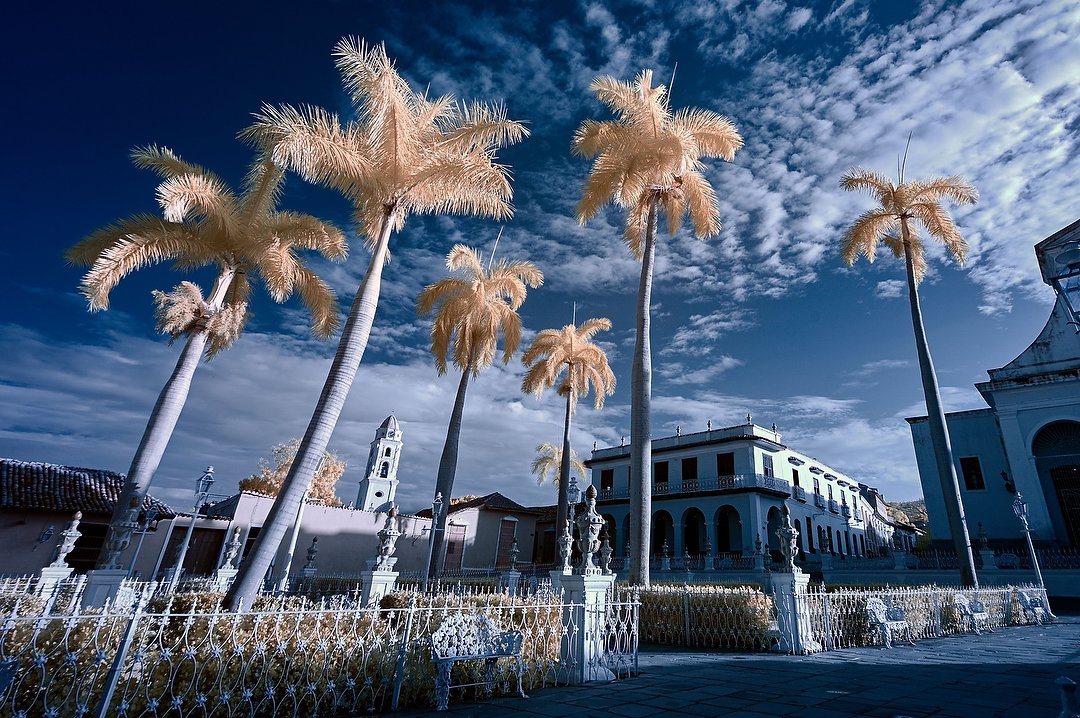
I brought my infrared camera along on this trip to Cuba last spring, and this is why. Captured in IR, I then swapped colors during editing to create a “false color” image. Nikon Z 6, Aperture Priority, Preset 2 white balance, ISO 100, 1/80 at f/11 in Matrix metering, +2.3 EV, Nikkor Z 14-30mm f/4 S lens at 15mm.
When shooting Monochrome with my infrared camera, this is the look I get. Notice how dark the sky is, and that the green foliage is recorded as almost white? Nikon Z 6 converted to full spectrum, Aperture Priority, Preset 2 white balance, ISO 100, 1/100 at f/13 in Matrix metering, +1.3 EV, Nikkor Z 24-120mm f/4 S lens at 102mm.
Here’s that same scene, shot with my regular Nikon and using the custom Monochrome Picture Control. Note how the blue sky doesn’t go as dark, and the green foliage now appears nearly black. Nikon Z 8, Aperture Priority, Sunny white balance, ISO 100, 1/320 at f/9 in Matrix metering, -1.0 EV, Nikkor Z 24-120mm f/4 S lens at 97mm.
So once again I’m finding a new way to share how I see the world around me, but this time in an old-fashioned way, using new technology. As the saying goes, “Everything old is new again.”
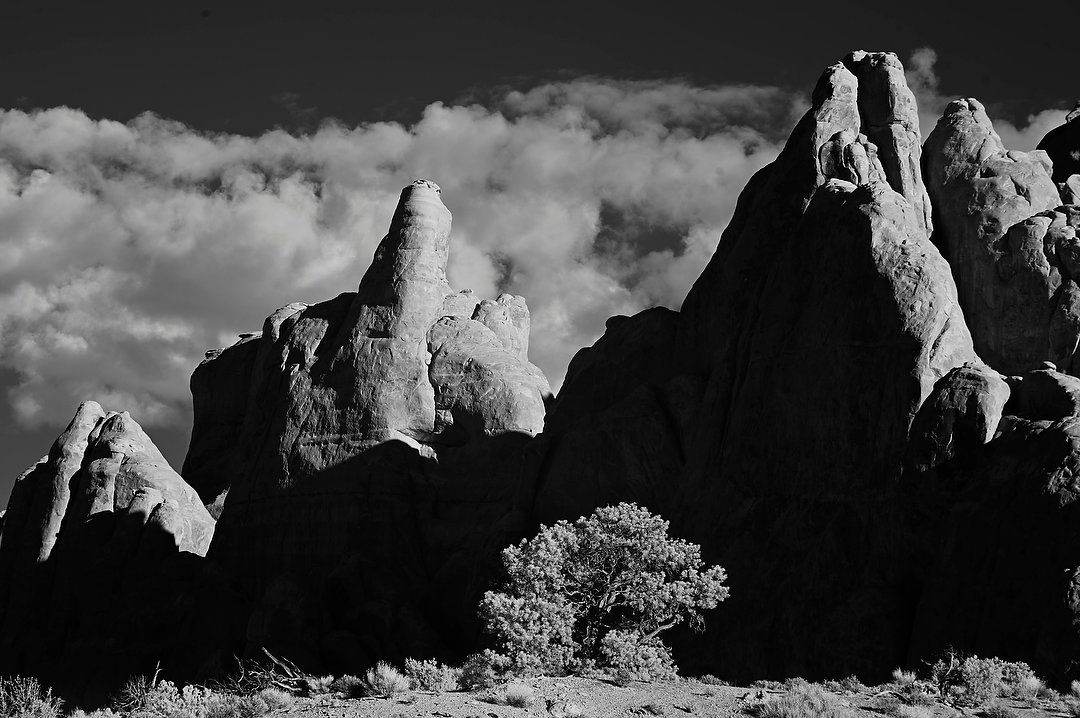
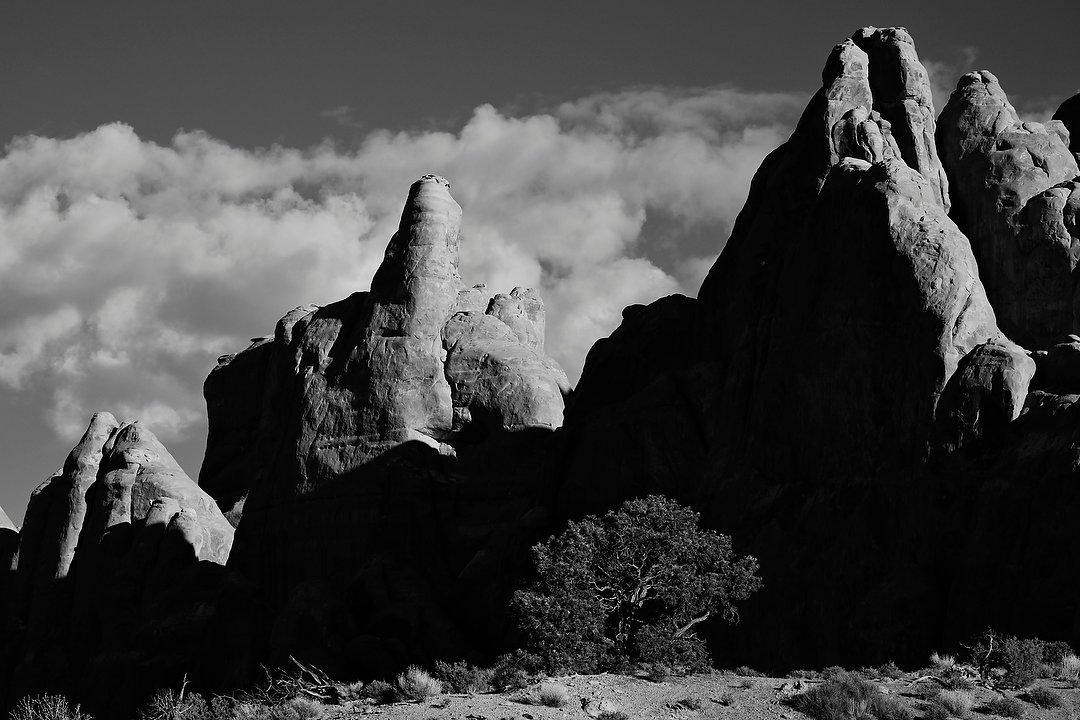
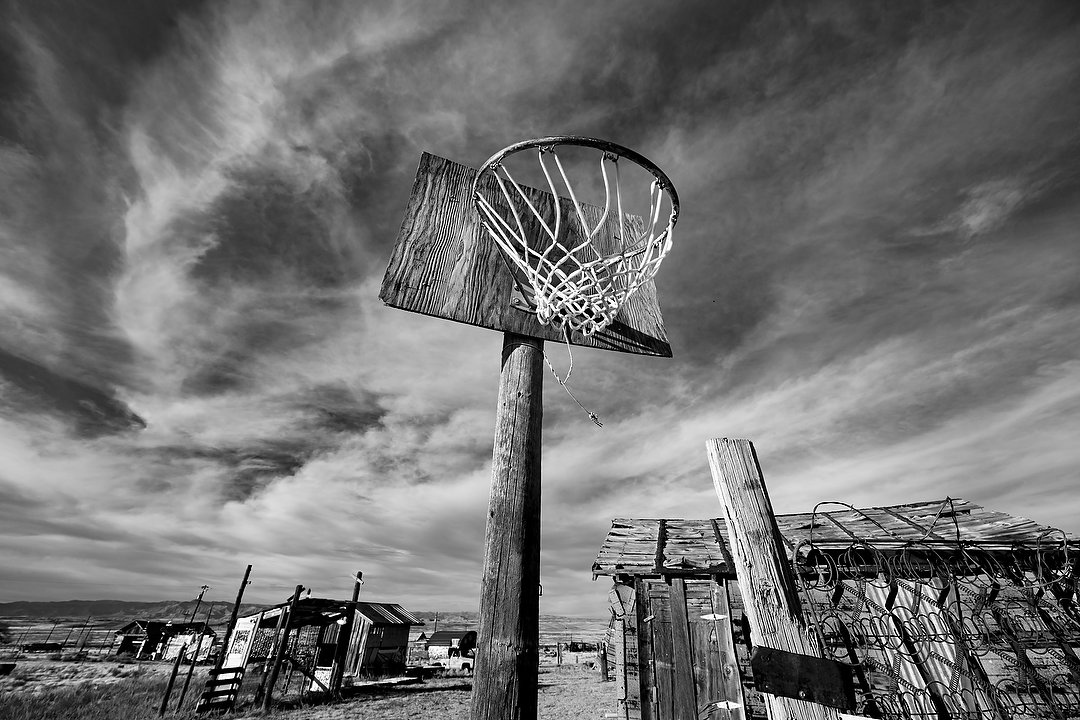
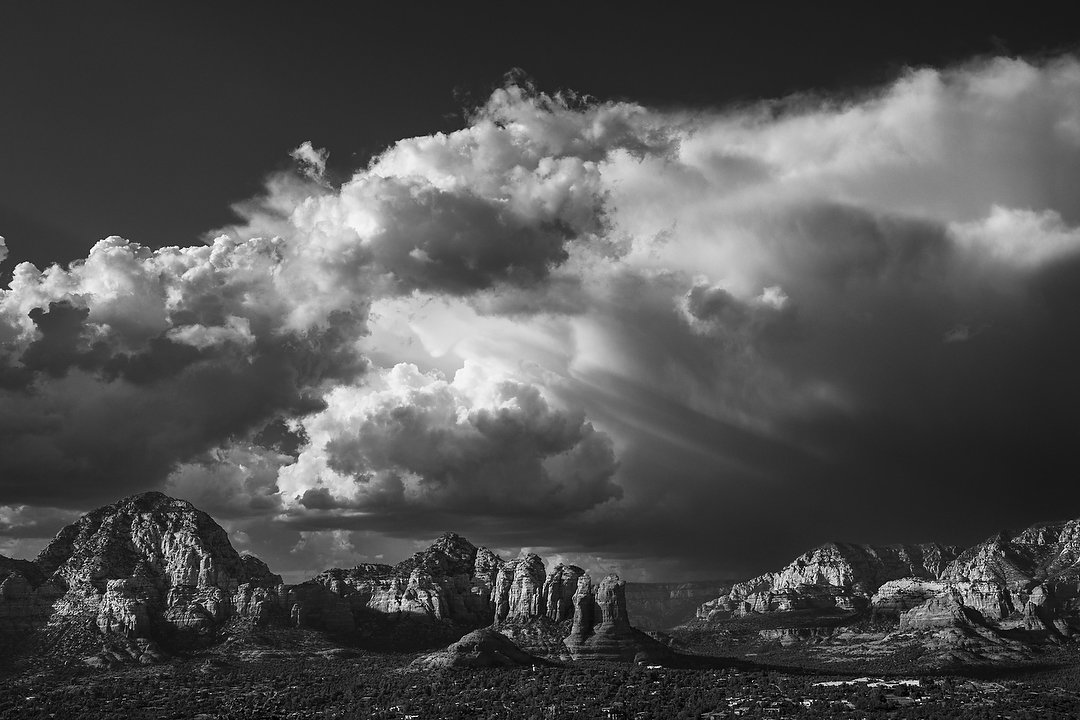
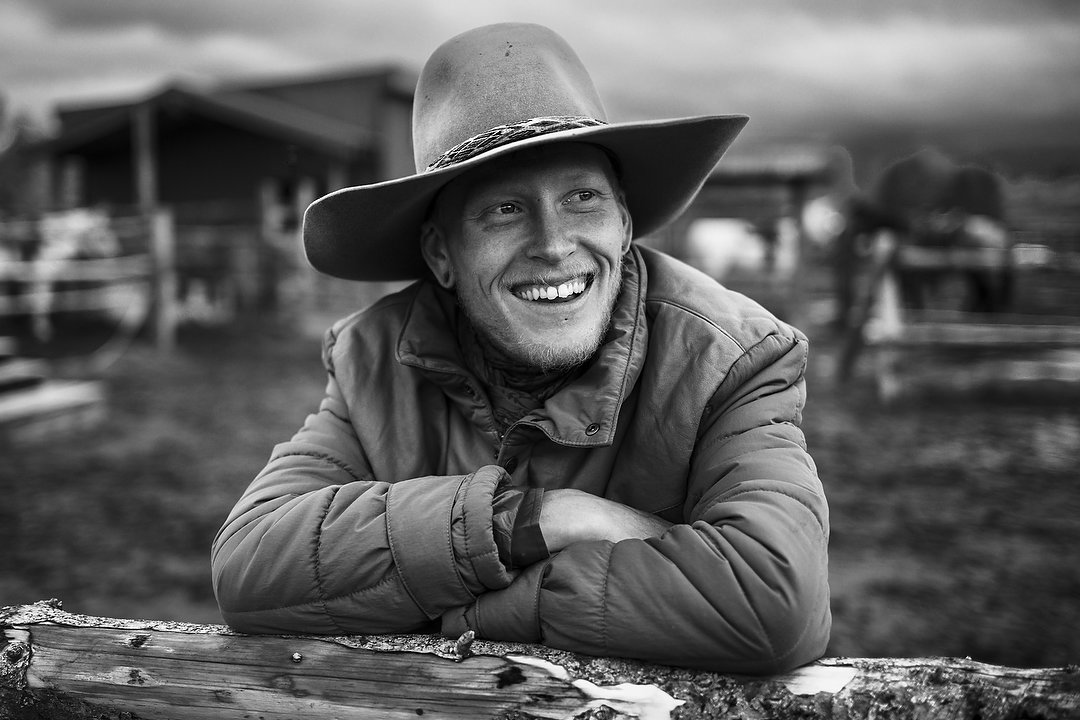
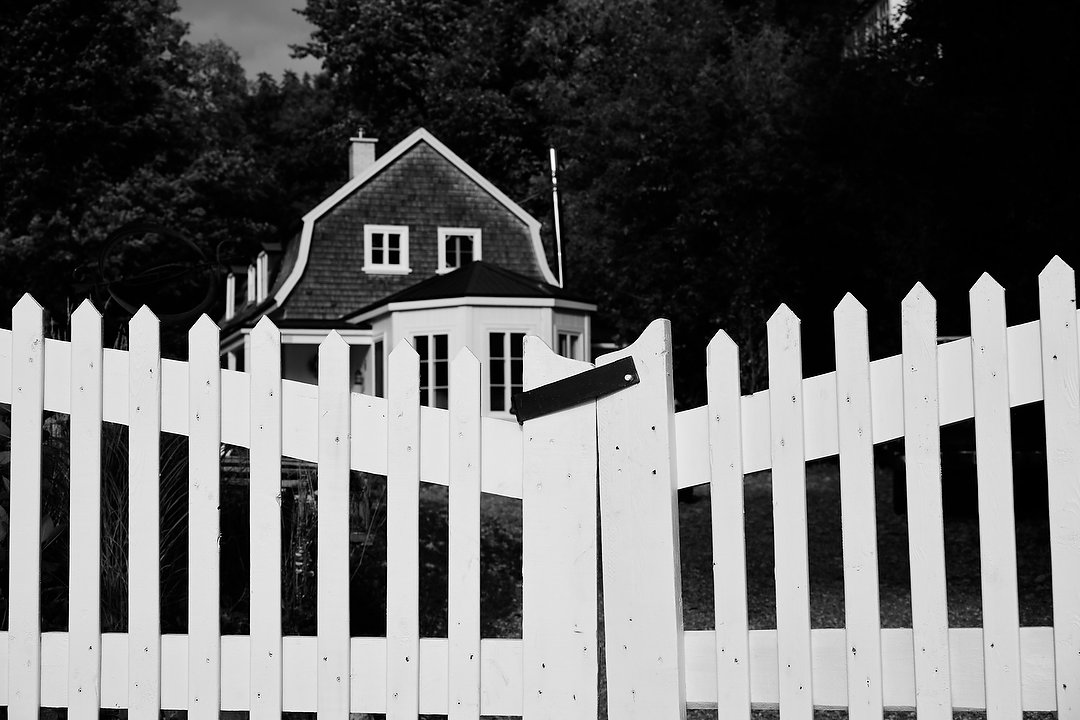
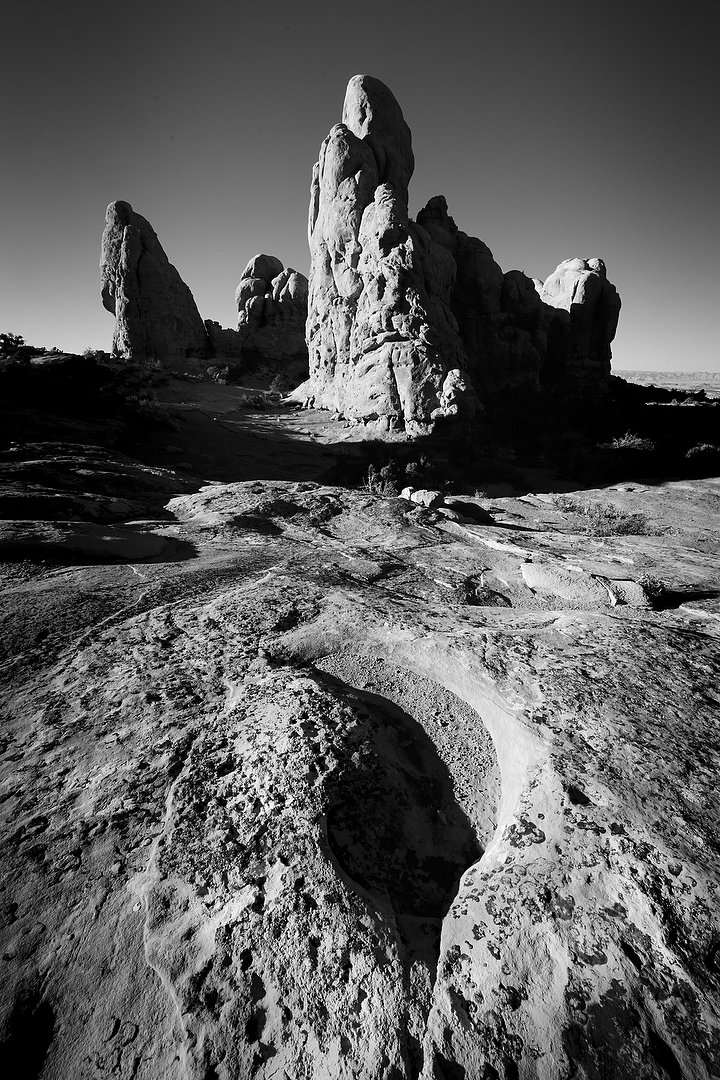
– Want to see more examples? Below are a few more black-and-white pictures I’ve made over the last few months during trips I’ve led, using my Nikon Z 8 and Z 9 cameras with this custom Picture Control –
(If you like this story, please share it with your friends and let them know about the links on photography that I post on my business Facebook page. I’m also on Instagram and Twitter, @reedhoffmann. And if you’re curious about the workshops I teach, you can find them here. Finally, you can subscribe to this blog on my home page.)
Thank you. Wonderful treatise on my old favorite B&W. What happened to the zone system. 😂🤣