For me, photography is all about change, trying new things. That’s why I had a camera converted to infrared over 15 years ago and kept having conversions done as I upgraded to newer camera bodies. That’s also why, for my most recent conversion, I went the full-spectrum route. Doing that lets me use the camera for IR photography, regular daylight photography and astrophotography simply by changing (or removing) the filter on the front of the lens (here’s a story about that). With my other conversions, the camera could only be used for IR photography. However, swapping filters as I changed lenses was a pain, and I didn’t have filters for my larger telephoto lenses or my super-wides (14-24 f/2.8 and fisheye). But there’s a solution to that as well – clip-in rear filters.
When a friend told me he’d read about a filter that went inside the lens mount, on top of the sensor, I didn’t believe him. Sounds crazy, right? Surely there wasn’t room, and I thought the risk of damage to the camera would be high. Then he bought a few, started using them and I realized I was wrong.
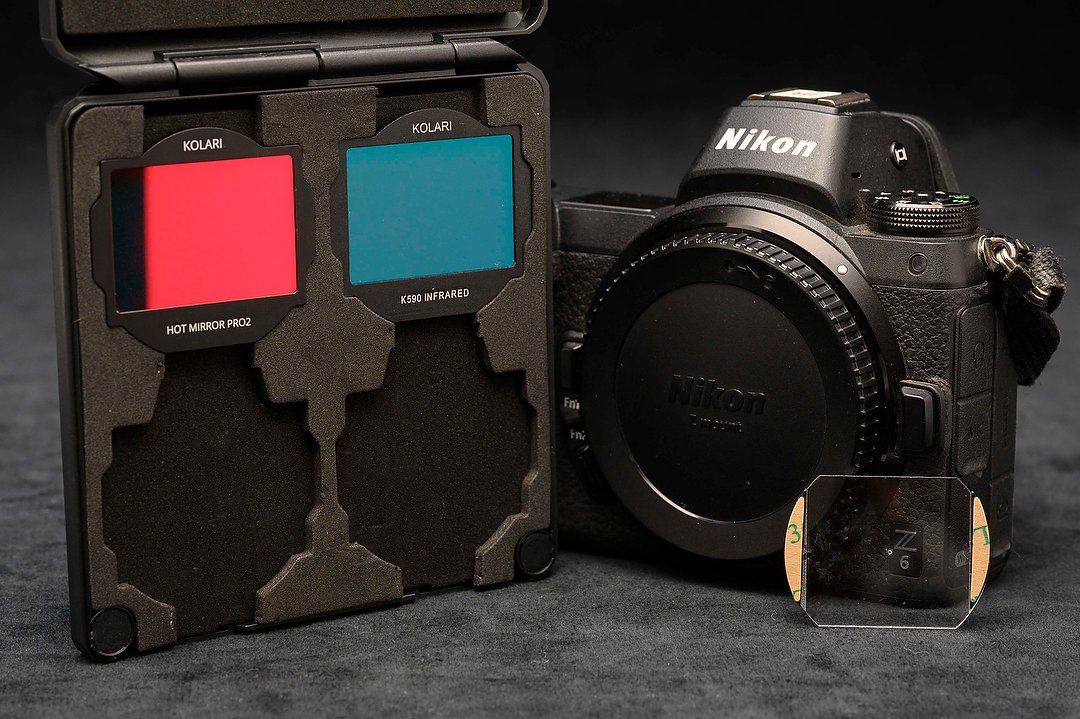
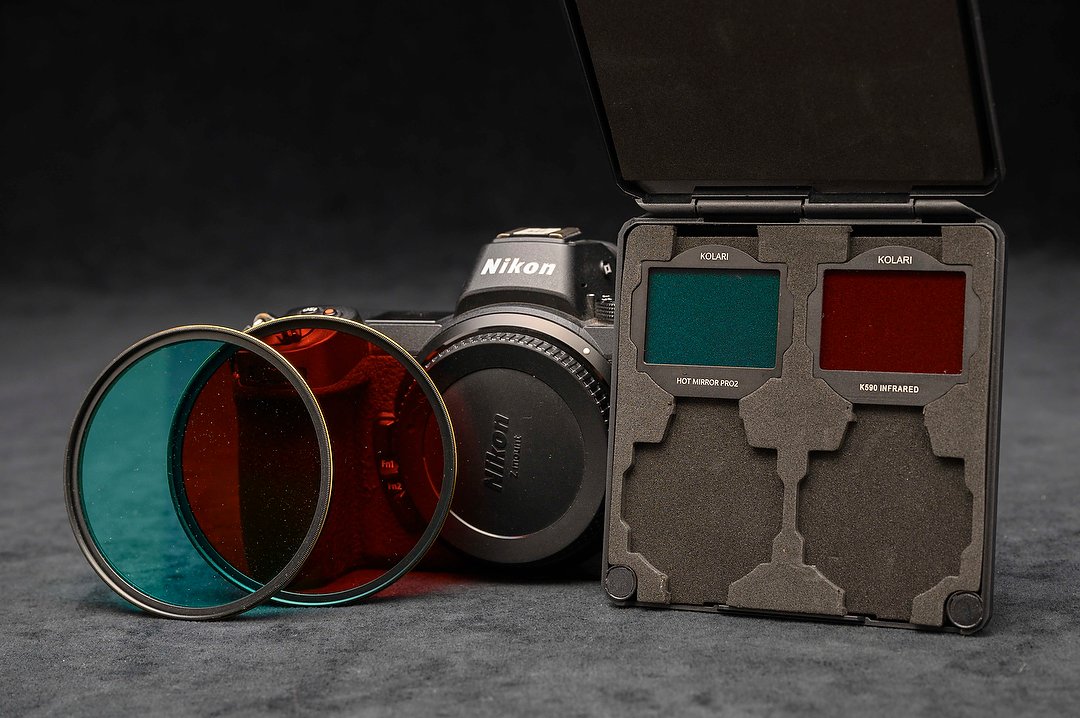
Here are the two filters I got from Kolari Vision, and the mounting plate, at lower right (with magnets attached).
Last month I ordered a kit from Kolari Vision (they’re one of at least two companies that offer this):
Filter 1 – I’ve been using 590nm IR filters for years now, and like what that lets me do with both black-and-white and “false color” infrared. So that was the first filter.
Filter 2 – The second one was a “UV/IR Hot Mirror Pro 2.” It turns the camera back into a “regular” camera. (Kolari Vision customer service was very helpful with my questions concerning this filter)
Mounting Plate – This helps you mount the magnets inside the camera in the proper position to be able to add filters.
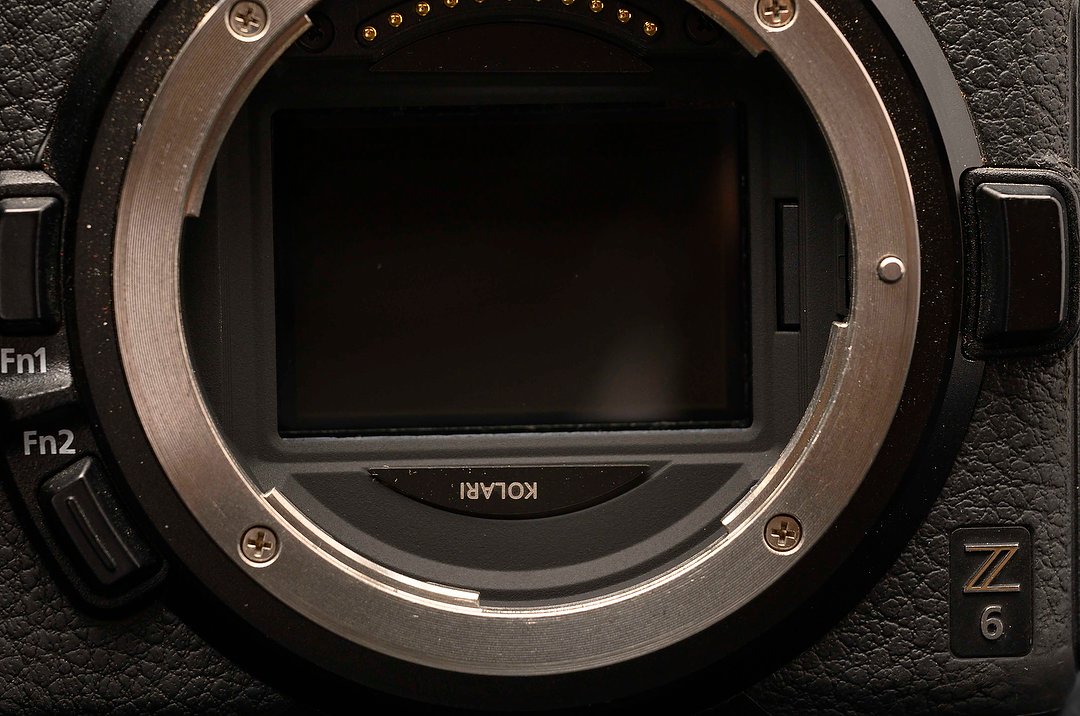
Here you can see one of the small magnets (with “Kolari” on it) after being placed inside the lens mount. The second one isn’t visible in the shadows above. You may choose to place your magnets right-side up!
I was a bit nervous about putting those magnets above and below the sensor, but the video tutorial on Kolari’s website gave me confidence that it would be pretty easy to do (and it was).
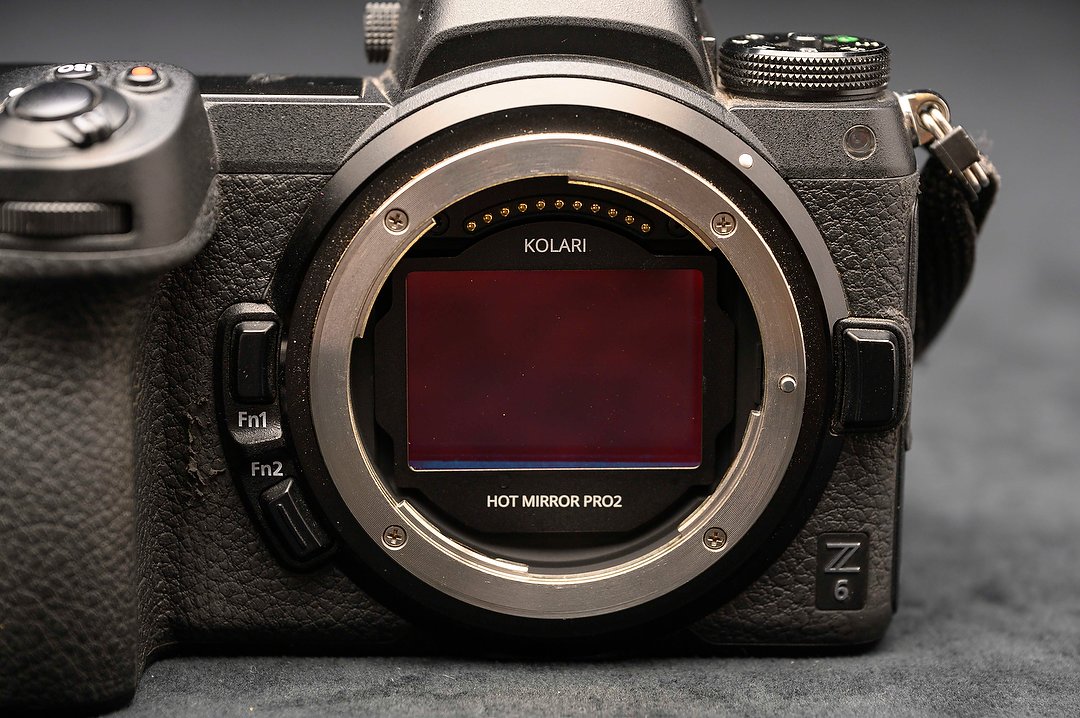
Success! With the magnets installed, I’ve added my Hot Mirror filter.
Now, by simply popping a filter in, I can do black-and-white infrared (changing Nikon’s Picture Control to Monochrome), color infrared (for making false-color IR pictures) or simply use the camera as a “regular” camera. But the big change from before is that I can now use ALL of my lenses on the camera, not just ones that I can fit a filter on the front of.
I’ve replaced my screw-in 82mm filters (at left) with two smaller filters that can be used with all of my lenses.
The original reason I wanted to go the full-spectrum route was so that when I traveled, my second, or back-up camera, could be used for more than IR. By switching to clip-in filters, I’ve been able to expand what’s possible with that camera. In the future, I may take that even further. After all, there are clip-in ND filters, other IR spectrums, Light Pollution, H-Alpha (for serious astrophotography) and many more. And, of course, there’s no reason I can’t add magnetic mounts to my other cameras and use the non-IR filters in them as well. Change is good!
Here are three examples of how I’ve been using my full-spectrum converted Nikon Z 6 camera:
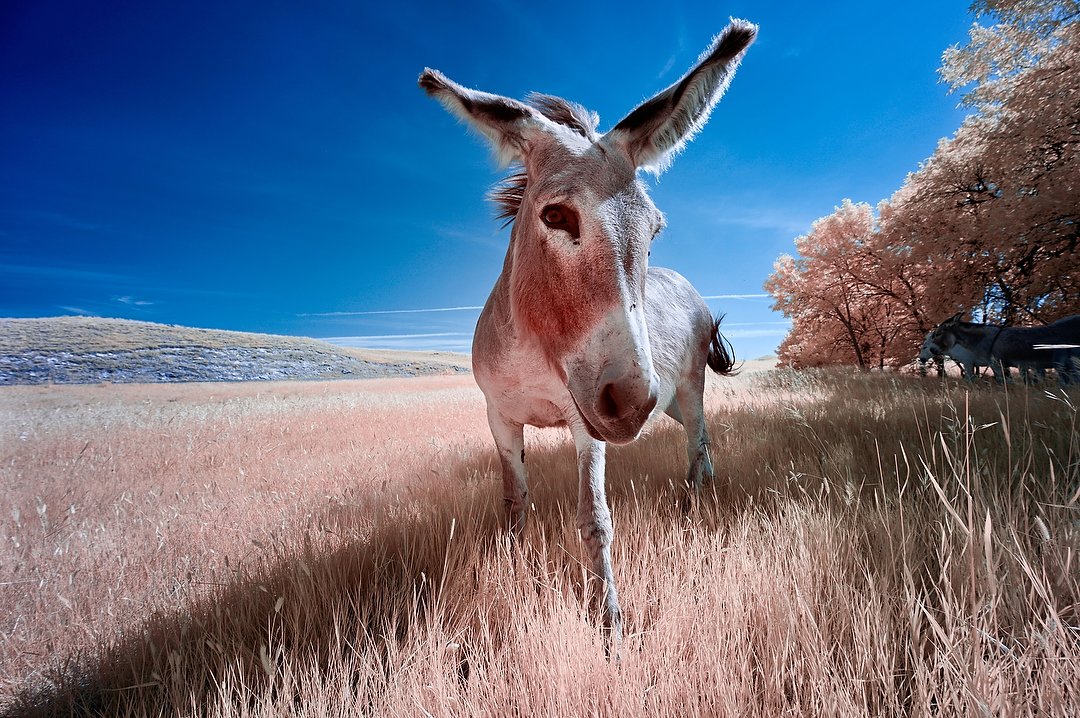
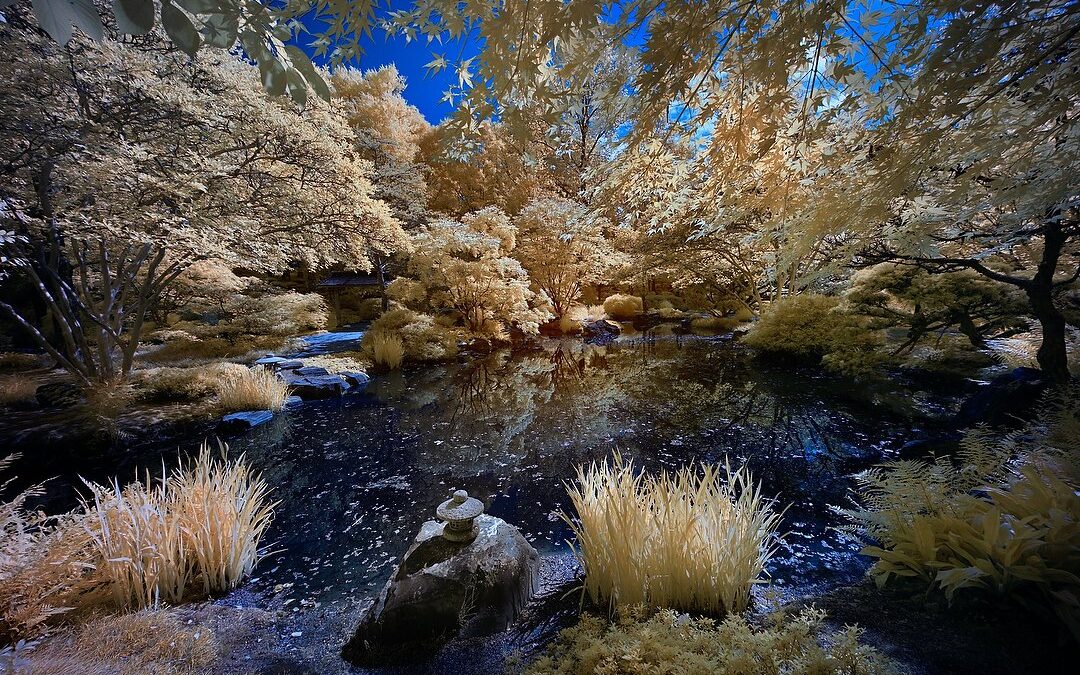
One of the wild burros in Custer State Park. This is a “regular” false color image made using the 590nm filter. Nikon Z 6, Aperture Priority, Preset white balance, ISO 160, 1/400 at f/8 in Matrix metering, +1.7 EV, Nikkor Z 14-30mm f/4 S lens at 14mm.
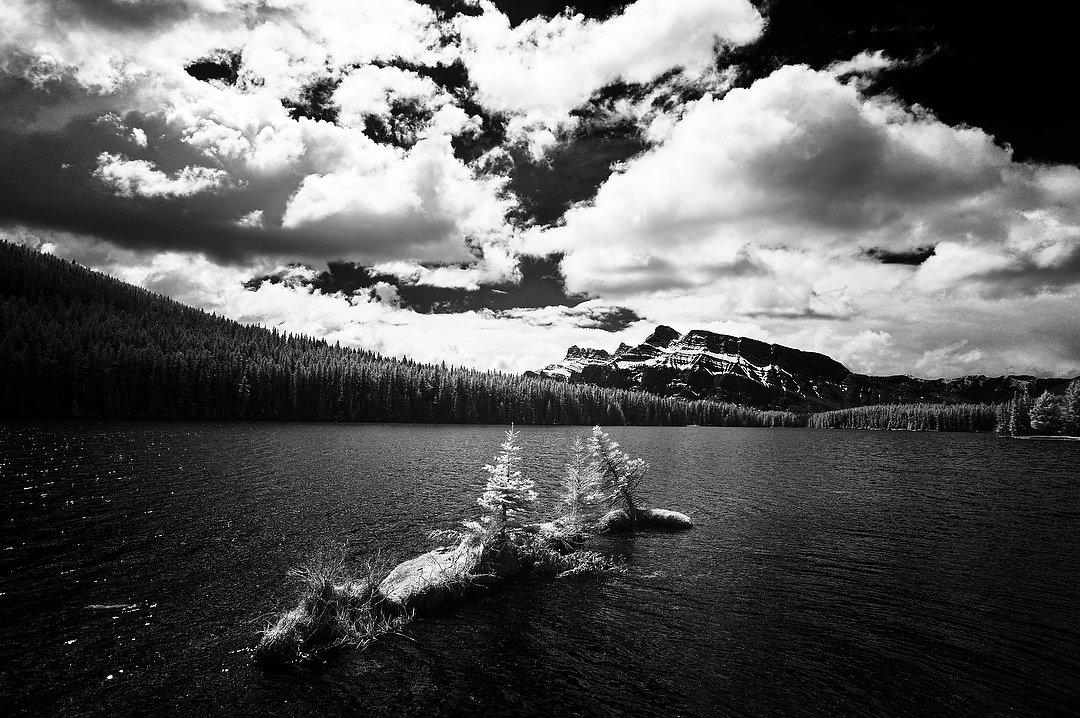
Minnewanka Lake, in the Canadian Rockies, shot with a 590nm filter and the camera’s Picture Control set to Monochrome. Nikon Z 6, Aperture Priority, Preset white balance, ISO 125, 1/400 at f/11 in Matrix metering, +2.0 EV, Nikkor Z 14-30mm f/4 S lens at 20mm.
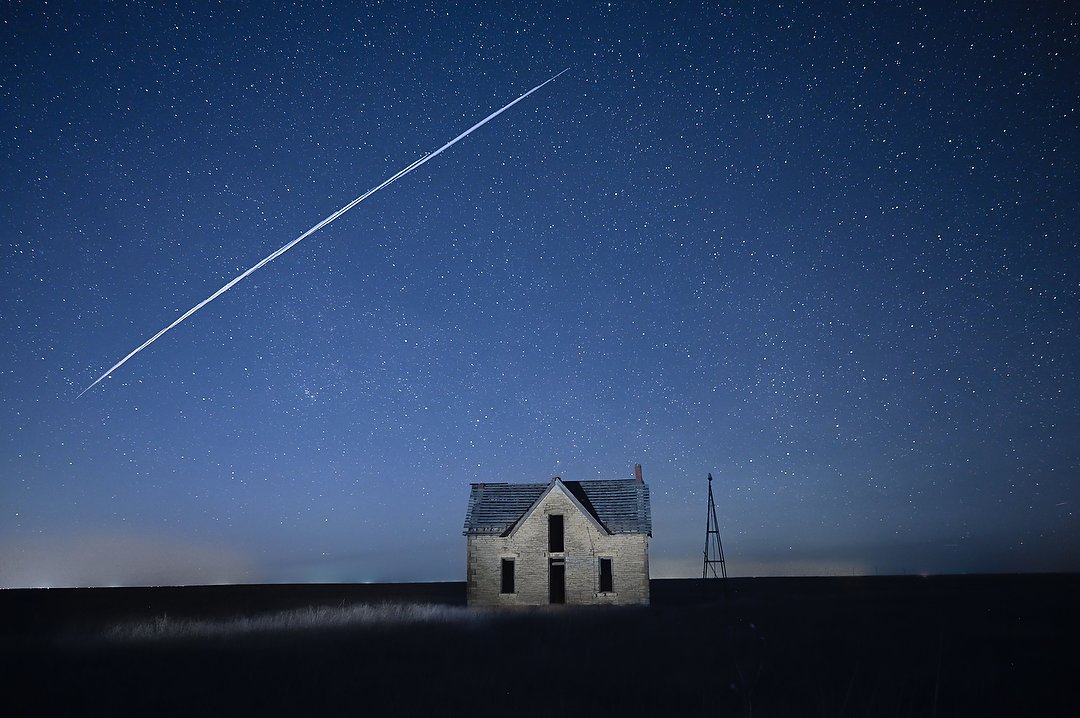
SpaceX StarLink satellites pass over an old stone house in the Tallgrass Prairie of Kansas. Shot with no filter added, the full-spectrum conversion can give you a bit of help when doing night photography like this. Nikon Z 6, Manual exposure, 3400K white balance, ISO 2000, 15-seconds at f/2.8, Nikkor Z 24-70mm f/2.8 S lens at 28mm.
(If you like this story, please share it with your friends and let them know about the links on photography that I post on my business Facebook page. I’m also on Instagram and Twitter, @reedhoffmann. And if you’re curious about the workshops I teach, you can find them here. And, you can subscribe to this blog on my home page.)