I thought I’d take a few minutes to expand on the photo (above) that I posted to Facebook and Instagram a couple days ago from a short road trip to central Kansas. I’m always on the lookout for new places to photograph near me, and keep a list of locations I’d like to visit, especially at night. Those rock formations at Wilson Lake were among them. So when a friend suggested a trip to some wildlife refuges in central Kansas, I looked over my list and agreed, knowing we could also visit a couple of those spots.
With any night shoot, it’s important to scout first in the daylight, to learn the terrain and do a little planning. We did just that, then continued on to one of the wildlife refuges, returning just before sunset. Doing that would let us make the hike in during daylight. And, that also let us take advantage of the warm, late-day light for a little extra photography once we got to the rocks.
Being on location before it gets dark also lets you take advantage of the last light of day. This was along the shore near the large rock formations we were planning to photograph. Nikon Z 9, Aperture Priority, Sunny white balance, ISO 200, 1/80 at f/11 in Matrix metering, 0.0 EV, Nikkor Z 14-30mm f/4 S lens at 19mm.
Once the sun had set, I began putting together my gear for the night shoot. Lume Cubes are my tool of choice for low-level lighting because I can control them through an app on my phone. And for this shoot, since the main light would need to be about 50 yards away, I also used a Lume Panel, which is more powerful. Once the lights are set up, it’s just a matter of waiting for the horizon glow to dim enough so the lights could match it in intensity. Then comes the tricky part with low-level lighting and night photography – as the sky continues to darken, you need to keep reducing the output from your light(s) and changing your exposure. It’s a balancing act, you need to provide enough illumination with your light(s) to photograph the foreground subject, while matching the exposure that will bring out the starry sky.
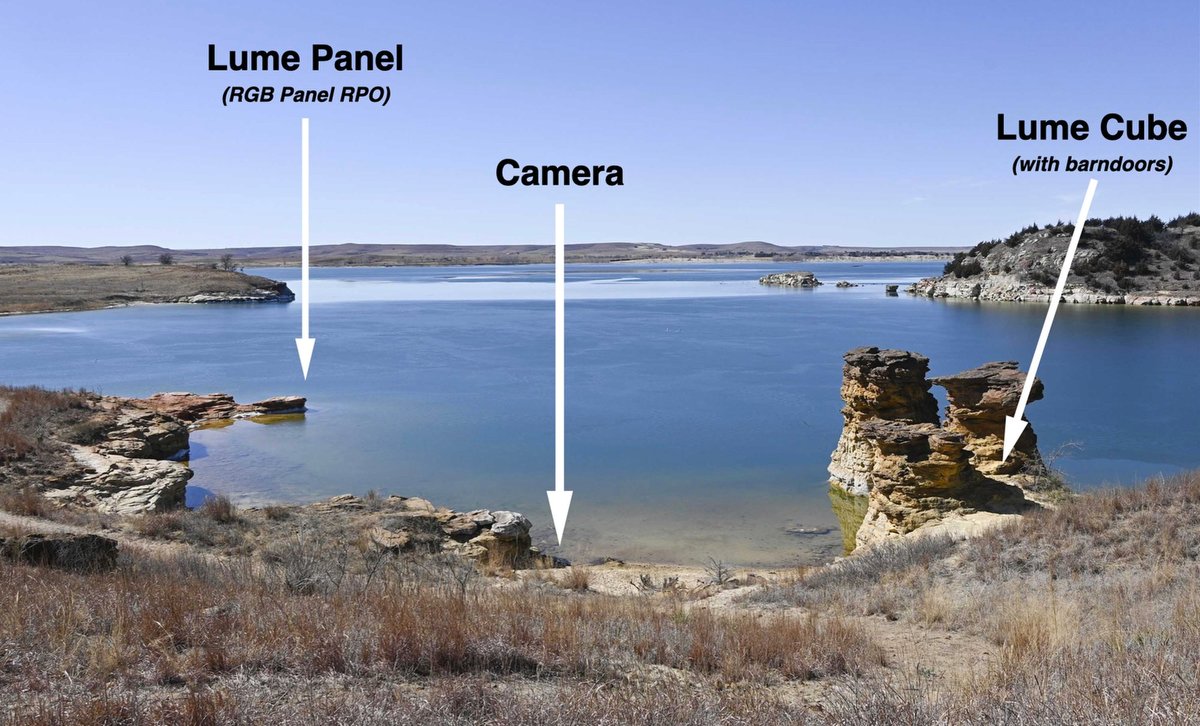
Here you can see how far my primary light source, the Lume Cube RGB Panel Light, was going to be from the rocks. It was mounted on a Lume Cube 5-ft stand to get it well above water level. Then I used a second light behind the formations to provide a little backlighting and separation. My initial location was on the shoreline (where the arrow points to), then moved to the top of the rocks behind me to make the photo below.
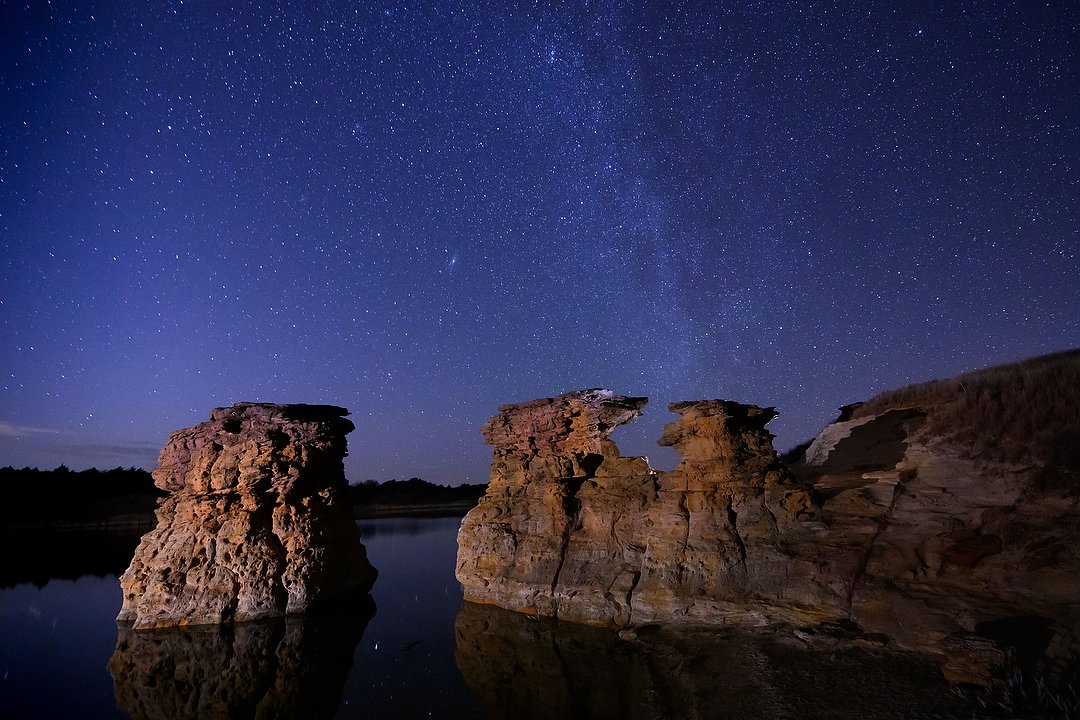
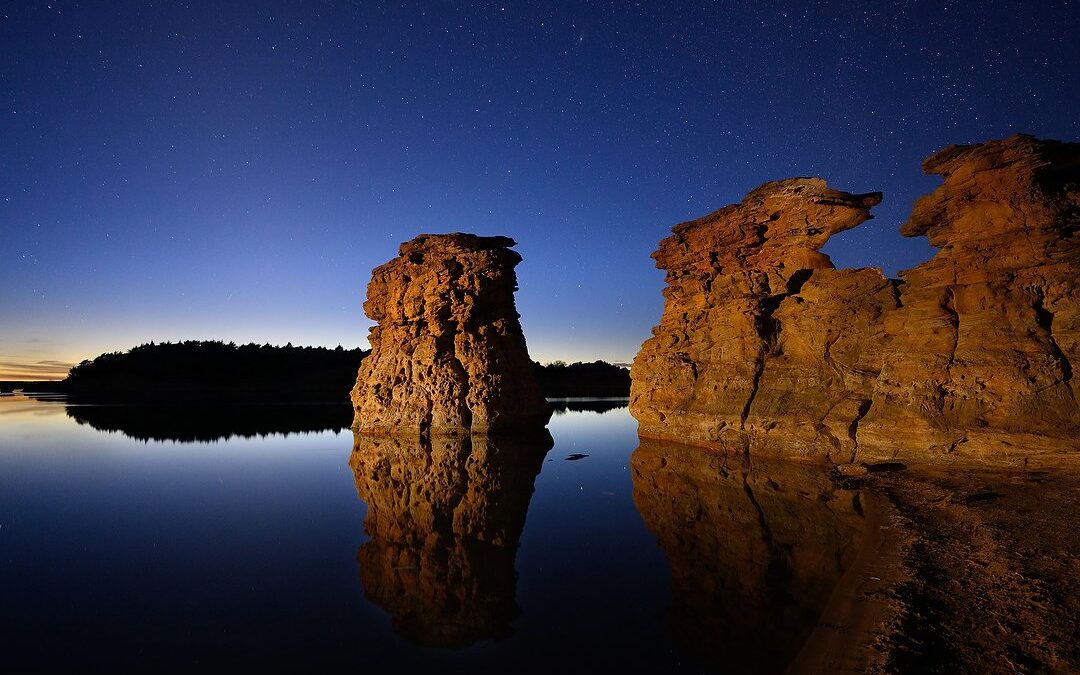
Once it was fully dark (a minimum of an hour after sunset), I reduced the intensity of the lights and opened up my exposure to show the stars, and a faint Milky Way. One other thing worth noting: using the Nikon Z 9’s “Starlight view” option, I was able to actually see enough of the scene to frame through my electronic viewfinder. It’s the first mirrorless camera I’ve used that can do that in such a dark environment. Nikon Z 9, Manual exposure, 3800K white balance, ISO 10,000, 30-seconds at f/4, Nikkor Z 14-30mm f/4 S lens at 14mm.
It helped that I had planned the days of this trip to coincide with a new moon. Stars will appear (and photograph) more brightly if there’s no moonlight. That moonlight can also make it more difficult to capture the Milky Way.
On our walk back to the car, we stopped several times and turned off our headlamps to admire the brightness of the starry sky. Living in a heavily developed area near Kansas City, I always appreciate those views when I get out into “dark sky” country.
The following night, after spending the day at another wildlife refuge, we made one more detour to another location I had on my list. Teter Rock is east of Wichita, and marks the site of an early community there. A 16-ft slab of rock on an open hilltop, I’d visited it once last year but wasn’t able to stay past dark. The reason why? The track (not a road) was muddy with water-filled ruts, and while I was able to pick my way in during daylight in my Camry, I was afraid that after dark I’d get stuck trying to get out. Cell service is minimal there. This time, though, the weather had been dry and my friend’s four-wheel-drive truck was more than up to the challenge of getting us in, and more importantly, out. So that’s where we were as dusk descended the second night.
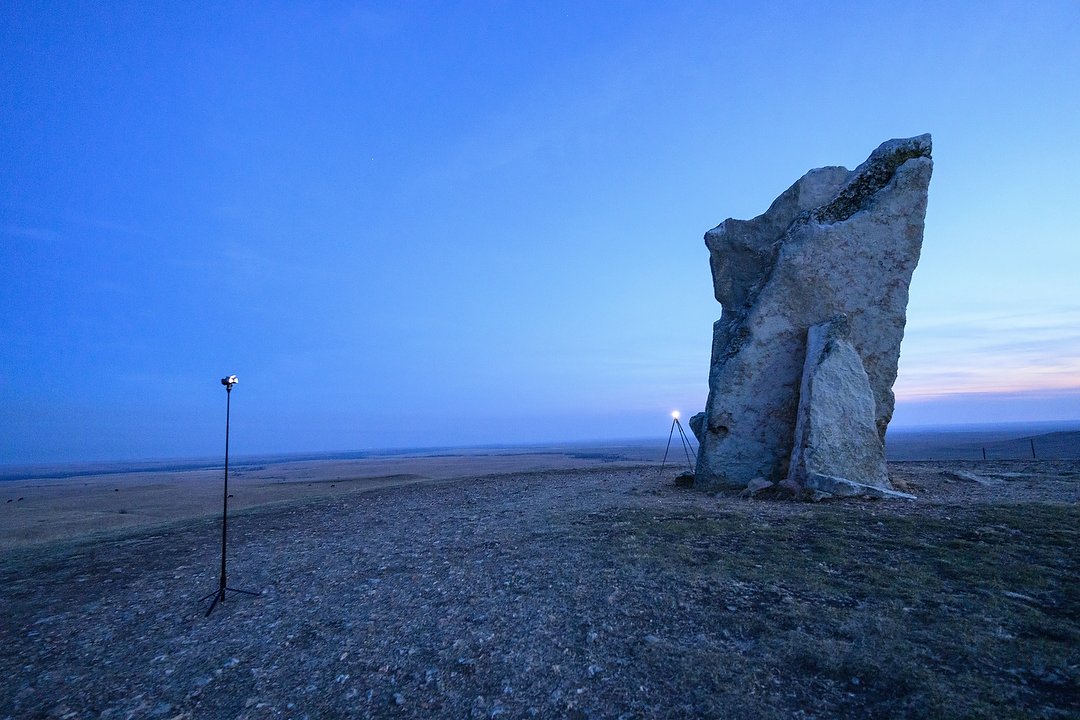
Arriving at Teter Rock just after sunset, I started setting up my lights. At left is a Lume Cube on one of their compact five-ft. stands, to sidelight the rock. And behind it I have a second Lume Cube, on a lightweight tripod, to backlight it and give a splash of light around its base. While the Lume Cube light stands are more portable and taller, I use this tripod occasionally on eneven ground, since I can adjust the length of the legs..
Having been there before, I already knew how I was going to shoot it. There are two angles that show off the shape and texture of the rock best, looking west and looking south. We did make a few picutres pointing west, but there’s a fence on that side that rises above the horizon. Which meant the “cleanest” angle would be facing south, and that’s also where more stars would be visible, at least early.
With a nice sky to the west created by the fading sunset, we started by shooting in that direction. However, if you look closely, you’ll see a fence just above the horizon. I’d rather not have that in the picture, so after the sunset faded further, I chose a different angle for the photo. Nikon Z 9, Manual exposure, Sunny white balance, ISO 1000, 15 at f/5, Nikkor Z 14-30mm f/4 S lens at 23mm.
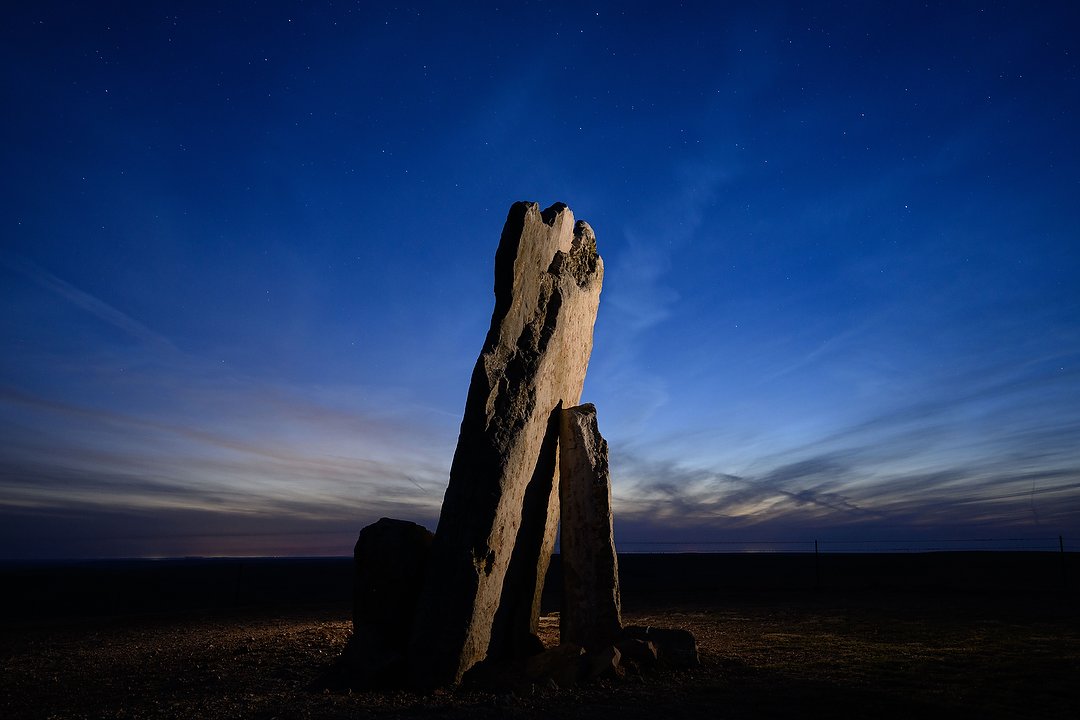
After moving our lights and cameras to take advantage of the southern view, we noticed something strange happening. There was a red glow in the sky on the left side of that view. While we couldn’t see it with our eyes, it sure showed up on the back of our cameras. Looking further in that direction, we could see what appeared to be a red light glowing dozens of miles to the east. Adding an Ice LIPO (Light Pollution) filter to the lens helped remove much of that red glow, and eventually the light went out and we continued shooting. (The filter is designed to remove the yellow glow caused by sodium-vapor lights, but did a nice job with this red as well)
I liked this angle better (no fence!), but notice that large red glow in the sky to the left? That’s from a field fire dozens of miles away. Nikon Z 9, Manual exposure, Sunny white balance, ISO 10,000, 20-seconds at f/4, Nikkor Z 14-30mm f/4 S lens at 15mm.
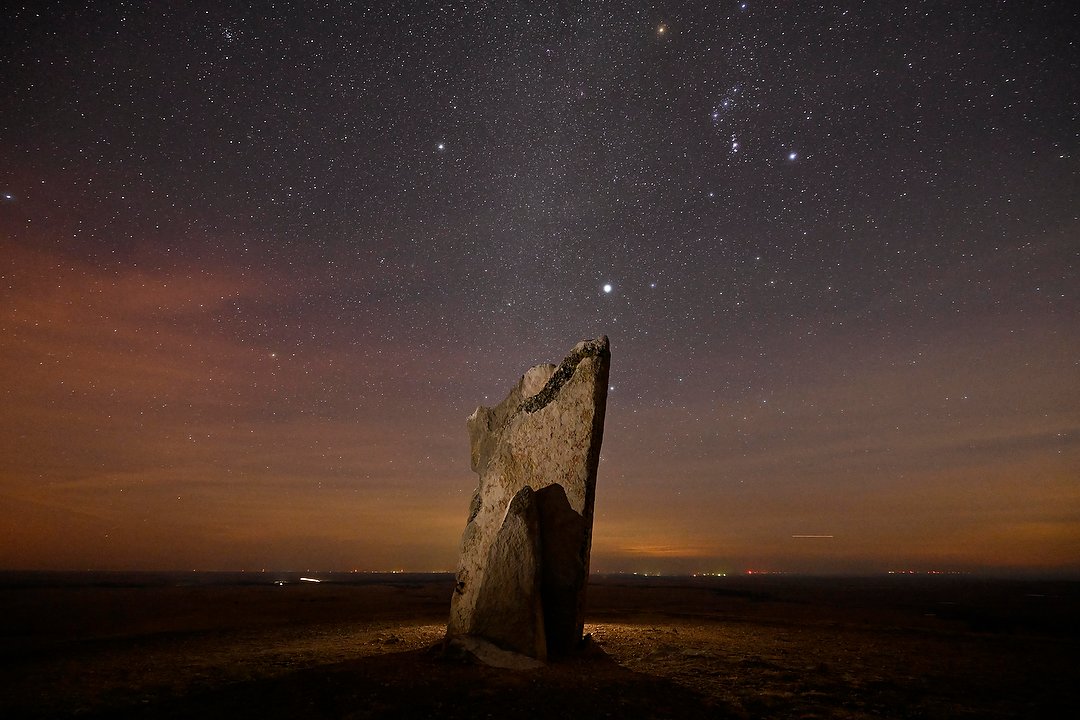
This frame is only about 30-seconds later, but I’ve put an ICE LIPO filter on the lens. You can see how much it reduces that red glow from he fire, as well as some of the streetlight glow from small towns south of me. Nikon Z 9, Manual exposure, Sunny white balance, ISO 10,000, 30-seconds at f/4, Nikkor Z 14-30mm f/4 S lens at 15mm.
I’d read about Light Pollution filters before, but the before and after examples I’d seen didn’t impress me (at least not enough to spend the money to buy one!). Now, though, I was sold. Not only did it do a nice job removing that red glow, but I could see it also removed some of the color from horizon glow created by distant towns. Having borrowed my friend’s for that shot, I now have that same filter on order :).
Later, the glow returned, this time stronger, and now we could see what was causing it – a line of fire. Springtime in Kansas is when some ranchers burn sectioons of their pasture, to remove invasive species and encourage fresh growth. It was impressive to see that even though the fire was far, far away from us (just a tiny, short line on the distant horizon), it still created enough light to affect our photos.
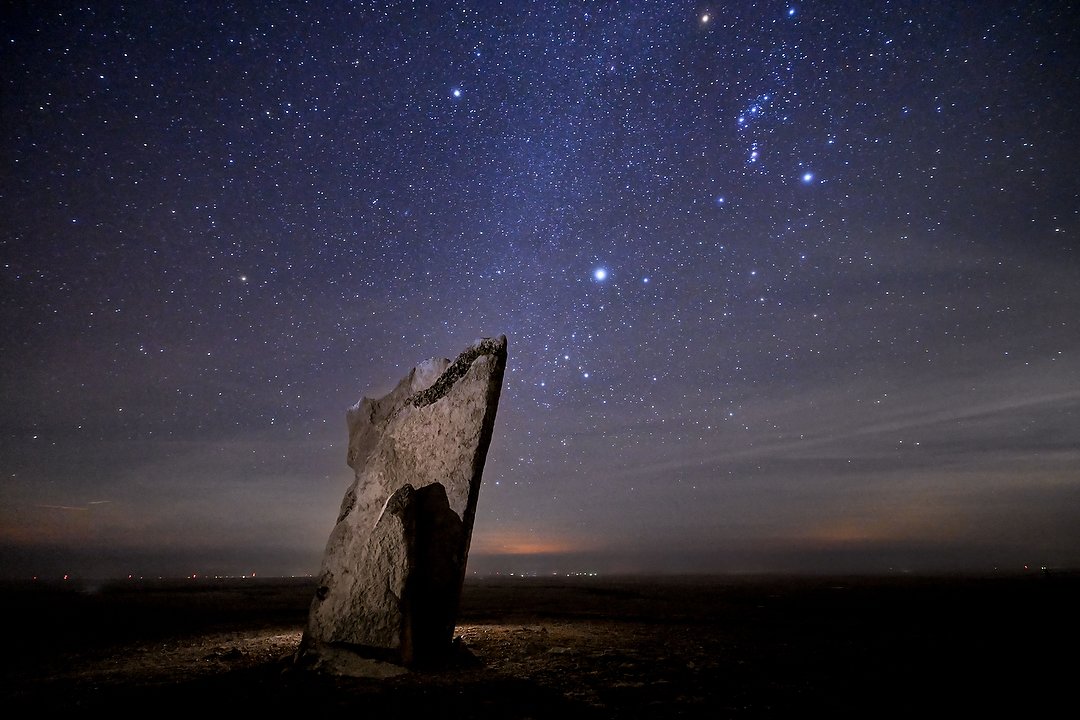
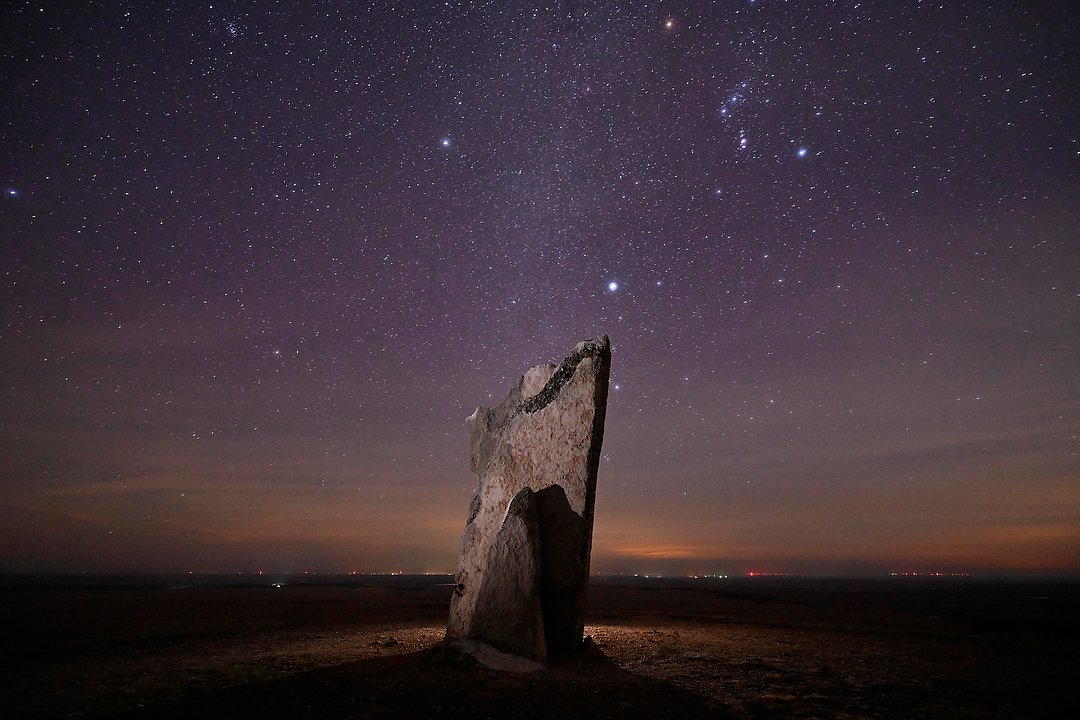
Here’s my favorite, final edited image of Teter Rock from that night. Nikon Z 9, Manual exposure, 3800K white balance, ISO 12,800, 25-seconds at f/4, Nikkor NIKKOR Z 14-30mm f/4 S lens at 15mm.
After about two hours, with the wind picking up, temperatures dropping and a long drive home ahead of us, we packed it in and carefully picked our way back to the main road. But this won’t be my last visit to these two locations. There are more photos I want to make at the first one (Wilson Lake), and I also plan to return to Teter Rock to try a Milky Way shot later this year. And I’m sure that by then, I’ll have more locations added to my list, and want to explore them as well. Which means it will be time for another road trip!
(If you like this story, please share it with your friends and let them know about the links on photography that I post on my business Facebook page. I’m also on Instagram and Twitter, @reedhoffmann. And if you’re curious about the workshops I teach, you can find them here. And, you can subscribe to this blog on my home page.)