Last night I took a walk in the woods. Literally. It was my solution to social distancing, exercise, and most importantly, being able to do some creative photography outdoors.
Where I live in Kansas, we’re still under a “stay at home” order, being asked not to go out except for essential things like food, doctor’s appointments and exercise. And since the success of this is only possible if we all follow the guidelines, I’ve limited my outings to a once-a-week grocery run and walking the dogs. That’s been it for me leaving the house. But I also realized I could follow those guidelines and avoid people by visiting local parks at night. I did it once about a month ago, and the second time yesterday. But this time, I decided to add the “social” part to social distancing, by inviting a friend to join me.
I’d heard good things about a small park not far from where I live and had been wanting to visit it. An old friend, and former photographer for the Kansas City Star, John Sleezer, had also said he’d like to see how I do light painting, and he knew the park. So we met there last night an hour before sunset. Keeping at least six-feet of separation between us was pretty easy, as we explored the area and caught up on families and kids. The lake has a dam at one end, and the overflow feeds a stream with a small waterfall. That waterfall could certainly make a photo, but since I couldn’t get close to it without getting very wet, I needed to find a nice foreground for the waterfall. Some overhanging rocks nearby would do nicely. Now to plan the shoot.
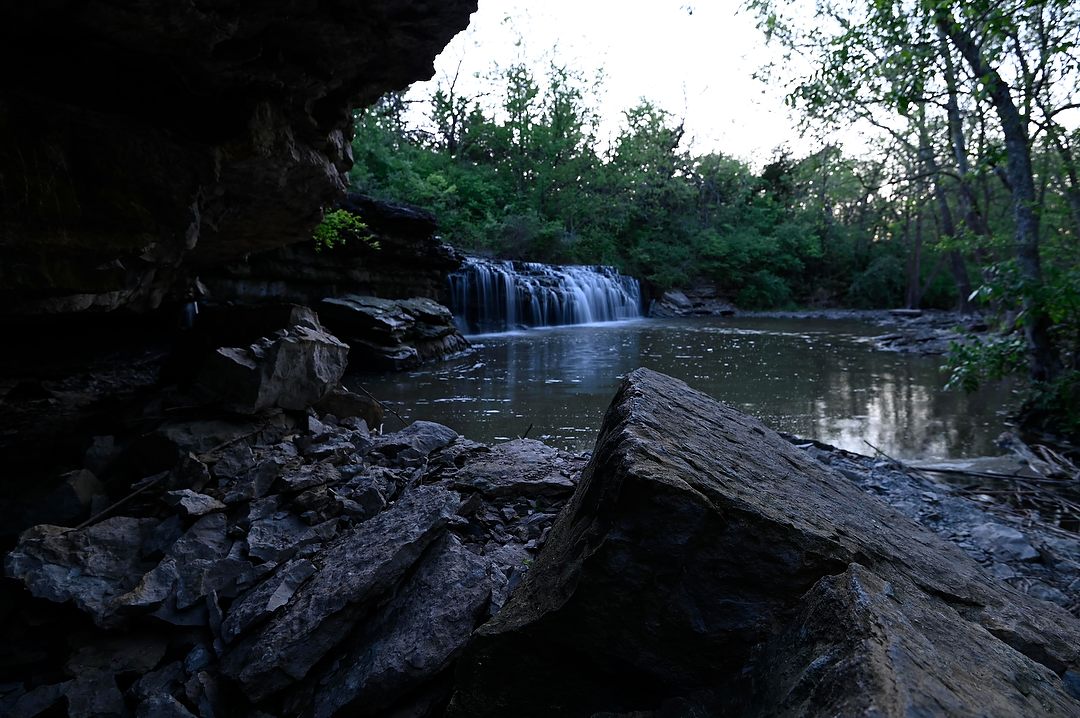
Here’s the spot I’ve chosen to shoot from. Now to set up the lights. Nikon D780, Aperture Priority, Sunny white balance, ISO 250, 1/2-second at f/6.3 in Matrix metering, -1.0 EV, Nikkor VR 16-35mm f/4G lens at 19mm.
One of the things I’ve always enjoyed about night photography is that it’s different from the photography most people do. In photography, “different” is usually good. And once you learn how to light paint, night photography becomes that much more special. After all, you’re going to create a scene that doesn’t exist without the lighting you add to it. However, to do it well, you need to do two things. First, find your photo before it gets dark, and second, figure out how you’re going to light it.
There are two ways to light paint. The traditional method is to use a flashlight and “paint” some light onto parts of the scene while the shutter is open. That usually involves running around in the dark with a flashlight. The other is called “Low-Level Lighting,” and means you’re using fixed, low-powered lights to illuminate parts of the scene. I learned low-level lighting a couple of years ago, and if I can get my light sources close enough, it’s what I prefer doing now. It lets me light more areas of a scene, more consistently, than I could with traditional light painting. And the tools I like best for doing that now are Lume Cubes.
Once I found my spot, I needed to decide how many lights I’d need, and how to place and control them. If the light comes from the same place the camera is, that light is “flat,” and you lose the shadows that would help define shape and texture. That’s why I always try to have the light coming from the side, whether working with natural or artificial light. The first issue was getting enough light on the falls and not having it spill over the entire scene. I mounted one Lume Cube on an ultralight tripod and set it up directly across from the falls, about forty yards from where I’d be. Because of the distance to the falls, I set it at full power and put a barndoor on it to control where the light fell. Next step was lighting the rocks that would be my foreground.
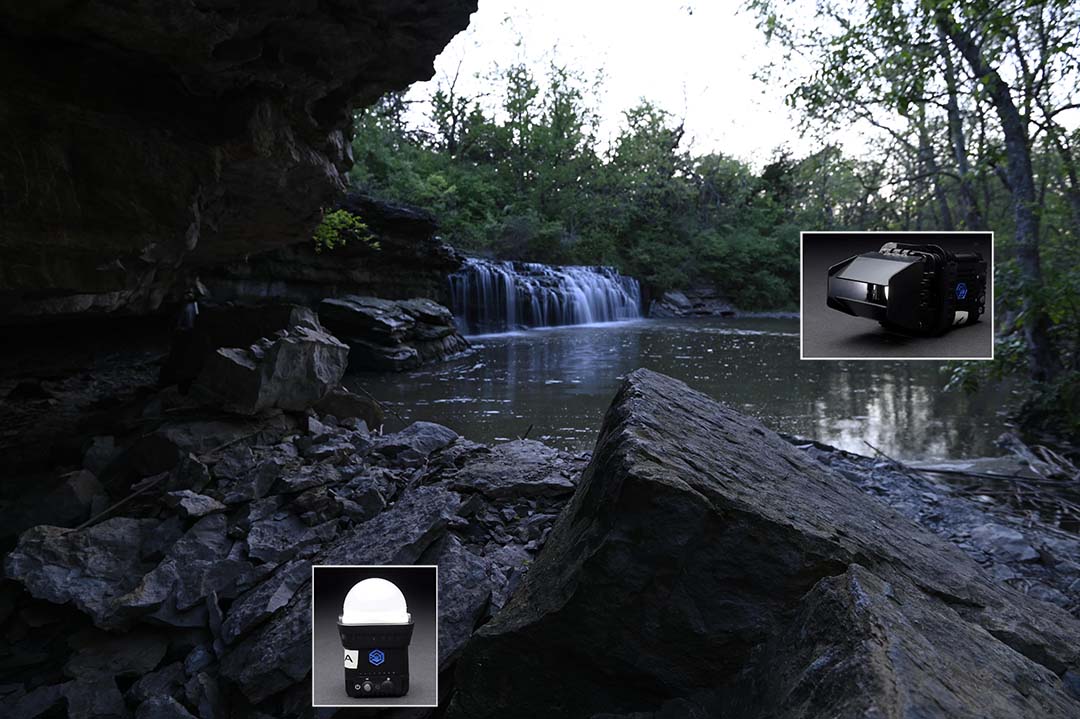
This shows where and how I used the Lume Cubes. I had one with a barndoor behind a tree way out to the right, about 40 yards away. Then a second, also with a barndoor, mounted on a tree directly to my right. The third was at my feet, with a dome, to fill in the shadows down there.
Since there was a rock wall to my left, that meant the second light had to be on the right side as well. I keep various devices in my lighting kit to mount lights with, and Gorillapods are great for that. In this case, I needed the light fairly high, so I wrapped a Gorillapod around a tree to my right. I used barndoors on it as well, to again control where the light went. That’s really important – controlling the spread of light instead of simply lighting up everything.
The third and last Lume Cube went at my feet, with a dome on it. Its job was to fill in a bit of the shadows in the foreground, so it wouldn’t be completely black.
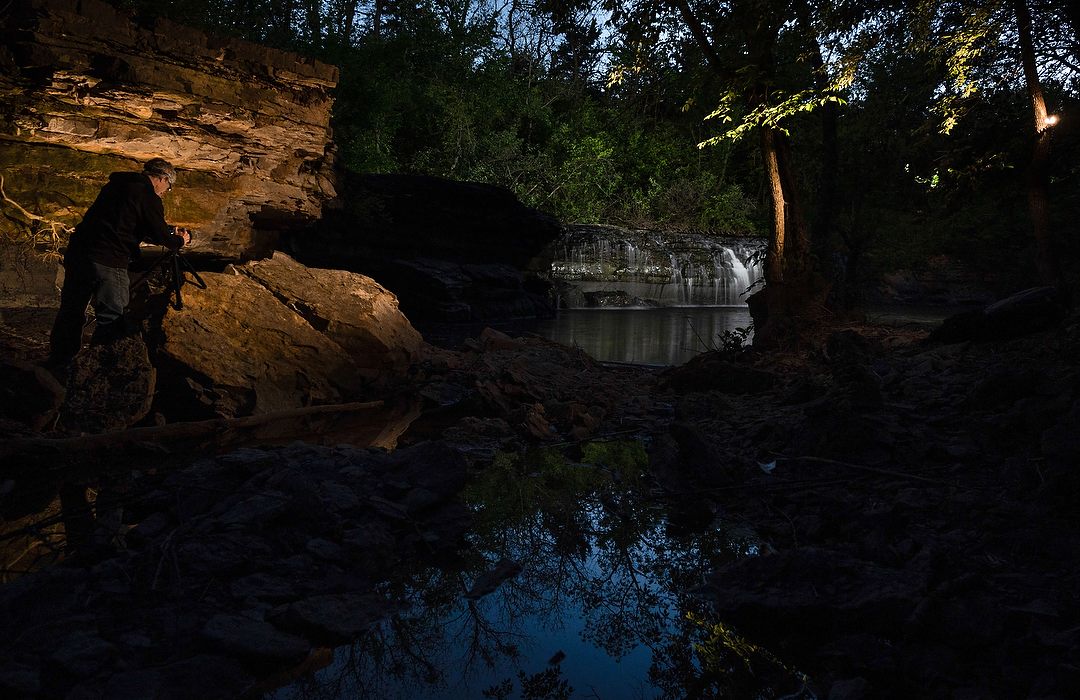
Here’s a photo John took of me as I’m finishing the setup. You can just see the one Lume Cube directly to my right, on the tree. The other is hidden through the woods, but you can see how it’s lighting up the falls. And the third, at my feet, is just providing a little illumination down there. Photo by John Sleezer, Nikon Z6, ISO 1600, Manual exposure, 1.5-seconds at f/6.3, Nikkor 24-70mm S lens at 24mm.
There are several features that make the Lume Cubes perfect for something like this. First, they’re designed to use accessories like gels, barndoors and domes, which pop on and off with magnets. The light on the falls had no gel, as I knew its color temperature was a little cool which would look good on the water and the trees. The two lights near me both had light orange gels on them, to add a bit of warmth to the scene. The final feature of these Lume Cubes, and probably the most important, is that I can control the power of the two nearby Lume Cubes from an app on my phone. That let me set them, then adjust power while standing behind my camera, to get just the right amount of light where I wanted it and balance it to the intensity of the light on the falls (communication is by Bluetooth, so I could control the two near ones from my phone, but the third was too far away for that).
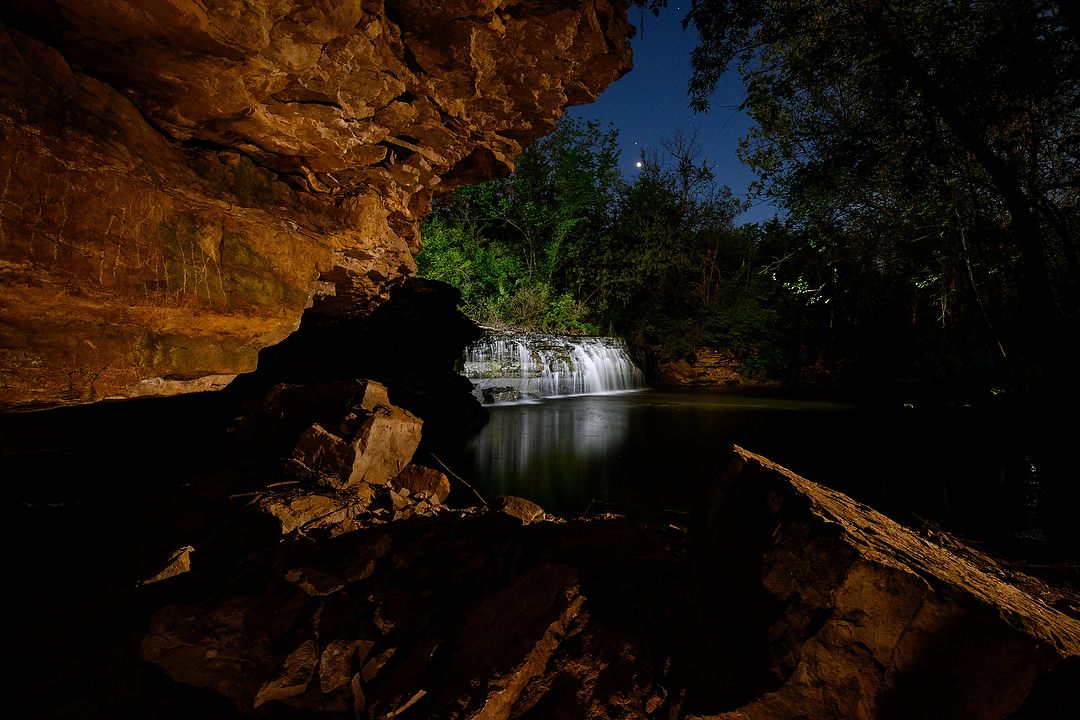
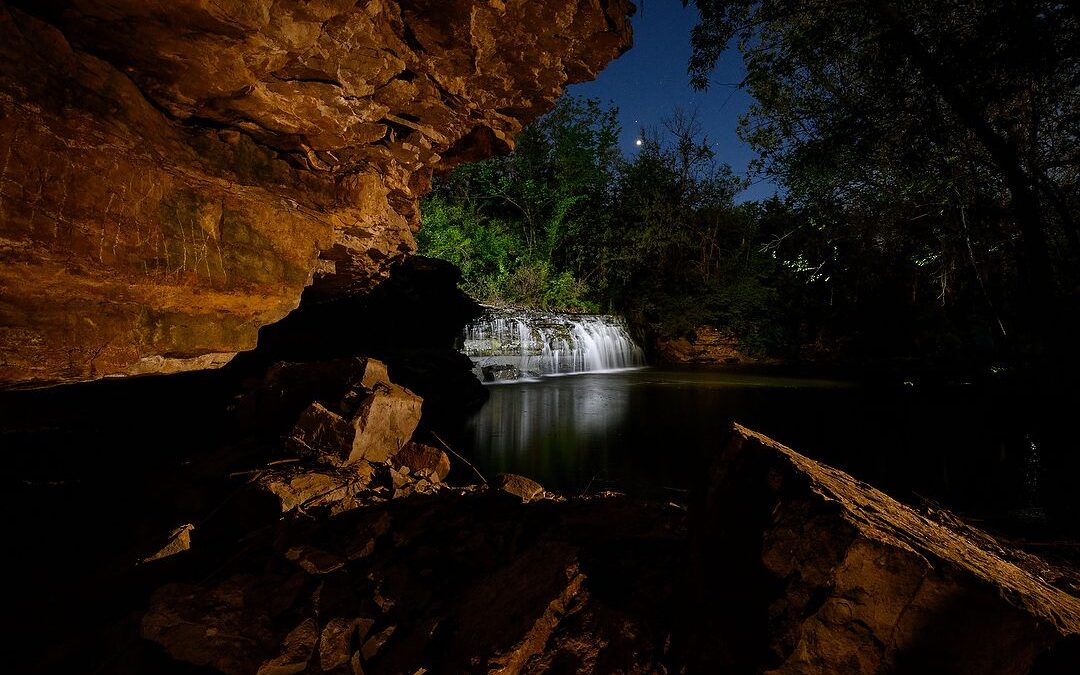
This how the final shot looked, about thirty minutes after John took the photo of me. I needed to wait for the brightness in the sky to drop. And Venus was kind enough to be in just the right spot up there. Nikon Z 50, Manual exposure, Sunny white balance, ISO 1000, 15-seconds at f/9, Nikkor AF-S DX Zoom-Nikkor 12-24mm f/4G IF-ED lens at 12mm.
After that came the easy part, taking the picture. With my camera mounted on my new Peak Design travel tripod, and using the Nikon Z 50’s Live View capability, I was able to find the right exposure after just a few test shots. I used a fairly small aperture (f/9) because I wanted good sharpness in both the rocks near me and the falls far away. I went with a relatively high ISO (1000) and long exposure time (15-seconds) so I could capture the stars and Venus. And with my white balance set for Daylight (Sunny), I knew how the color from the Lume Cubes would appear. Piece of cake, right?
From scouting to getting gear from the car to lighting the scene to making the picture and packing to leave took 2.5 hours. Actual time shooting was only about 20 minutes, and only that long because I shot it both vertically and horizontally, with two cameras (I also used my new D780). And I’m happy with that. Scouting and planning take time, but if done right, you end up with a nice picture that can be surprisingly easy to make. As a bonus, I also got my exercise with two miles of walking, and visited with an old friend. Now that’s how to do social distancing right!
(NOTE: Lume Cube puts their gear on sale occasionally, but if it’s not, and you want to buy some, use the code LUMEREED15 to get 15% off their normal prices)
(If you like this story, please share it with your friends and let them know about the links on photography that I post on my business Facebook page. I’m also on Instagram and Twitter, @reedhoffmann. And if you’re curious about the workshops I teach, you can find them here.)
Great pic and story of how you planned and executed the image. I’ve been looking at Lume Cubes for awhile specifically for Milky Way foregrounds. Might Just be my next purchase…
If you do decide to buy any, and they’re not on sale, use the code LUMEREED15. That will get you 14% off. As you can see, I’ve had a lot of fun with them.
I really like how you have composed your photograph of the waterfall after dark with the lighting, your eyes are taken to the light detail on the rock face and through onto the waterfall.
I took a look at your Lume Cube lighting page on your website and clicked onto the link for the kit that you have, but it says it doesn’t exist anymore.
Is this the kit that you have here, or is it just a newer version https://lumecube.com/collections/best-sellers/products/lume-cube-2-0-professional-lighting-kit-2-lights-all-diffusers-and-modifiers
Hi Cameron. Thanks for pointing that out, the link I had was out of date, and is fixed now. And yes, the two light kit with accessories is how I got started. I’ve since added a couple more :). They sometimes have sales on their gear, but if it’s not on sale, you can get a 15% discount using the code LUMEREED15.